


Reelmaster 5010- HGroomer Page 8 - 8
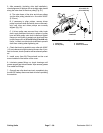
Service and Repairs
CAUTION
Never work on the groomer with the engine
running. Always stop the engine, remove the
key from the ignition switch and wait for all
machine movement to stop before working on
the groomer.
Also, before installing, removing or working on
the cutting units, disconnect the electrical pow-
er supply by separating the 48 VDC battery dis-
connect (see 48 VDC Battery Disconnect in th e
General Information section of this chapter).
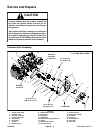
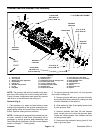
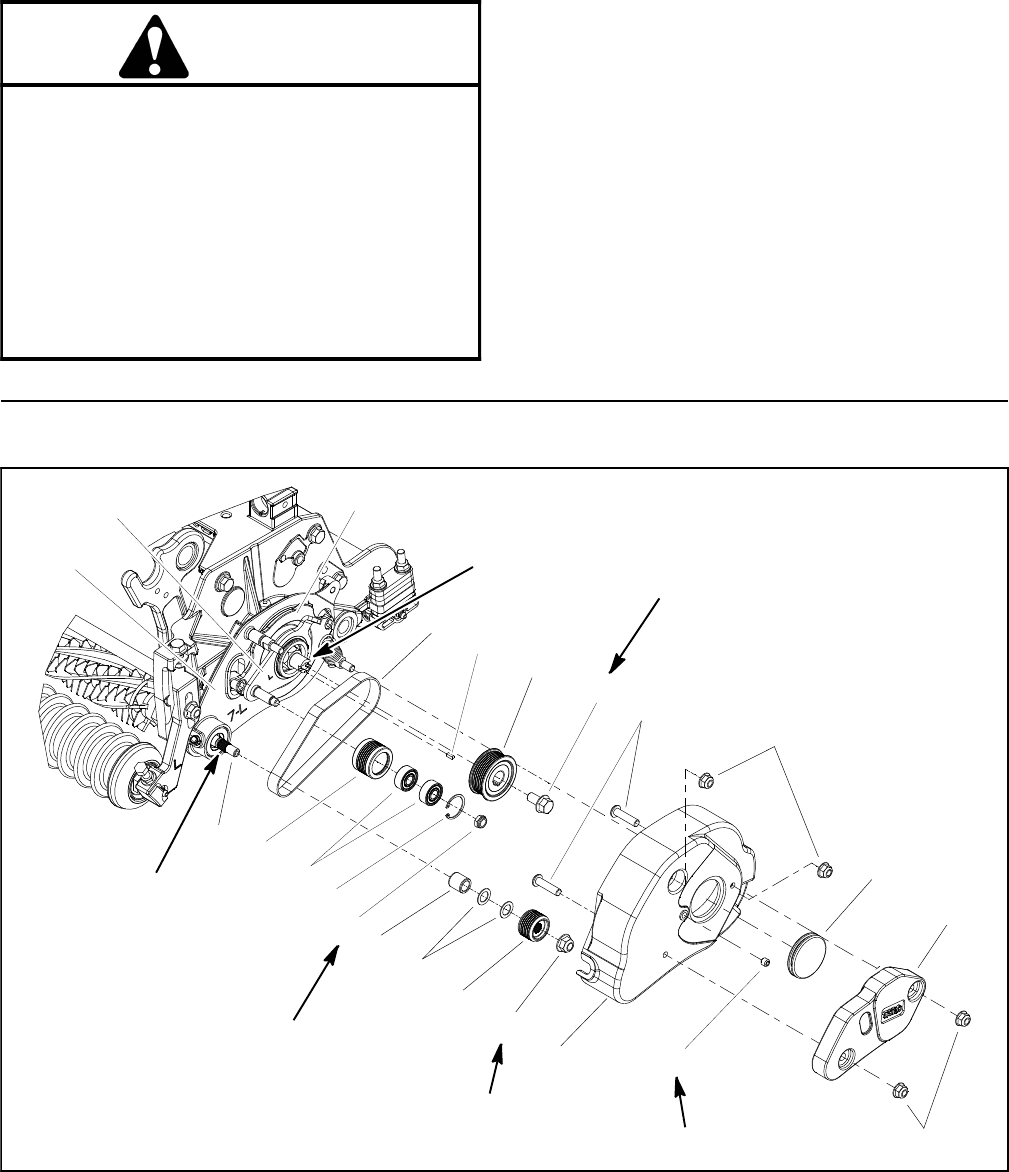
Groomer Drive Assembly
Figure 6
1. Flange nut (2 used)
2. Groomer cover
3. Groomer drive belt
4. Flange head screw
5. Drive pulley
6. Square key
7. Lock nut
8. Retaining ring
9. Ball bearing (2 used)
10. Idler pulley
11. Flange nut
12. Drive pulley
13. Washer (for pulley alignment)
14. Spacer
15. Groomer drive shaft
16. Groomer weight
17. Screw (2 used)
18. Flange nut (2 used)
19. Grommet
20. Set screw
21. Groomer plate
22. Pivot hub
23. Idler plate
4
3
1
2
9
10
8
5
6
11
12
13
14
15
16
17
19
7
18
20
27 to 33 ft- lb
(37to44N-m)
Loctite #242
27 to 33 ft- lb
(37to44N-m)
75 to 90 in-lb
(8.5 to 10.1 N- m)
Antiseize
Lubricant
Antiseize
Lubricant
21
23
22
7” CUTTING UNIT SHOWN
In Key Slot