


Reelmaster 5010- H GroomerPage 8 - 7
Adjustments
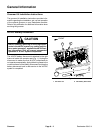
CAUTION
Never work on the groomer with the engine
running. Always stop the engine, remove the
key from the ignition switch and wait for all
machine movement to stop before working on
the groomer.
Also, before installing, removing or working on
the cutting units, disconnect the cutting units
from the electrical power supply by separating
the cutting unit power disconnect connector
(see 48 VDC Battery Disconnect in the General
Information section of this chapter).
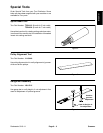
Groomer Height/Depth Adjustment
NOTE: Grooming is performed above the soil level.
When adjusting groomer height/depth, groomer blades
should never penetrate the soil.
1. Parkmachineonacleanand level surface, lower
cutting units completely to the ground, stop engine, en-
gage parking brake and remove key from the ignition
switch.
2. To preventunexpected reelmotor operation,d iscon-
nect motors from the electrical power supply by unplug-
ging the 48 VDC battery d isconnect (see 48 VDC
BatteryDisconnect intheGeneral Informationsectionof
this chapter).
3. Make sure rollers are clean and cutting unit is set to
the desired height- of- cut (see Cutting Unit Operator’s
Manual).
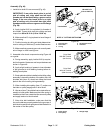
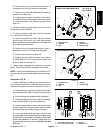
4. Place the groomer reel in the grooming (lowered)
position by rotating the quick- up levers toward the front
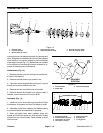
of the cutting unit (Fig. 5).
NOTE: Improper or over- aggressive use of the groom-
er (e.g. too deep or too frequent grooming) may cause
unnecessary stress on the turf leading to severe turf
damage. Use the groomer cautiously.
NOTE: Usethe gaugebar assembly(see SpecialTools
in this chapter) to determine groomer height.
5. Measure the distance from the lowest tip of the
groomer blade to the working surface. Turn groomer
height adjuster to raise or lower the groomer blade tip to
the desired height (Fig. 5).
6. Repeat step 5 on the opposite end of the groomer.
Then, recheck setting on the first side of groomer.
Height settingon bothends ofgroomer shouldbe identi-
cal.
7. Plug the 48 VDC battery disconnect back in before
operating the machine.
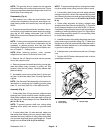
1. Groomer height adjuster
2. Quick-up lever
3. Gauge bar assembly
4. Groomer height
Figure 5
2
1
4
3
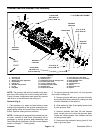
Groomer