


Reelmaster 5010- H Page 3 - 7 Kubota Diesel Engine
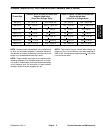
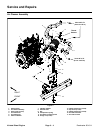
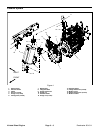
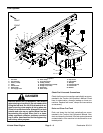
Removal (Fig. 4)
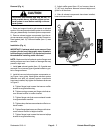
CAUTION
The muffler and exhaust pipe may be hot. To
avoid possible burns, allow the engine and ex-
haust system to cool before working on the ex-
haust system.
1. Raise and support hood to gain access to exhaust
system. Allowengine andexhaust systemto coolbefore
doing any disassembly of exhaust system components.
2. Remove exhaust system components from the en-
gineas necessary usingFigure4 asa guide.Discardex-
haust gasket (item 13) if exhaust header (item 11) was
removed.
Installation (Fig. 4)
IMPORTANT: If exhaust studs were removed from
engine cylinder head, thoroughly clean threads in
head and apply Loctite #277 (or equivalent) to stud
threads before installing studs into head.
NOTE: Make sure that all exhaust system flanges and
sealing surfaces are free of debris or damage that may
prevent a tight seal.
1. Install new exhaust gasket (item 13) if gasket was
removed. Do not use any type of gasket sealant on gas-
ket or flange surfaces.
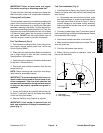
2. Install all removed exhaust system components us-
ing Figure 4 as a guide. Hand tighten exhaust system
fasteners and after all exhaust system components
have been installed, fullytighten the fasteners as shown
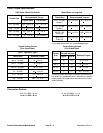
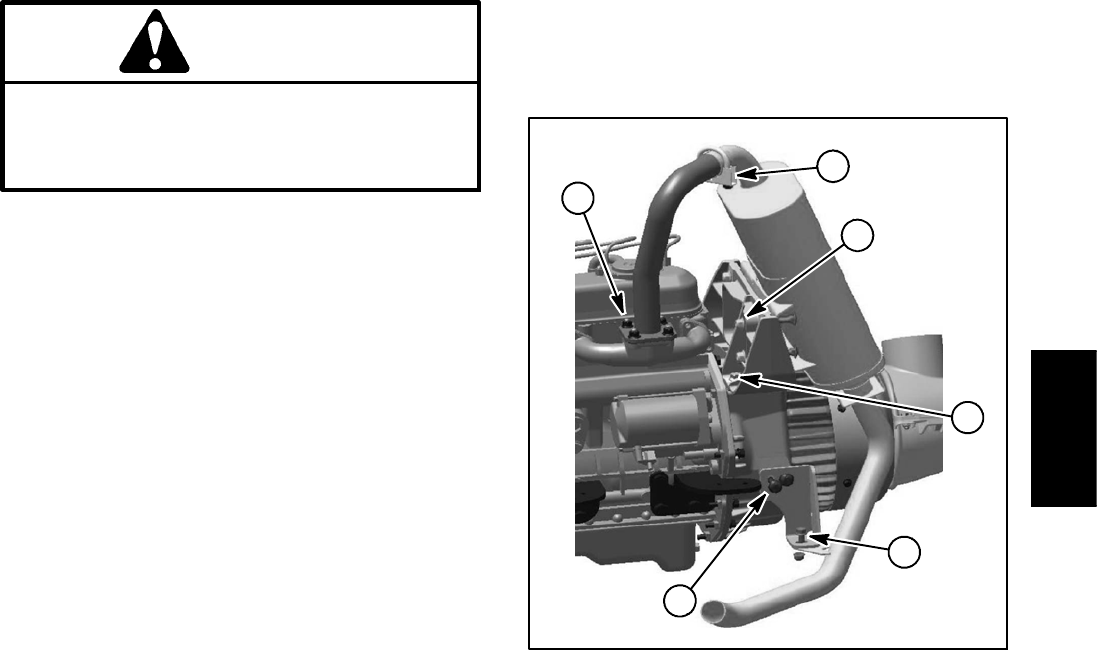
in Figure 5:
A. Tighten flange head screws that secure muffler
bracket to engine bellhousing.
B. Tighten carriage screws and flange nuts that se-
cure exhaust muffler to m uf fler b racket.
C. Tighten flange nuts that secure exhaust header
to engine exhaust manifold.
D. Tighten clampthat secures exhaust muffler to ex-
haust header.
E. Tighten flange head screwand flangenut that se-
cures exhaust muffler to tailpipe bracket.
F. Tighten flange head screws that secure tailpipe
bracket to engine bellhousing.
3. Adjust muffler guard (item 15) on frame so there i s
⅜” (9.5 mm) clearance between exhaust tailpipe and
guard in all directions.
4. After all exhaust components have been installed,
lower and secure hood.
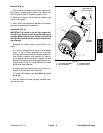
Figure 5
B
A
C
D
E
F
Kubota Diesel
Engine