


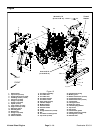

Reelmaster 5010- H Page 3 - 9 Kubota Diesel Engine
IMPORTANT: Follow all local codes and regula-
tions when recycling or disposing waste f uel.
To c lean fuel tank, flush tank out with clean diesel fuel.
Make sure tank is free of all contaminates and debr is.
Priming the Fuel System
The fuel system needs to be primed before starting the
engine for the first time, after running out of fuel or after
fuel system maintenance (e.g. draining the filter/water
separator , replacing a fuel hose). To prime the fuel sys-
tem, makesurethat thefuel tankhas fuel init. Then, turn
the ignition key to the RUN position for ten (10) to fifteen
(15) seconds which allows the fuel pump to prime the
fuel system. DO NOT use the engine starter motor to
crank the engine in order to prime the fuel system.
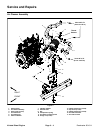
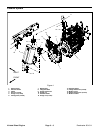
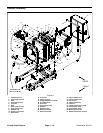
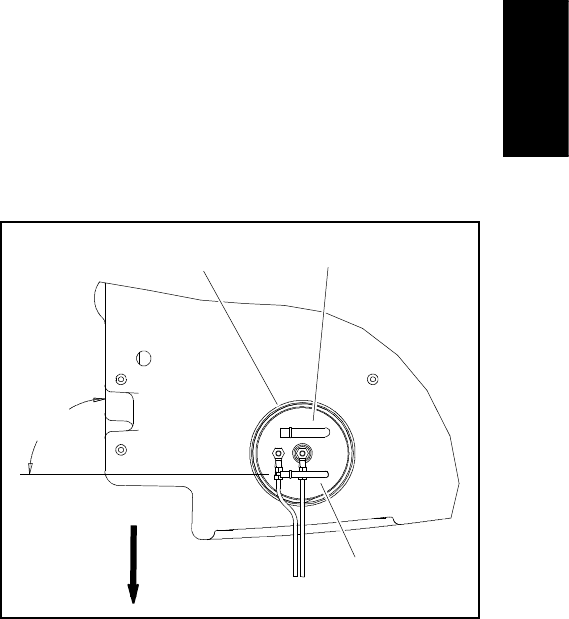
Fuel Tank R emoval (Fig. 6)
1. Park machine on a level surface, lower cutting units,
stop engine, engage parking brake and remove key
from the ignition switch.
2. Place drainpan under fueltank. Make sure that drain
pan is large enough to hold fuel tank contents (see
Specifications in this chapter).
3. Open draincock onbottom offuel tankand allowtank
to fully drain. Clos e draincock.
4. Disconnect wire harness connection from the fuel
sender (item 19).
NOTE: Before removing fuel hoses from tank fittings,
label hoses for a ssembly purposes.
IMPORTANT: To prevent damage to fuel hoses, nu-
merous cable ties are used t o secure hoses to ma-
chine components. Take note of all cable ties that
areremoved from machineduring fuel tankremoval
so they can be properly replaced during tank in-
stallation.
5. Loosen hose clamps and carefully disconnect sup-
ply (item 7) and return (item 9) fuel hos es from fittings
on the top of the fuel sender.
6. Remove fuel tank us ing Figure 6 as a guide.
IMPORTANT: If fuel sender is removed from fuel
tank, note orientation of fittings for assembly pur-
poses (Fig. 7).
Fuel Tank Installation (Fig. 6)
1. Install fuel tank to frame using Figure 6 as a guide.
Secure fuel hoses with cable ties as noted during fuel
tank removal.
A. If fuel sender was removed from fuel tank, make
sure that fuel fittings on sender are orientated at 90
o
from right side of tank as shown in Figure 7 . Also, to
prevent damage to fuel sender during assembly,
make sure that fuel sender does not turn as sender
cap is tightened.
2. Correctly connect supply (item 7) and return (item 9)
fuel hosesto fittings onthe topof thefuel sender.Secure
fuel hoses with hose clamps.
3. Secure wir e harness connector to fuel sender.
4. Make sure that fuel tank draincock is closed. Fill fuel
tank with clean fuel.
5. Prime the fuel system (see above).
6. Before returning machine to operation, make sure
that no fuel leaks exist.
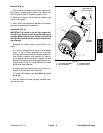
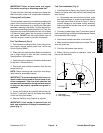
Figure 7
1. Fuel sender
2. Fuel supply fitting
3. Fuel return fitting
3
1
2
90
o
FRONT
Kubota Diesel
Engine