


Reelmaster 7000
DPA Cutting Units
Page 8 -- 18
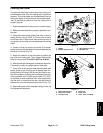
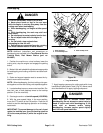
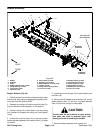
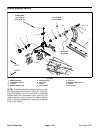
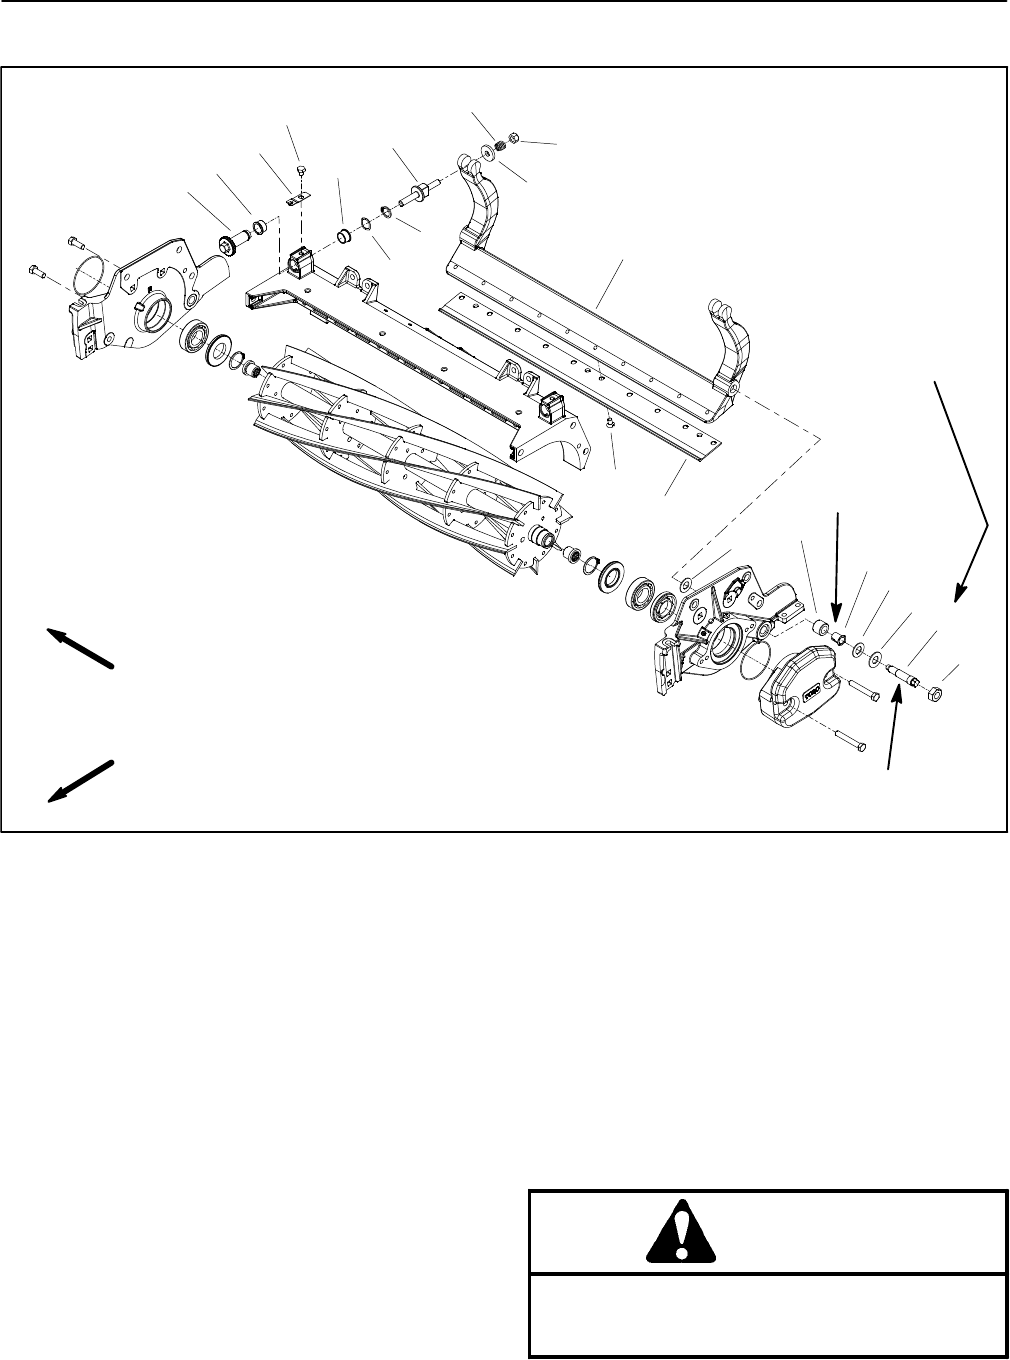
Bedbar Assembly
1. Bedbar
2. Bedknife
3. Screw
4. Bedbar adjuster shaft (2 used)
5. Flange bushing (4 used)
6. Cap screw (2 used)
7. Detent (2 used)
8. Wave washer (2 used)
9. Retaining ring (2 used)
10. Bedbar adjuster screw (2 used)
11. Washer (2 used)
12. Compression spring (2 used)
13. Lock nut (2 used)
14. Rubber bushing (2 used)
15. Flange bushing (2 used)
16. Plastic washer (4 used)
17. Metal washer (2 used)
18. Bedbar pivot bolt (2 used)
19. Lock nut (2 used)
Figure 22
Antiseize
Lubricant
27 to 33 ft--lb
(37to44N--m)
FRONT
RIGHT
6
7
8
9
10
11
12
13
15
16
17
18
19
14
4
5
2
5
3
16
1
Antiseize
Lubricant
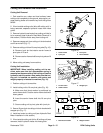
Bedbar Removal (Fig. 22)
1. Positionmachine on a clean andlevel surface, lower
cutting units,stop engine, engage parkingbrake and re-
move key from the ignition switch.
2. Remove the cutting unit from the machine (see Cut-
ting Unit Removal and Installation in this section).
3. Position cutting unit on work bench. Use the cutting
unit kickstand to support the cutting unit (see Special
Tools).
4. Loosen the lock nuts (item 13) on the end of each
bedbaradjuster assemblyuntilwasher (item11) isloose
on bedbar.
5. Loosen the lock nuts (item 19) on each bedbar pivot
bolt (item 18).
6. Remove two (2) bedbar pivot bolts (item 18), two (2)
metal washers (item 17) and four (4) plastic washers
(item 16) from the cutting unit side plates.
CAUTION
Contact with the reel, bedknife or other cutting
unit parts can result in personal injury. Use
heavy gloves when handling the bedbar.
7. Remove bedbar assembly from cutting unit.