


Reelmaster 7000 Page 3 -- 11 Kubota Diesel Engine
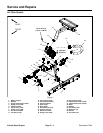
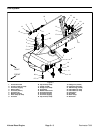
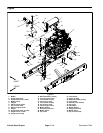
Removal (Fig. 6)
1. Park machine on a level surface, lower cutting units,
stop engine, engage parking brake and remove key
from the ignition switch.
2. Removehoodfromthe machine(seeHoodRemoval
in the Service and Repairssection of Chapter 7 -- C has-
sis).
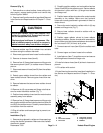
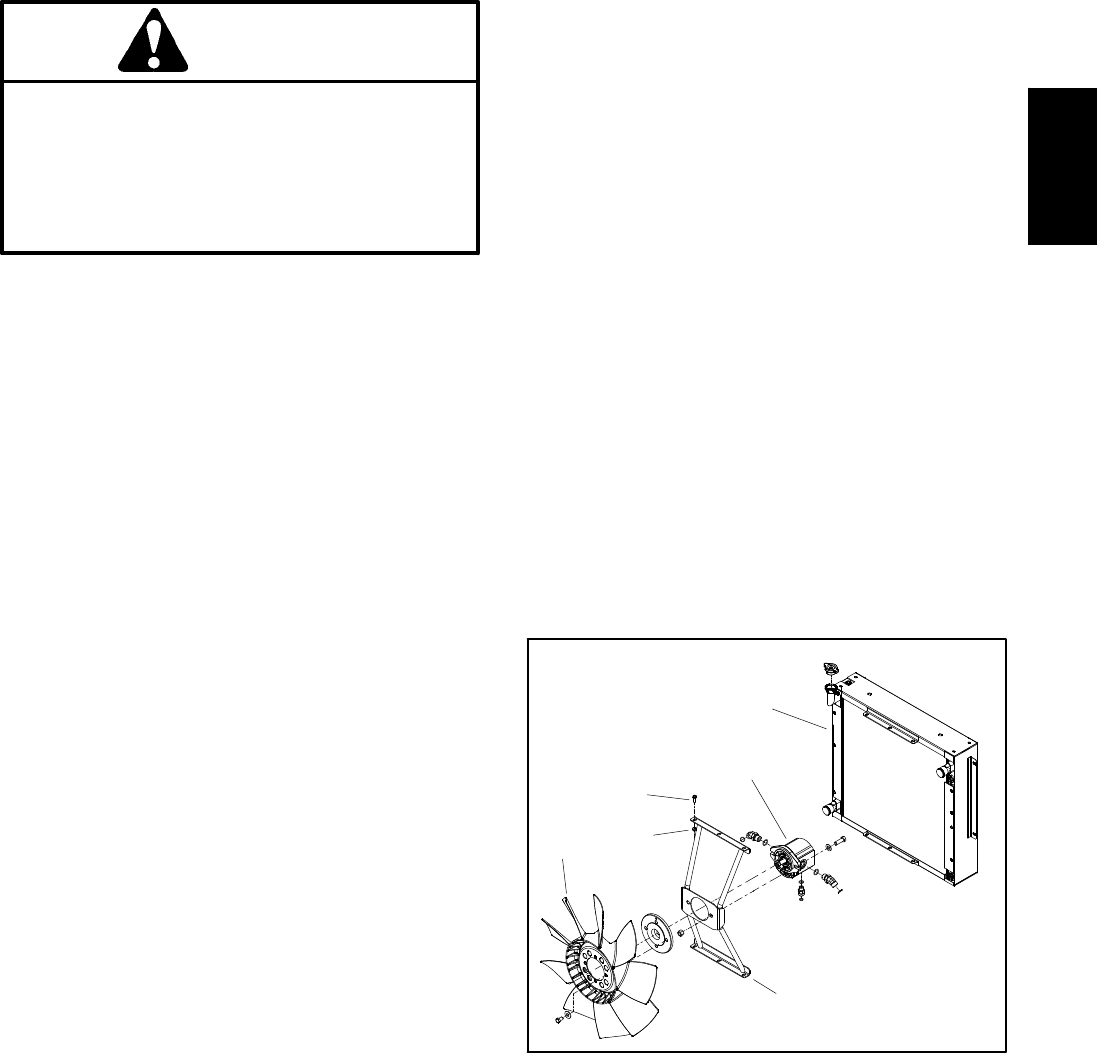
CAUTION
Do not open radiator cap or drain coolant if the
radiator or engine is hot. Pressurized, hot cool-
ant can escape and cause burns.
Ethylene--glycol antifreeze is poisonous. Dis-
pose of coolant properly or store it in a properly
labeled container away from children and pets.
3. Remove radiator cap. Drain radiator into a suitable
container using the radiator draincock.
4. Disconnectupper and lower hoses fromthe radiator.
5. Remove air cleaner hose (item 6).
6. Remove four (4)flange head screws and flange nuts
that secure plenum (item 7) to radiator mount. Remove
plenum.
7. Disconnectreservoirhose(item39)fromtheradiator
vent tube.
8. Detach upper radiator shroud from the radiator and
lower radiator shroud. Remove upper shroud from ma-
chine.
9. Remove fasteners that secure lower radiator shroud
to radiator.
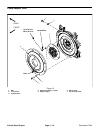
10.Remove six (6) cap screws and flange nuts that se-
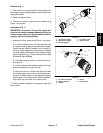
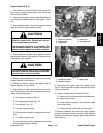
cure fan motor bracket to radiator (Fig. 7).
11.Positionlower radiator shroudand fan motorbracket
assembly away from radiator.
12.Remove four (4) flange head screws and flange nuts
securingther adiator andrecirculationbarriers(items 24
and 25) to the radiator mount.Carefully remove barriers
and radiator from the machine.
13.Plug all radiator and hose openings to prevent con-
tamination.
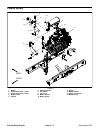
Installation (Fig. 6)
1. Remove plugs placed in radiator and hose openings
during the removal procedure. Make sure that radiator
draincock is closed.
2. Carefully position radiator and recirculation barriers
(items 24 and 25)to the radiator mount. Secure radiator
and barriers in place with four (4) flange head screws
and flange nuts.
3. Positionlower radiator shroudand fan motorbracket
assembly to the radiator. Make s ure that hydraulic
hoses are correctly positioned in grommets in lower ra-
diator shroud.
4. Secure fan motor bracket to radiator with six (6) cap
screws and flange nuts (Fig. 7).
5. Secure lower radiator shroud to radiator with re-
moved fasteners.
6. Position upper radiator shroud to lower radiator
shroud and radiator. Secure shrouds with removed fas-
teners. Make sure that clearance between shrouds and
fan is at least 0.180” (4.6 mm) at all points.
7. Connect reservoir hose (item 39) to the radiator vent
tube.
8. Connect upper and lower hoses to the radiator.
9. Install plenum (item 7) to radiator mount and secure
with flange head screws and flange nuts.
10.Install air cleanerhose (item 6) to theair cleaner and
plenum.
11.Fill radiator with coolant.
12.Install hood on the machine (see Hood Installation in
the Service and Repairs section of Chapter 7 -- Chas-
sis).
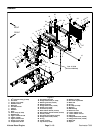
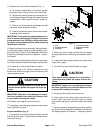
Figure 7
1. Fan
2. Fan motor bracket
3. Fan motor
4. Cap screw (6 used)
5. Flange nut (6 used)
6. Radiator
1
2
3
4
5
6
Kubota
Diesel Engine