


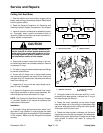
Reelmaster 3550−D
Cutting Units
Page 7 − 23
Bedknife Grinding
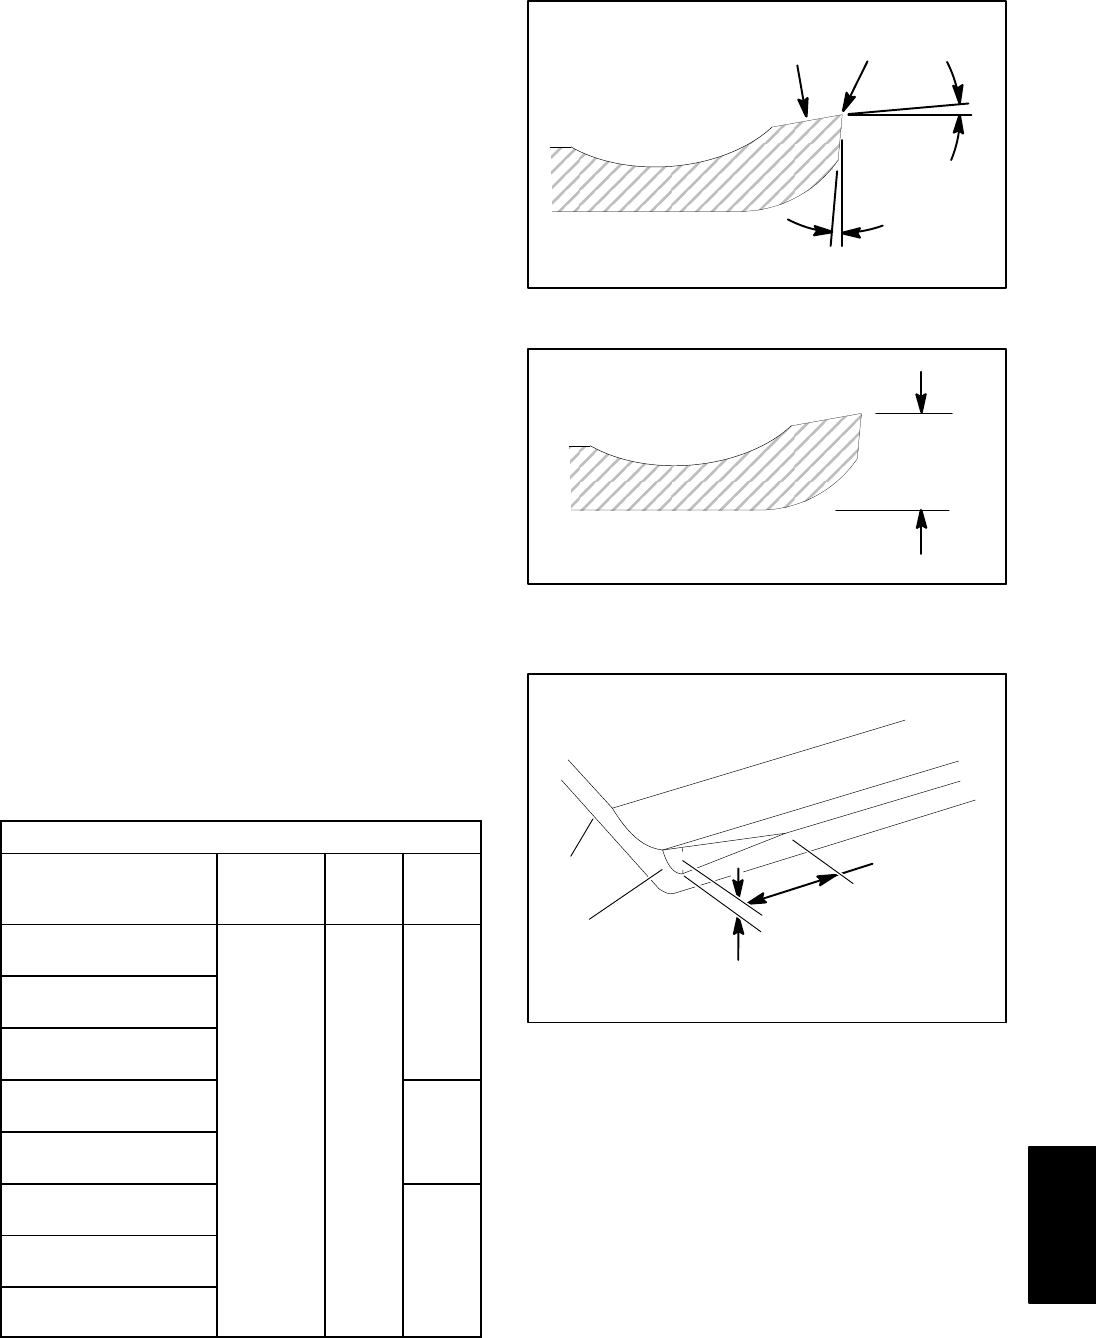
Since there can be variations in the mounting surface of
the bedbar, a new bedknife will not be perfectly flat after
it is installed to the bedbar. Because of this, it is neces-
sary to grind a new bedknife after installing it to the bed-
bar. Follow the bedknife grinding specifications
provided and grind only enough to make sure the top
surface of the bedknife is true (Fig. 28 and 29).
IMPORTANT: Do Not grind the bedknife below it’s
service limit (Fig. 28 and 30). Operating the cutting
unit with the bedknife below the service limit may
result in poor after−cut appearance and reduce the
structural integrity of the bedknife for impacts.
NOTE: When grinding the bedknife, be careful to not
overheat the bedknife. Remove small amounts of mate-
rial with each pass of the grinder. Also, clean and dress
grinding stone often during the grinding process.
NOTE: Some bedknives were produced with a 5_ top
angle. Use a 10_ top angle when regrinding bedknives.
1. Use Toro General Service Training Book, Reel Mow-
er Basics (part no. 09168SL) and grinder manufactur-
er’s instructions for bedknife grinding information.
2. After grinding bedknife, check lead−in chamfer on
bedknife (Fig. 31). Regrind bedknife lead−in chamfer if
necessary.
3. After bedknife grinding is complete, install bedbar to
cutting unit.
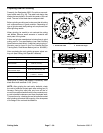
Bedknife Grinding Specifications
Bedknife
Lip Height
Service
Limit
Top
Angle
Front
Angle
EdgeMaxR
Low HOC
0.19”
(4.8 mm)
10_
5_
Premium
Low HOC
Standard
Low HOC
Extended EdgeMaxR
Low HOC
10_
Extended
Low HOC
EdgeMaxR
Standard HOC
5_
Standard
Standard HOC
Heavy Duty
Standard HOC
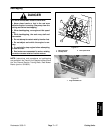
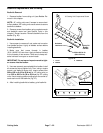
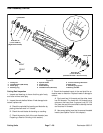
Figure 28
Figure 29
Top
Front Angle
Top
Remove
Burr
Angle
Surface
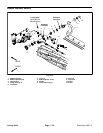
1. Bedknife
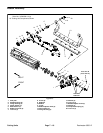
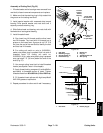
Figure 30
Height
Service
Lip
Limit
1. Bedknife 2. Lead −in Chamfer
Figure 31
1
2
0.25” (6.4 mm
)
0.06”
(1.5 mm)
DPA Cutting
Units