


Groundsmaster 5900/5910 Page 7 -- 27 Chassis
NOTE: Hood removal and installation requires two
people.
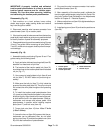
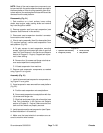
Removal (Fig. 23)
1. Park machine on a level surface, lower cutting
decks, stop engine, apply parking brake and remove
key from the ignition switch.
2. Unlatch and raise hood.
3. Haveoneperson support the rear ofthe raised hood.
4. Have a second person disengage gas springs from
front ball. Lift up on flat clip until ball is released from
spring socket.
5. Remove the two (2) hair pins (item 18) that secure
the clevis pins to the frame.
6. Whilesupporting hood on bothsides,remove two (2)
clevis pins (item 19) that secure hood to machine. Lift
hood and remove from rear of machine.
7. Inspect all foam seals for damage. Also, make sure
that foam seals show evidence of effective sealing with
hood. Remove and replace foam seals if necessary.
8. If necessary, remove hood components using Fig-
ures 23 and 24 as guides.
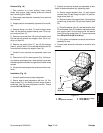
Installation (Fig. 23)
1. Replace all removed hood components using Fig-
ures 23 and 24 as guides.
2. While supporting hood on both sides, position hood
to align clevis pin holes in hood and machine frames.
Install two (2) clevis pins to secure hood to machine.
3. Haveoneperson support the rear ofthe raised hood.
4. Have a second person secure the gas springs to the
machineframe.Alignball and socket andpresstogether
to engage.
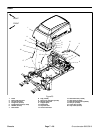
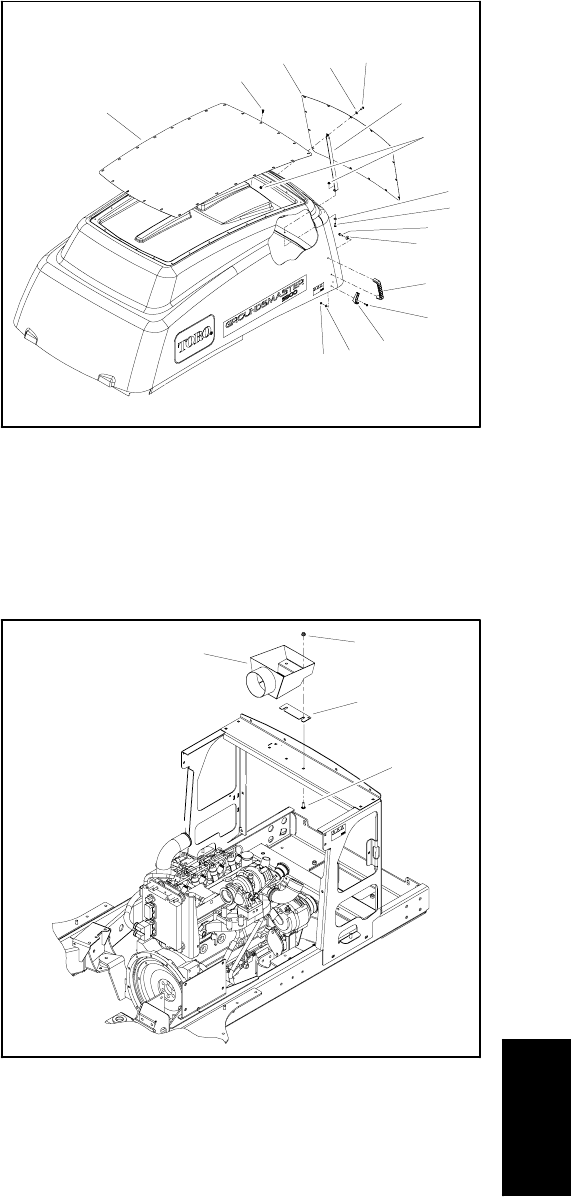
5. Lower hood and check that hood makes a continu-
ous seal around air cleaner system airbox. If necessary,
use shim(s) to adjust location of airbox for proper seal-
ing with hood (Fig. 25).
6. Lower and secure hood.
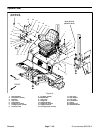
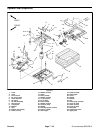
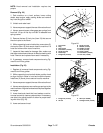
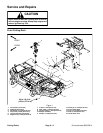
1. Top screen
2. Plug
3. Rear screen
4. Flat washer (2 used)
5. Screw (2 used)
6. Hood strap
7. Flange nut (2 used)
8. Screw (4 used)
9. Washer (4 used)
10. Handle (2 used)
11. Screw (4 used)
12. Latch (2 used)
13. Flat washer (4 used)
14. Lock nut (4 used)
Figure 24
1
2
3
4
5
6
7
8
9
10
11
4
5
12
13
14
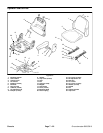
1. Flange nut (2 used)
2. Air box
3. Shim (as needed)
4. Carriage screw (2 used)
Figure 25
1
2
3
4
Chassis