


Reelmaster 2300–D/2600–D Page 3 – 15 Engine
9. Close fuel shut–off valves under the fuel tank and
on the fuel filter.
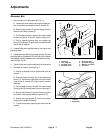
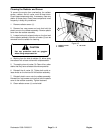
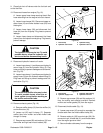
10. Disconnect hoses from engine (Fig. 19).
A. Loosen upper hose clamp securing the air filter
hose extending from the engine to the air cleaner.
B. Loosen hose clamps (23). Disconnect upper ra-
diator hose (18) and lower radiator hose (24) from
the engine.
C. Loosen hose clamp (38) and disconnect fuel
hose (44) from the lift pump. Plug hose to prevent
leakage.
D. Loosen hose clamp and disconnect fuel hose
(return) from the injector nozzle piping. Plug hose to
prevent leakage.
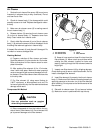
CAUTION
The hydraulic fluid may be hot. To avoid
possible burns, allow the hydraulic sys-
tem to cool before disconnecting hoses.
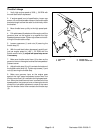
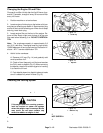
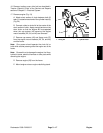
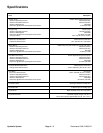
11. Disconnect hydraulic hoses to oil cooler.
A. Loosen hose clamp (1) and disconnect hydraulic
return hose (2) from the hydraulic fitting (3). Plug
hose and fitting to prevent leakage and contamina-
tion (Fig. 20).
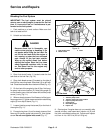
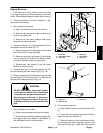
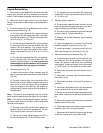
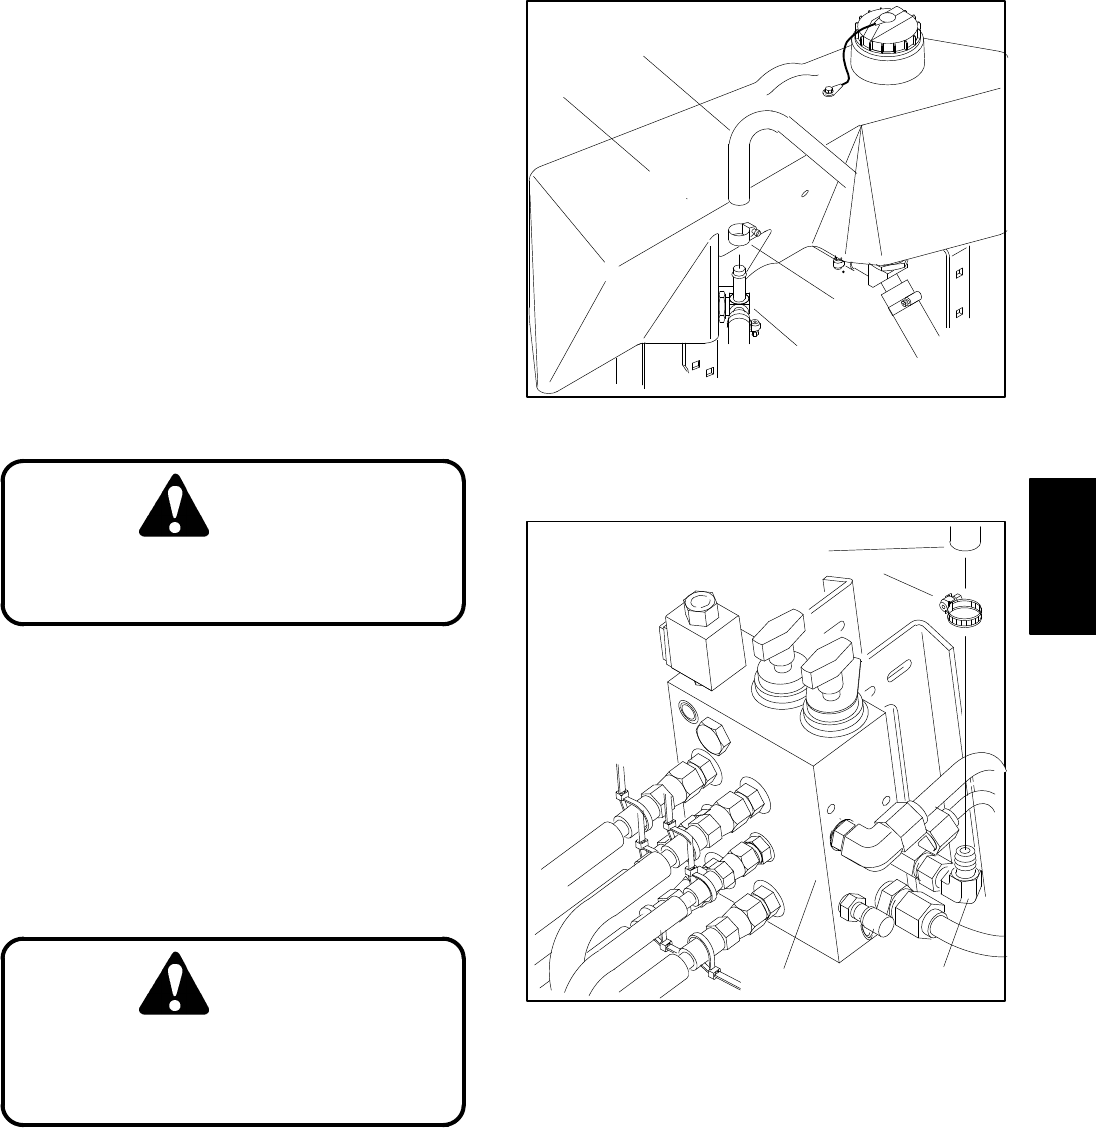
B. Loosen hose clamp (1) and disconnect hydraulic
supply hose (2) from the hydraulic elbow fitting (3).
Plug hose and fitting to prevent leakage and con-
tamination (Fig. 21).
CAUTION
The muffler and muffler tube may be hot.
To avoid possible burns, allow the ex-
haust system to cool before working on
the muffler and muffler tube.
12. Remove exhaust system (Fig. 19).
A. Remove muffler clamp (19) from the muffler (14)
and muffler tube (15).
B. Loosen nut (20) and U–clamp (17). Separate
muffler tube from muffler and slide muffler tube
through U–clamp.
C. Remove cap screws (36) and washers (13) from
the muffler and right rear mount bracket (46).
Figure 20
1. Hose clamp
2. Hydraulic return hose
3. Hydraulic fitting
4. Hydraulic reservoir
2
3
1
4
Figure 21
1. Hose clamp
2. Hydraulic supply hose
3. Hydraulic elbow fitting
4. Hydraulic manifold
3
1
2
4
D. Remove cap screws (39) and flat washers (11)
from the muffler and exhaust manifold. Remove
muffler and muffler gasket (53) from the engine.
13. Disconnect throttle cable (Fig. 19).
A. Loosen cap screw (43) enough to separate the
throttle cable from the throttle cable clamp (30).
B. Remove cotter pin (30) from clevis pin (29). Re-
move clevis pin, throttle tab (31), and throttle cable
from the engine governor lever.
C. Secure throttle cable away from the engine.
Engine