Reelmaster 2300–D/2600–D Page 3 – 7 Engine
Adjustments
Alternator Belt
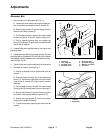
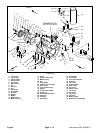
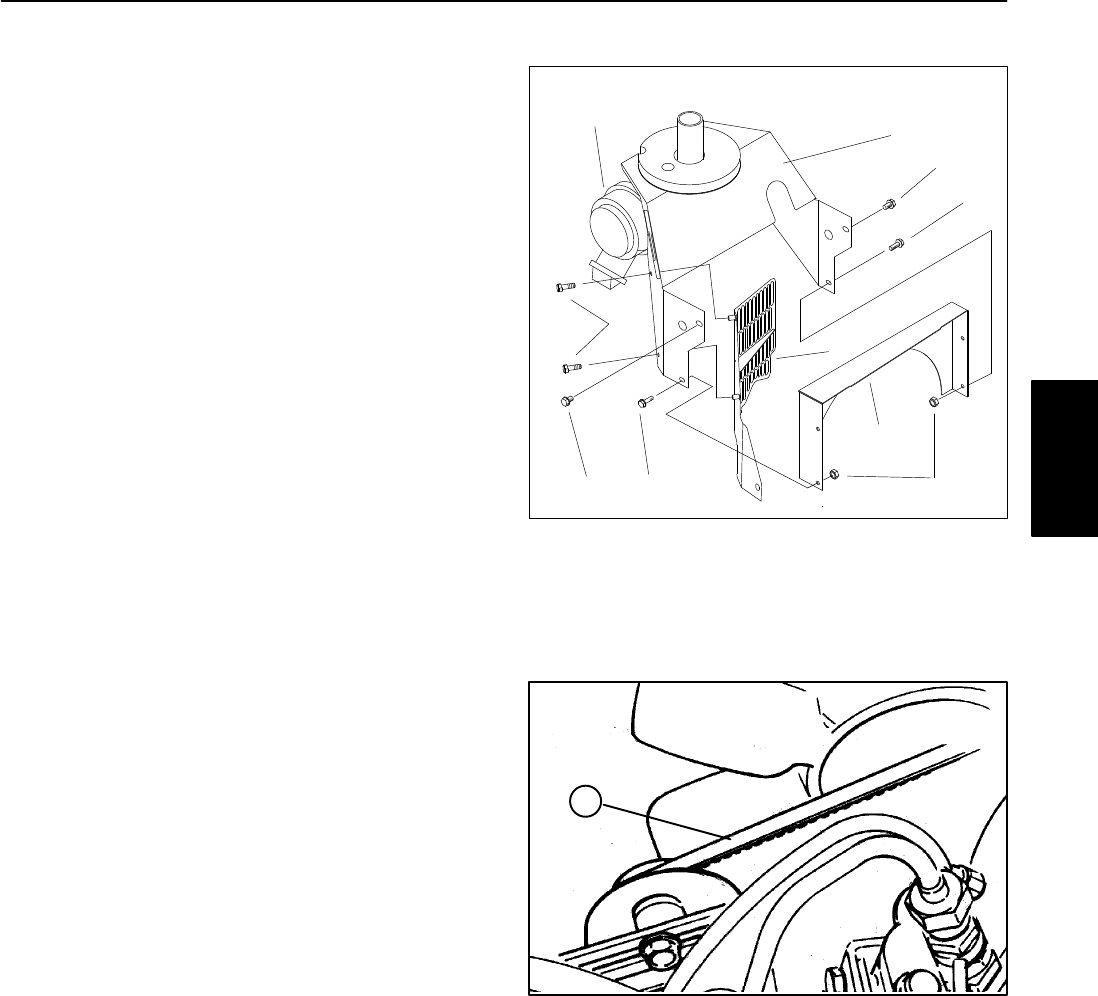
1. Gain access to the alternator belt (Fig 7).
A. Loosen top hose clamp securing the upper por-
tion of the hose connected to the air cleaner (8).
B. Remove cap screws (1) and lock flange nuts (2).
Remove hex head screws (3).
C. On European models, remove hex head screws
(4) from the guard (5) and air cleaner housing (6).
D. Pull air cleaner housing from the radiator top
shroud (7) and hose. Plug air cleaner hose and hose
inlet to the air cleaner.
2. Loosen bolts securing alternator to the engine and
adjusting strap.
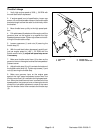
3. Adjust alternator belt to the proper tension. Tension
alternator belt so it deflects 0.20 inch with a 2 to 3 pound
load applied midway between the crankshaft and alter-
nator pulleys (Fig. 8).
4. Tighten bolts securing the alternator to the engine.
5. Reinstall air cleaner housing (Fig 7).
A. Unplug air cleaner hose and hose inlet to the air
cleaner.
B. Place air cleaner housing (6) on the radiator top
shroud (7). Reconnect upper end of the air cleaner
hose to the air cleaner (8). Align holes to receive
fasteners.
C. On European models, reinstall hex head screws
(4) into guard (5) through the air cleaner housing (6).
D. Secure cap screws (1) and lock flange nuts (2) to
air cleaner housing and radiator top shroud (7).
E. Secure hex head screws (3) into the air cleaner
housing and radiator assembly.
F. Tighten hose clamp securing the hose to the air
cleaner.
6
3
1
7
2
1
3
4
Figure 7
1. Cap screw
2. Lock flange nut
3. Hex head screw
4. Hex head screw
5. Guard (Europe)
6. Air cleaner housing
7. Radiator top shroud
8. Air cleaner
5
8
Figure 8
1. Engine belt
1
Engine


