


Reelmaster 3100−DPage 7 − 28Cutting Units
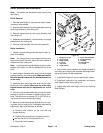
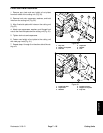
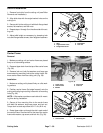
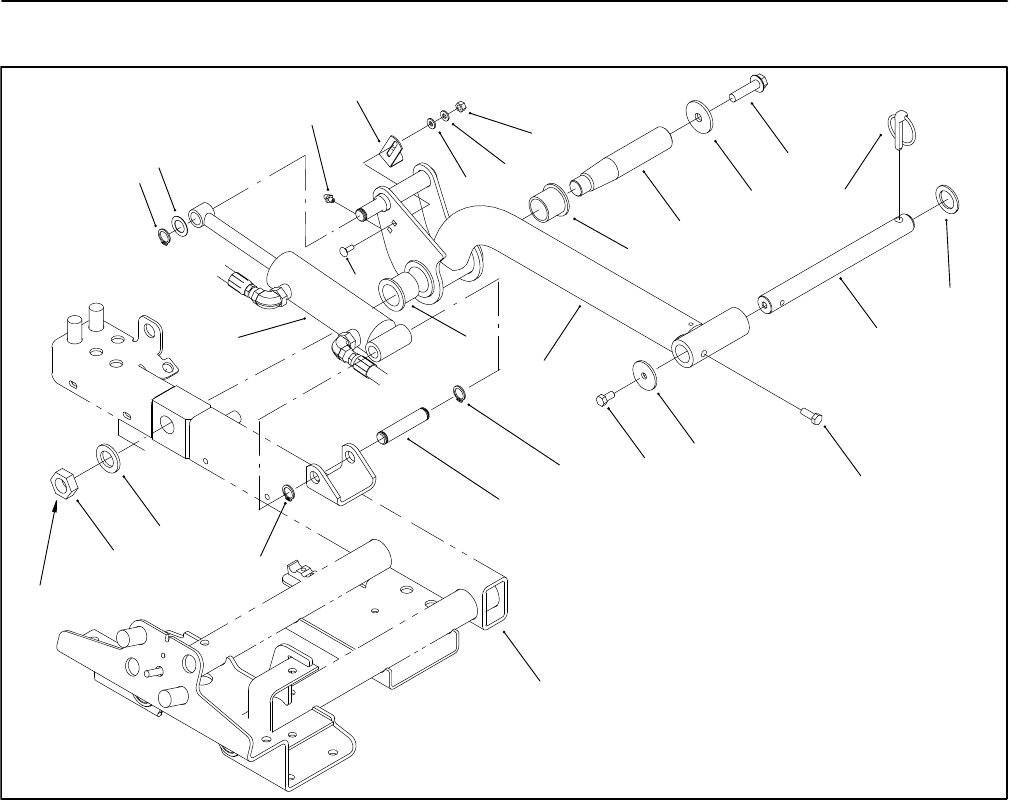
Rear Lift Arm
1. External retaining ring
2. Thrust washer
3. Rear lift arm
4. Rear hydraulic cylinder
5. Flange head screw
6. Thrust washer
7. Rear pivot shaft
8. Bushing
9. Jam nut
10. Washer
11. Lynch pin
12. Washer
13. Cutting unit pivot shaft
14. Cap screw
15. Rebound washer
16. Cap screw
17. Pin
18. Carrier assembly
19. Hex nut
20. Lock washer
21. Flat washer
22. Carriage screw
23. Switch bracket
24. Grease fitting
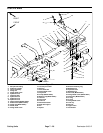
Figure 36
1
1
19
20
21
8
7
6
5
11
12
16
15
14
17
9
10
1
2
23
24
4
22
3
18
8
13
200 to 250 Ft−lb
(271 to 339 N−m)
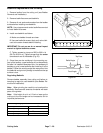
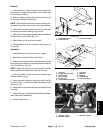
Removal
1. Park machine on a level surface, lower cutting units,
stop engine, engage parking brake, and remove key
from the ignition switch.
2. Remove cutting unit from the pivot shaft of the rear
lift arm (see Cutting Unit Removal).
3. Remove external retaining ring and thrust washer
from the lift cylinder shaft of the rear lift arm.
4. Remove flange head screw and thrust washer from
the rear pivot shaft.
5. Slide rear lift arm from rear pivot shaft and hydraulic
cylinder.
6. Disassemble lift arm as necessary using Figure 36
as a guide.
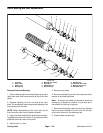
Installation
1. Assemble lift arm using Figure 34 as a guide.
A. If the rear pivot shaft was removed, torque jam
nut from 200 to 250 Ft−lb (271 to 339 N−m).
B. If the switch bracket was removed, make sure the
lip of the switch bracket faces away from the rear lift
arm when installed.
2. Slide rear lift arm onto rear pivot shaft making sure
that the lift shaft of the rear lift arm slides into the clevis
of the hydraulic cylinder.