


Reelmaster 3100−DPage 7 − 20Cutting Units
Bedknife Replacement and Grinding
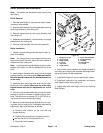
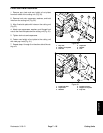
1. Remove bedbar from the cutting unit (see Bedbar
Removal and Installation).
2. Remove bedknife screws and bedknife.
3. Remove all rust, scale and corrosion from the bedbar
surface before installing new bedknife.
NOTE: Use a torque wrench and a bedknife screw tool
to install bedknife screws.
4. Install new bedknife as follows:
A. Make sure bedbar threads are clean.
B. Use new bedknife screws. Apply anti−seize lubri-
cant to the screw threads before installing.
IMPORTANT: Do not use an air or manual impact
wrench to tighten bedknive screws.
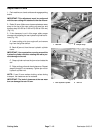
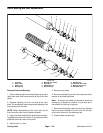
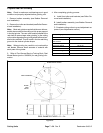
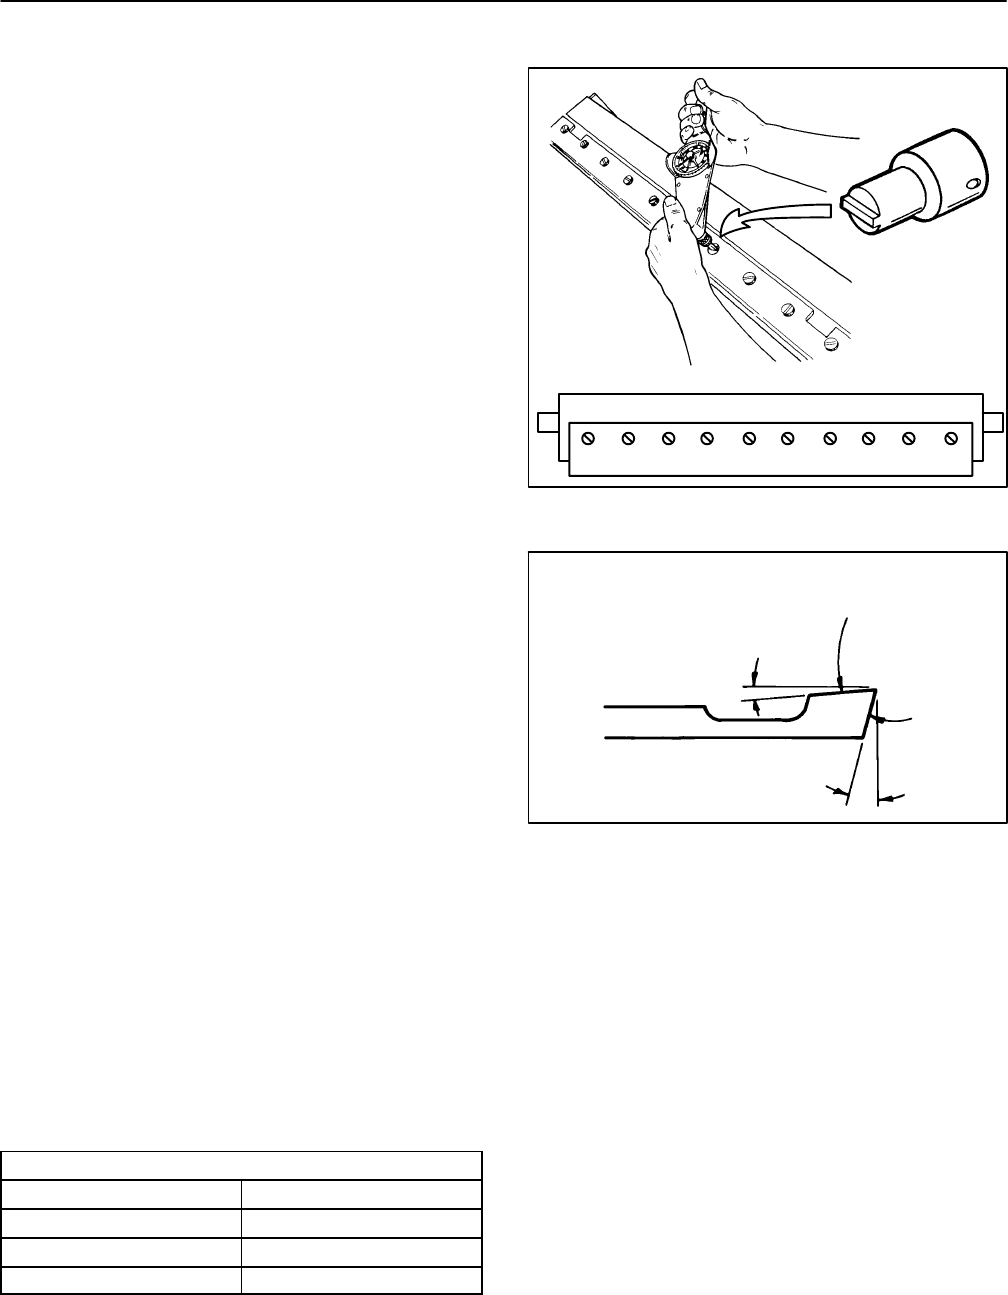
C. Tighten screws to a torque of 250 to 300 in−lb
(28.3 to 33.9 N−m). Tighten screws from the center
toward each end of the bedbar (Fig. 25).
5. Since there can be variations in the mounting sur-
face of the bedbar, a new bedknife will not be perfectly
flat after it is installed. Because of this, it is necessary to
backlap or grind a new bedknife after installing it to the
bedbar. Follow the existing angle that was ground into
the bedknife and grind only enough to make sure the top
surface is true.
Regrinding Bedknife
Remove bedbar assembly from cutting unit before at-
tempting to regrind a used bedknife (see Bedbar Re-
moval and Installation).
Note: When grinding, be careful to not overheat the
bedknife. Remove small amounts of material with each
pass of the grinder.
Note: If the height of cut is a 1/2 inch or lower on the
cutting unit, the front angle can be increased to 30
o
for
improved performance.
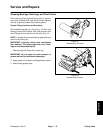
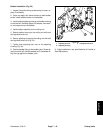
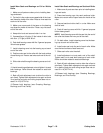
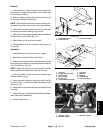
Bedknife Regrinding Specifications
Relief Angle 5
o
Relief Angle Range 3
o
to 6
o
Front Angle 15
o
(see Note above)
Front Angle Range 13
o
to 17
o
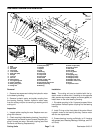
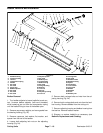
124683579 10
Figure 25
Relief Angle
Front Angle
Top Face
Front
Face
Figure 26