


Reelmaster 5010 SeriesHydraulic System (Rev. C) Page 4 -- 114
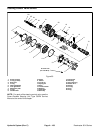
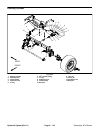
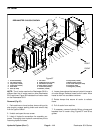
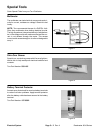
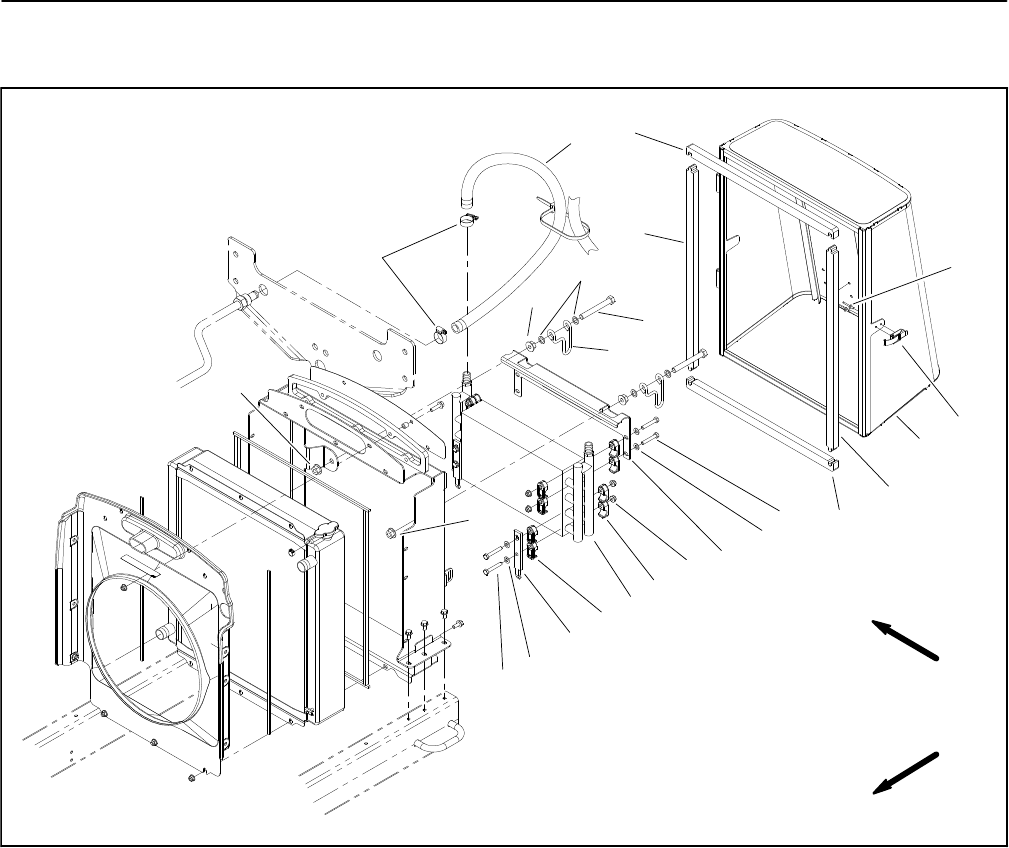
Oil Cooler
1. Screen assembly
2. Oil cooler bracket
3. Cap screw (4 used)
4. Foam seal (2 used)
5. Draw latch
6. Rivet (2 used)
7. Oil cooler
8. Hydraulic hose (2 used)
9. Flat washer (8 used)
10. Hose clamp (4 used)
11. Foam seal (2 used)
12. Washer (4 used)
13. Cap screw (2 used)
14. Mount plate (2 used)
15. Oil cooler clamp (16 used)
16. Clamp (2 used)
17. Flange nut (4 used)
Figure 97
FRONT
RIGHT
1
3
2
6
12
8
5
13
9
14
7
13
15
9
11
4
17
4
11
10
16
3
17
17
15
REELMASTER 5410/5510 SHOWN
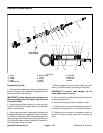
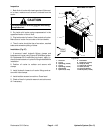
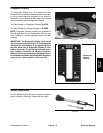
NOTE: The oil cooler used on the Reelmaster 5610 is
different than the oil cooler used on other Reelmaster
5010 machines. Figure 98 illustrates the oil cooler used
on the Reelmaster 5610.
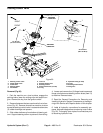
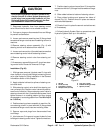
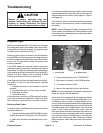
Removal (Fig. 97)
1. Park machine on a level surface, lower cutting units,
stop engine, engage parking brake and remove key
from the ignition switch.
2. Unlatch and open the rear screen.
3. Label all hydraulic connections for assembly pur-
poses. Thoroughly clean hydraulic connections prior to
loosening hydraulic hoses.
4. Loosen hose clamps that secure hydraulic hoses to
oil cooler fittings. Remove hoses from oil cooler. Allow
hoses to drain into a suitable container.
5. Rotate clamps that secure oil cooler to radiator
frame.
6. Pull oil cooler from machine.
7. If necessary, remove hydraulic fittings, clamps and
brackets from oil cooler using Figures 97 and 98 as
guides.