


36 4. The Multi Mode
● MULTI PLAY POLYPHONY & DYNAMIC VOICE ALLOCATION
The TG500 actually consists of two 32-note tone generator units (“A” and
“B”), giving it a total polyphony of 64 notes. Some of the preset waves are
produced by tone gerator “A,” while others are produced by tone generator
“B.” Thus, each voice is produced by one or the other tone geneator depending
on which wave is assigned to it. To find out which of the tone generator units
a voice is produced by, select either the voice edit mode “1-1:Wave Select” or
“3-1-01:Wave Select” function (pages 107 and 108) and look at the inverse
letter following the assigned wave name — it will be either “ A ” or “ B ”
corresponding to the tone generator unit it is produced by. The wave assign-
ments are also listed in the complete voice list given in the Appendix (page
303). In terms of multi polyphony this means that if all the voices assigned to
a multi setup are generated by the same tone generator unit (“A” or “B” only),
the maximum polyphony for that multi setup will be 32 notes. It is therefore a
good idea to use a well-balanced combination of voices produced by both tone
generator units to ensure maximum polyphony.
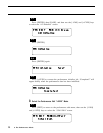
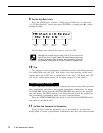
● SELECTING A MULTI SETUP
MULTI PLAY setups are selected in essentially the same way as voices and
performance combinations: first use the [PLAY MODE] key to engage the
MULTI PLAY mode, then use the [-1/NO] and [+1/YES] keys to select the
desired multi setup (00 … 15).
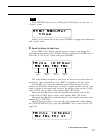
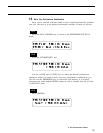
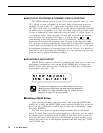
The information displayed on the bottom display line tells you
about the current effect mode and what effects are assigned to
the TG500’s two effect processors. See the “Effects” section
beginning on page 251 for more details.
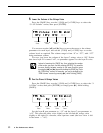
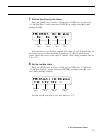
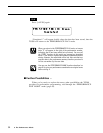
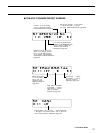
■ Editing a Multi Setup
After selecting the multi setup you want to edit, press the [EDIT/COM-
PARE] key to enter the MULTI EDIT mode, press the [PAGE] key to call the
menu, use the [-1/NO] and [+1/YES] keys to select the “1:Parameter” screen,
then press [ENTER].
You now have access to the three multi parameter edit screens shown
below. To move from screen to screen simply move the cursor past the end of
the current screen. A flashing arrow at either or both ends of the screen indi-
cates that the cursor can be moved in that direction to access another screen.
Simply move the cursor to the required parameter and edit using the [-1/NO]
and [+1/YES] keys.
DETAIL