24
PRODUCT MANUAL 1012581
CHAPTER 3—CONFIGURING THE AUTOLOADER
OVERVIEW OF AUTOLOADER MENUS
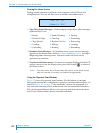
When the Home screen is displayed on the LCD, press , , , or to
access the autoloader’s main menus.
Press or to loop through the main menus, and press to enter one of
the menus and see its sub-menus. Once you are within a menu, press or
to loop through the choices in that menu.
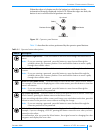
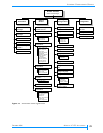
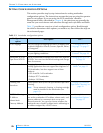
Ta bl e 3 -2 provides an overview of the autoloader’s main menus. Figure 3-3
shows the organization of the menus.
Table 3-2 Autoloader main menus
Menu Description
Select a Command Allows you to issue commands for basic autoloader operations, including:
inserting and removing cartridges
loading and unloading cartridges from the tape drive
updating the inventory
cleaning the tape drive
View a Status Allows you to view:
an event log for the autoloader
tape drive information (firmware, serial number, and SCSI ID)
library information (firmware, serial number, SCSI ID, loads, moves, ethernet
settings, and the operation mode)
individual cartridge cell statistics (puts and picks)
bar code label information
tape drive status (see “Viewing the Home Screen” on page 22)
sensor readings (door, eject, and cell sensors, library temperature, system fan,
and power supply fan)
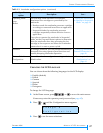
Change a
Configuration
Allows you to view and change the:
SCSI IDs
emulation mode
autoclean settings
operating mode
Ethernet settings
Also allows you to:
set up a password to restrict access to the operator panel menus
restore the autoloader configuration settings to their default values
Perform a
Diagnostic
Allows you to:
run a hardware self test
run system demos
reset the autoloader


