


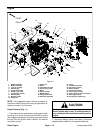
Greensmaster 3420 Page 4 -- 11 Diesel Engine
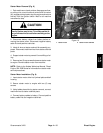
DANGER
Diesel fuel is flammable. Use caution when stor-
ing or h andling it. Do not smoke while servicing
the fuel tank. Do not fill fuel tank while engine is
running or in an enclosed area. Always fill fuel
tank outside and wipe up any spilled fuel before
starting the engine. Store fuel in a clean, safety--
approved container and keep the cap in place.
2. Drain fuel tank:
A. Close fuel shut--off valve on bottom of fuel tank.
B. Disconnect fuel supply hose at the fuel filter and
drain any fuel trapped in the fuel filter and f uel hose
intoasuitablecontainer.
C. Placeendof fuelhose intoa suitable containerfor
draining the tank.
D. Drain fuel tank by opening the fuel shut off valve.
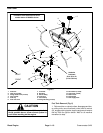
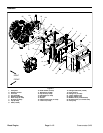
3. Remove vent hose (item 10) from fuel vent valve
(item 6).
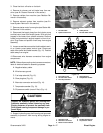
4. To allow easier access to fasteners that secure fuel
tank, raise and support tank mount plate assembly (hy-
draulic reservoir, fuel tank and tank mount plate) (see
Tank Mount Plate Assembly in the Service and Repairs
section of Chapter 7 -- Chassis).
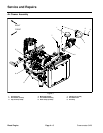
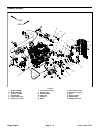
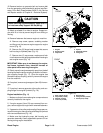
5. Remove four (4) cap screws (item 14), flat washers
(item 13) and flange bushings (item 12) that secure the
fuel tank to the tank mount plate (item 2).
6. Move fuel tank towards the rear of the machine to
gainaccess tofuelreturn hose(item15). Removereturn
hose from elbow fitting on front of tank.
7. Remove the f uel tank from the machine.
8. If necessary, remove fuel supply hose from shut--off
valve.
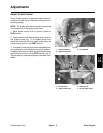
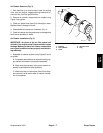
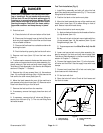
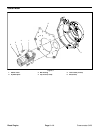
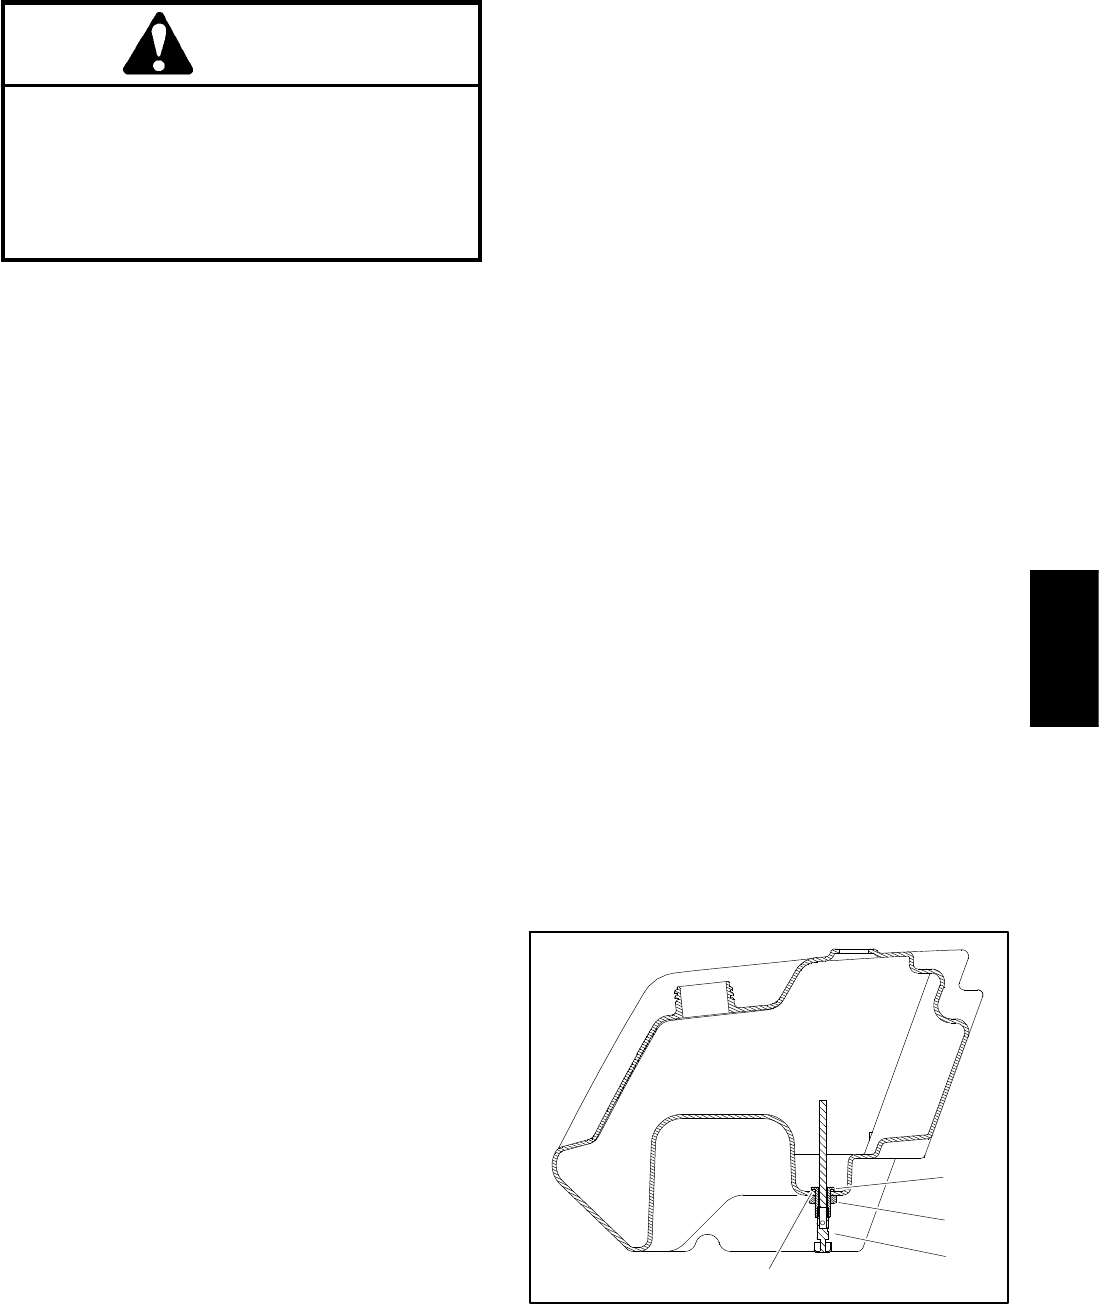
9. If necessary, remove shut--off valve and fitting as-
sembly from fuel tank (Fig. 7). The nut and fitting have
left hand threads.
Fuel Tank Installation (Fig. 6)
1. Install fitting assembly and shut--off valve into fuel
tankif they wereremoved from tank(Fig. 7). Thenutand
fitting have left hand threads.
2. Position fuel tank on the tank mount plate.
3. Move fuel tank towards the rear of the machine and
install return hose (item 15) to elbow fitting on front of
tank.Securehosewithhoseclamp.
4. Secure fuel tank to tank mount plate:
A. Apply antiseizelubricant to thethreadsof thefour
(4) cap screws (item 14).
B. Secure fuel tank to the tank mount plate with four
(4) cap screws (item 14), flat washers (item 13) and
flange bushings (item 12).
C. Torque capscrews from30 to 50in--lb (3.4to 5.6
N--m).
5. Lower and secure tank mount plate assembly (hy-
draulic reservoir, fuel tank and tank mount plate) (see
Tank Mount Plate Assembly in the Service and Repairs
section of Chapter 7 -- Chassis).
6. Connect fuel supply hose (item 17) to the fuel shut--
off valve and fuel filter. Secure supply hose with hose
clamps.
7. Connect vent hose (item 10) to fuel vent valve (item
6) and secure with hose clamp.
8. Fill fuel tank with fuel.
9. Open fuel shut--off valve. Check all fuel hoses and
fuel tank for leaks.
Figure 7
1. Shut--off valve
2. Nut (LH thread)
3. Fitting (LH thread)
4. O--ring
1
2
3
4
Diesel
Engine