


Rev. A
Greensmaster 3320/3420
DPA Cutting Units
Page 8 - 18
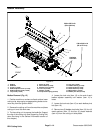
Bedknife Replacement and Grinding
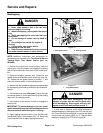
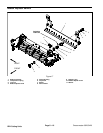
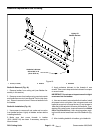
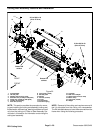
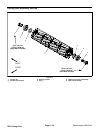
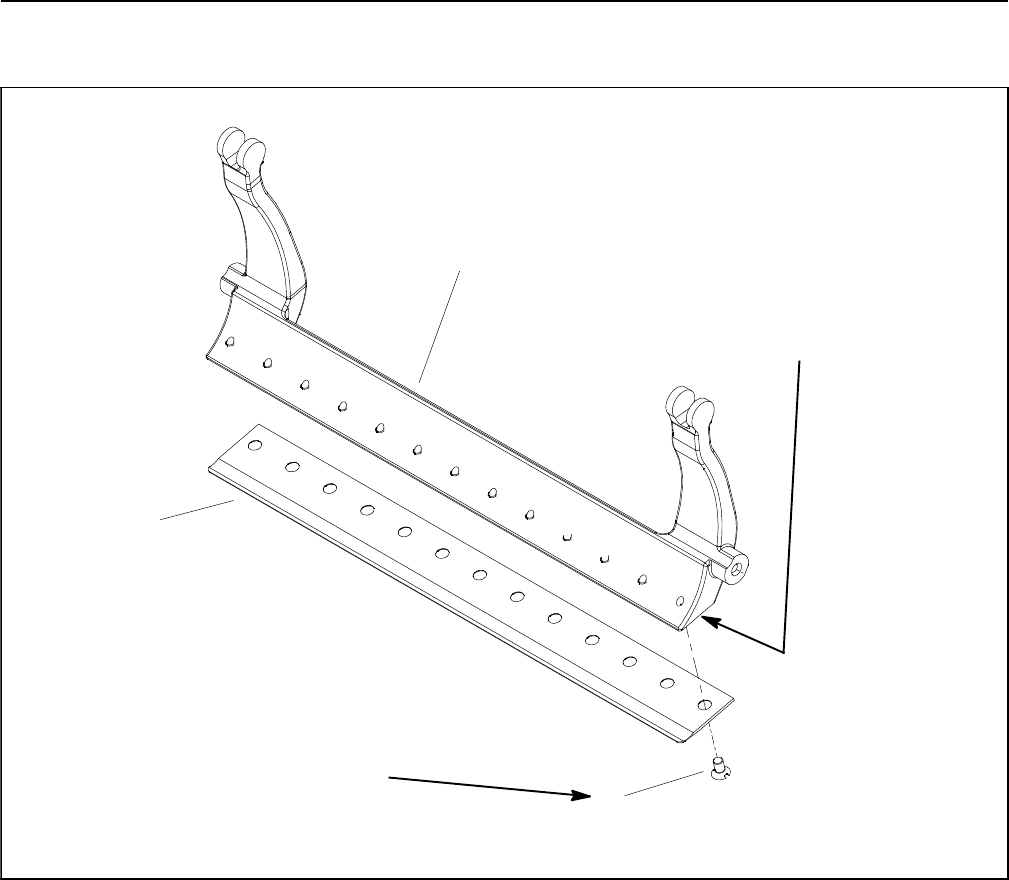
1. Screw (13 used) 2. Bedbar 3. Bedknife
Figure 18
v
200 to 250 in-lb
(23to28N-m)
Lightly Oil
Bedbar Surface
2
Antiseize Lubricant
1
3
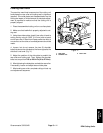
Bedknife Removal (F ig. 18)
1. Remove bedbar from cutting unit (see Bedbar As-
sembly in this section).
2. Remove screws from bedbar using a socket wrench
and bedknife screw tool (see Special Tools in this chap-
ter). Discard removed screws. Remove bedknife from
the bedbar.
Bedknife Installation (Fig. 18)
1. Use scraper to remove all rust, scale and corrosion
from bedbar surface. Lightly oil bedbar surface before
installing bedknife.
2. Make sure that screw threads in bedbar
(5/16- 18UNC- 2A) are clean. If necessary, use tap t o
clean threads.
3. Apply antiseize lubricant to the threads of new
screws. Take care to keep antiseize lubricant from taper
on screw heads.
IMPORTANT: Do not use an impact wrench to tight-
en screws into the bedbar.
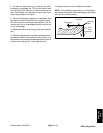
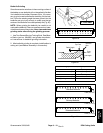
4. Usenew screwsto secure bedknife to bedbar.Install
all screws but do not tighten. Use a torque wrench and
bedknife screw tool to torque the two (2) end screws to
10in-lb(1.1N-m)which willcenter thebedknife. Then,
starting with center screw, torque all screws from 200 to
250in-lb(23to28N-m). Use a torquing pattern work-
ingfromthe ce ntertoward eachend ofthe bedknife(Fig.
19).
5. After installing bedknife to bedbar, grind bedknife.