


Greensmaster 3320/3420
DPA Cutting Units
Page 8 -- 34
IMPORTANT: The brush drive belt may fail prema-
turely if the pulleys are not properly aligned.
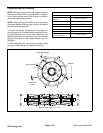
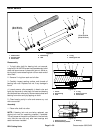
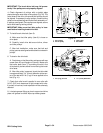
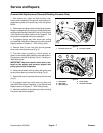
4. Check alignment of pulleys with a straight edge
placed along the outer face of the pulleys (Fig. 40). The
outer faces of the drive, driven and idler pulleys should
be aligned. If necessary to align pulleys, loosen locking
collarson brushbearingsand movebrush assemblyun-
til pulleys are aligned. Once pulleys are aligned, secure
brush with bearing locking collars.
IMPORTANT: Make sure that idler pulley is loos-
ened before installing brush drive belt.
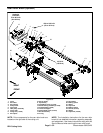
5. To install brush drive belt (item 2):
A. Make sure that idler pulley (item 6) is loose on
drive plate.
B. Carefully install drive belt around drive, driven
and idler pulleys.
C. After belt installation, make sure that belt and
pulleygroovesarealignedand thatbeltis centeredin
pulleys.
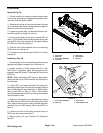
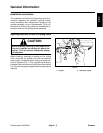
6. To tension the drive belt:
A. Pushdownontheidlerpulleyandsecure withcap
screw (item 22) and flange nut (item 8). Make sure
that cover plate (item 7) is covering the slot in the
drive plate to prevent debris from entering the brush
drive area.
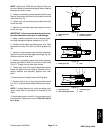
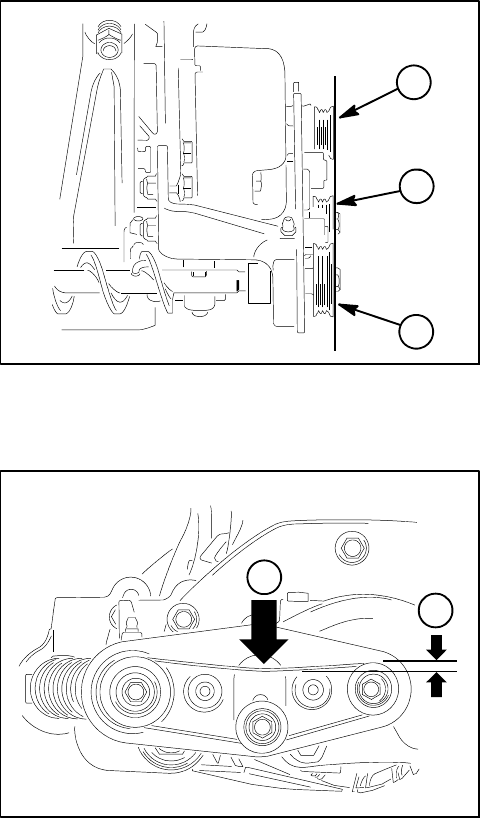
B. After idler pulley is secured, c heck that drive belt
has approximately 1/4” (6 mm) deflection at the cen-
ter of the belt with 2 lb (1 kg) of force applied to the
belt (Fig. 41).
7. Check that roller brush is parallel to rear roller with
0.010” (0.25 mm) clearance to light contact with roller.
If contact is incorrect, brush operation will be adversely
affected.
8. Lubricate grease fittings on brush support and drive
plate until grease is visible. Wipe up excess grease.
1. Drive pulley
2. Driven pulley
3. Idler pulley
4. Drive belt
Figure 40
2
3
1
Figure 41
1. 2 lb (1 kg) of force 2. 1/4” (6 mm) deflection
1
2