


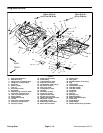

Groundsmaster 4100--D Cutting DeckPage 8 -- 11
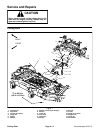
Removal (Fig. 6)
1. Position machine on a clean, level surface. Lower
cutting deck and engage parking brake.
2. Fully raise wing deck, stop engine and remove key
from the ignition switch. R emove three (3) washer head
screws and shield strap that secure flex shield to wing
deck. Lower wing deck.
3. Remove hydraulic motor from wing deck (see Cut-
ting Deck Motor Removal in the Service and Repairs
Section of Chapter 4 -- Hydraulic System).
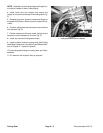
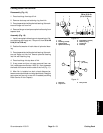
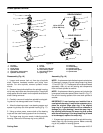
4. Remove cap screw and lock nut that secure lift cylin-
der clevis to the wing deck (Fig. 7).
5. Remove switch shield (item 50) from center deck.
6. Support wing deck to prevent it from falling as links
are removed.
7. Remove cap screw (item 29) from pivot pin on upper
end of both links. Cap screw on rear link also uses a flat
washer (item 28).
NOTE: Whenremoving pivotpins from deck, note loca-
tion of thrust washers ( item 6) and hardened spacers
(item 42).
8. Remove flange nut (item 19) from carriage bolt (item
26) and pull pivot pins (item 18) from deck. Locate and
retrieve thrust washers (item 6) and hardened spacers
(item 42) from between links and deck brackets.
9. Slide the wing deck away from the center deck.
10.If required, remove link(s) from wing deck by remov-
ing lock nut and flat washer that secure tapered stud to
deck. Press tapered stud from deck to remove link as-
sembly. Remove foam washer (item 42) and link skid.
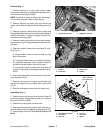
Installation (Fig. 6)
1. Park machine on a clean,levelsurface. Stop engine,
engage parking brake and remove key from the ignition
switch.
2. If links were removed from wing deck, thoroughly
clean tapered stud on link and mounting boss of wing
deck. Place foam washer on tapered stud and insert
stud into deck mounting boss. Position link skid to stud
and securewithflat washer and lock nut.Torquelock nut
from 160 to 180 ft --lb (217 to 244 N--m).
NOTE: Pivot latches (item 8) may need to be manually
opened prior to w ing deck installation. If necessary, use
a pry bar to carefully open latch.
3. Position the wing deck to the center deck.
1. Hydraulic motor
2. Flange head screw
3. Lift cylinder clevis
Figure 7
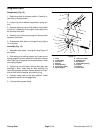
1
2
2
3
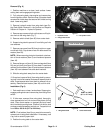
Figure 8
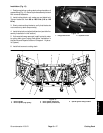
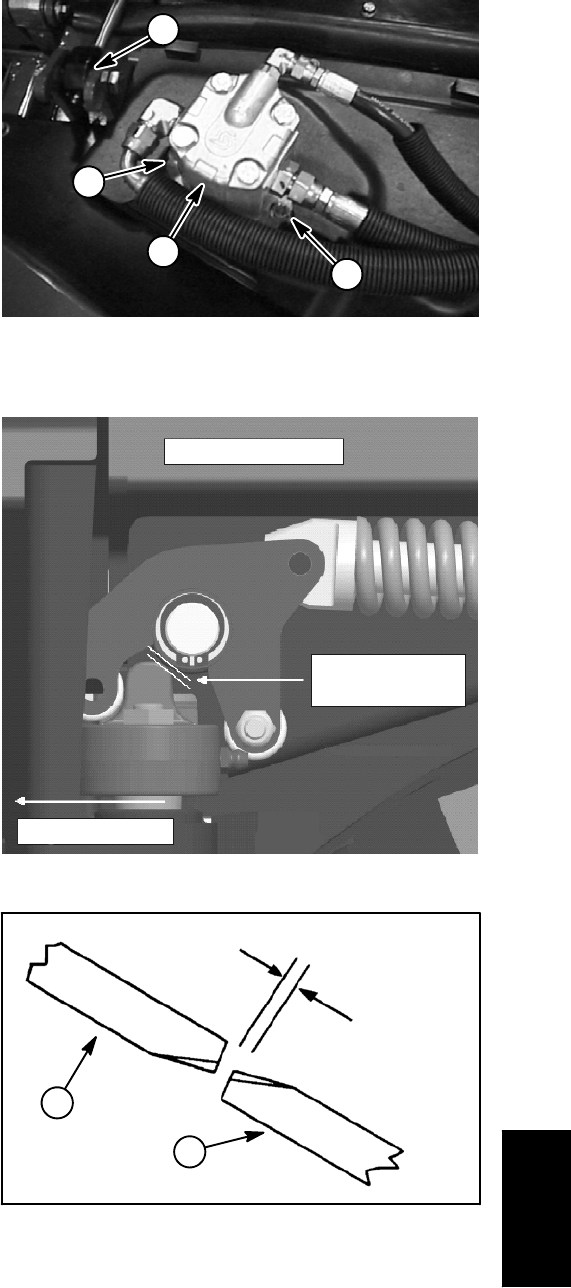
Front of center deck
Wing opens this way
0.060” to 0.090”
(1.5 to 2.2 mm)
(wing lowered & latched)
1. Wing deck blade 2. Center deck blade
Figure 9
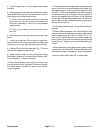
(9.7 to 15.7 mm)
0.380” to 0.620”
1
2
Cutting Deck