Greensmaster 3150Hydraulic System Page 4 -- 62
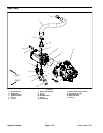
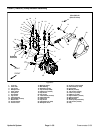
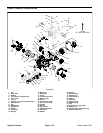
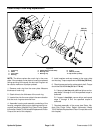
11.Remove two (2) cap screws (item 17), lock washers
(item 16) and flat washers (item 3) that secure pump as-
sembly to pump adapter mounted to engine. Separate
pump assembly from the pump adapter and remove
from machine.
12.If necessary, remove pump hub (item 1) from pump
input shaft. Locate and retrieve key (item 39).
13.Separate gear pump from the piston pump (see Gear
Pump in this section).
IMPORTANT: If fittings are going to be removed
from piston pump, note position of fittings for as-
sembly purposes.
14.If fitting removal from piston pump is n ecessary,
mark hydraulic fitting orientation to allow correct assem-
bly. Remove hydraulic fittings and O--rings from piston
pump. Discard removed O--rings.
15.If necessary, remove the neutral assembly attached
to the piston pump (see Piston (Traction) Pump Neutral
Assembly in this section).
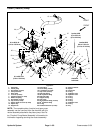
Piston Pump Installation (Fig. 42)
1. If any neutral assembly components were removed
from piston pump, install them to pump (see Piston
(Traction) Pump Neutral Assembly in this section).
2. Make sure the flange surfaces of the gear pump and
piston pump are t horoughly clean.
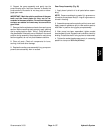
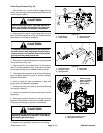
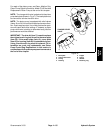
IMPORTANT: A case drain exists in the piston (trac-
tion) pump and a suction port is near the input shaft
of the gear pump (Fig. 45). Before the gear pump is
installed to the piston pump, make sure that plugs
placed in either of these ports are removed. Failure
to remove plugs will cause exc essive pressure in
the piston pump and damage seals.
3. Install gear pump to the piston pump (see Gear
Pump in this section).
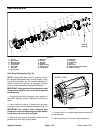
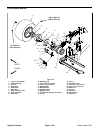
4. If removed, secure hub(item 1) to piston p ump shaft:
A. Make sure that pump shaft and bore of hub are
thoroughly cleaned.
B. Position key (item 39) to pump shaft.
C. Apply Loctite #242 (or equivalent) to the thread s
of the cap screw used to secure hub to pump shaft.
D. Slide hub onto pump shaft and secure with
spacer (item 28) and cap screw (item 29). Torque
cap screw from 27 to 33 ft--lb (37 to 44 N--m).
5. Inspect threads and sealing surfaces of hydraulic fit-
tings and hydraulic hose connectors. Replace any dam-
aged or worn fittings or connectors.
6. Lubric ate and place new O--r ings onto all removed
hydraulic fittings. Install fittings into pump openings
making sure that fitting orientation is as noted during re-
moval. Tighten fittings (see Hydraulic Fitting Installation
in the General Information section of this chapter).
7. Position pump assembly to pump adapter on engine
and align pump hub with rubber coupling (item 8). Se-
cure pump assembly to pump adapter with two (2) cap
screws (item 17), lock washers (item 16) and flat wash-
ers (item 3).
8. Secure pump hub to rubber coupling (item 8) with
two (2) cap screws (item 10), flat washers (item 9), cou-
pling spacers (item 7) and lock nuts (item 6).
CAUTION
The neutral arm extension spring is under ten-
sion and may cause personal injury during
installation. Use caution when installing the
spring to the pump neutral arm.
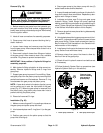
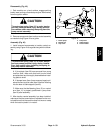
9. Connect the extension spring to the neutral arm (Fig.
44).
10.Connect the traction control cable to the neutral arm
(Fig. 43):
A. Secure traction cable ball joint to neutral arm.
B. Secure control cable to neutral arm with cable
jam nuts. Make sure that a washer is positioned on
each side of the neutral arm.
11.Remove plugs from hydraulic fittings and hoses that
were placed during pump removal.
12.Using labels placed during pump removal, lubricate
new O--rings and connect hydraulic hoses to gear pump
and piston pump fittings. Tighten hose connections (see
Hydraulic Hose and Tube Installation in the General In-
formation section of this chapter).
13.Make sure tha t gear pump inlet hose is installed to
pump fitting and secured with hose clamp. Remove
clamp from gear pump inlet hose.
14.Check oil level in hydraulic reservoir and add correct
oil if necessary.
15.Follow Hydraulic System Start--up procedures (see
Hydraulic System Start--up in this section).
16.Check neutral position of the traction pedal. If adjust-
ment is required, see Adjust Transmission for Neutral in
the Traction Unit Owner’s Manual.


