Greensmaster 3150 Page 3 -- 11 Engine
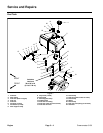
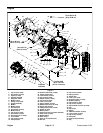
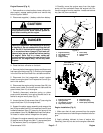
Disassembly (Fig. 6)
DANGER
Gasoline is flammable. Use cautionwhen storing
or handling it. Wipe up any spilled fuel before
starting the engine.
1. Inspect carbon cannister and attached hoses for
damage or obvious leaks. Adamaged orleaking cannis-
ter should be replaced.
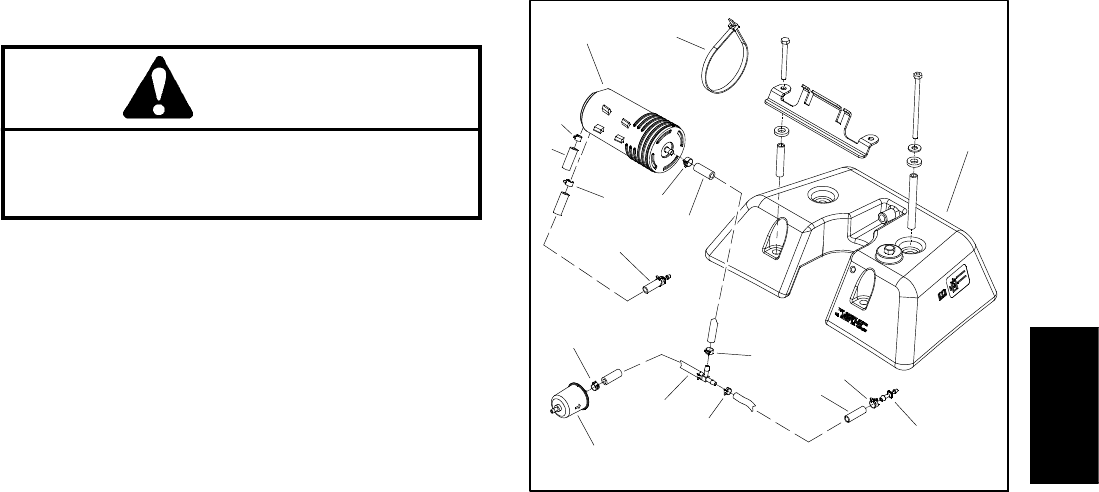
2. Remove components as needed using Figure 6 as
a guide.
A. If either purge hose assembly (item 5) or T--hose
assembly (item 10) is to be removed, label ends of
hose for assembly purposes. Both of these assem-
blies include a check valve so direction of installation
is important for correct operation of the evaporative
control system. The check valve is not available as a
separate part so hose assembly replacement is nec-
essary if the check valve or hose is faulty. To ensure
proper operation of check valves, do not attempt to
remove them from the hose assembly.
Assembly
1. Install all removed components using Figure 6 as a
guide.
A. If either purge hose assembly (item 5) or T--hose
assembly (item 10) was removed, make sure t hat
installation is correct.
B. Make sure that fuel hoses are not kinked after
installation. Also, secure all hoses with hose clamps.
Figure 6
1. Leak detector tank
2. Carbon cannister
3. Cable tie (2 used)
4. Hose clamp
5. Purge hose assembly
6. Hose clamp
7. Hose (to fuel tank vent)
8. Hose clamp
9. Hose (to t--fitting)
10. T--hose assembly
11. Fresh air filter
12. Hose (to air cleaner)
13. Barbed fitting
1
3
2
6
5
4
9
8
7
4
4
4
8
10
11
12
13
Engine


