GENERAL
The installer must ensure that the home standby gen-
erator has been properly installed. The system must
be inspected carefully following installation. All appli-
cable codes, standards and regulations pertaining to
such installations must be strictly complied with. In
addition, regulations established by the Occupational
Safety and Health Administration (OSHA) must be
complied with.
Prior to initial startup of the unit, the installer must
ensure that the engine-generator has been properly
prepared for use. This includes the following:
• An adequate supply of the correct fuel must be
available for generator operation.
• Theenginemustbeproperlyservicedwiththerec-
ommended oil.
FUEL REQUIREMENTS
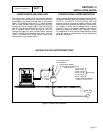
With LP gas, use only the vapor withdrawal system.
This type of system uses the vapors formed above
the liquid fuel in the storage tank.
The engine has been fitted with a fuel carburetion
system that meets the specifications of the 1997
California Air Resources Board for tamper-proof dual
fuel systems. The unit will run on natural gas or LP
gas, but it has been factory set to run on natural gas.
Should the primary fuel need to be changed to LP
gas, the fuel system needs to be reconfigured. See
the Reconfiguring the Fuel System section for instruc-
tions on reconfiguration of the fuel system.
Recommended fuels should have a Btu content of
at least 1,000 Btus per cubic foot for natural gas; or
at least 2,520 Btus per cubic foot for LP gas. Ask the
fuel supplier for the Btu content of the fuel.
Required fuel pressure for natural gas is 5 inches to
7 inches water column (0.18 to 0.25 psi); and for liq-
uid propane, 10 inches to 12 inches of water column
(0.36 to 0.43 psi).
NOTE: All pipe sizing, construction and layout
must comply with NFPA 54 for natural gas applica-
tions and NFPA 58 for liquid propane applications.
Once the generator is installed, verify that the
fuel pressure NEVER drops below four (4) inches
water column for natural gas or 10 inches water
column for liquid propane.
Prior to installation of the generator, the installer
should consult local fuel suppliers or the fire marshal
to check codes and regulations for proper installation.
Local codes will mandate correct routing of gaseous
fuel line piping around gardens, shrubs and other
landscaping to prevent any damage.
Special considerations should be given when install-
ing the unit where local conditions include flood-
ing, tornados, hurricanes, earthquakes and unstable
ground for the flexibility and strength of piping and
their connections.
Use an approved pipe sealant or joint compound on
all threaded fitting.
All installed gaseous fuel piping must be purged and
leak tested prior to initial start-up in accordance with
local codes, standards and regulations.
FUEL CONSUMPTION
The fuel consumption rates are listed in the
SPECIFICATIONS section at the front of this manual.
BTU FLOW REQUIREMENTS - NATURAL GAS:
BTU flow required for each unit based on 1000 BTU
per cubic foot.
7 kW - 140,000 BTU/Hour
9 kW - 156,000 BTU/Hour
12 kW - 215,000 BTU/Hour
13 kW - 220,000 BTU/Hour
16 kW - 261,000 BTU/Hour
18 kW - 294,000 BTU/Hour
DANGER
$
Gaseous fuels such as natural gas and liquid
propane (LP) gas are highly explosive. Even
the slightest spark can ignite such fuels and
cause an explosion. No leakage of fuel is per-
mitted. Natural gas, which is lighter than air,
tends to collect in high areas. LP gas is heavi-
er than air and tends to settle in low areas.
NOTE: A minimum of one approved manual shut-
off valve must be installed in the gaseous fuel
supply line. The valve must be easily accessible.
Local codes determine the proper location.
RECONFIGURING THE FUEL SYSTEM
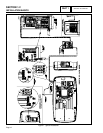
8 kW, 410CC ENGINE:
To reconfigure the fuel system from NG to LP, follow
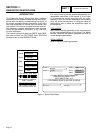
these steps (Figure 1):
NOTE: The primary regulator for the propane sup-
ply is NOT INCLUDED with the generator. A fuel
pressure of 10 to 12 inches of water column (0.36
to 0.43 psi) to the fuel inlet of the generator must
be supplied.
1. Turn off the main gas supply (if connected).
2. Open the roof and remove the door.
3. Remove the battery (if installed).
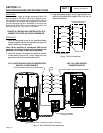
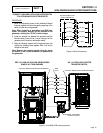
4. Locate the plastic T-handle fuel selector in the poly bag
supplied with the generator.
5. Locate the selector knob on the air box cover, behind
the yellow air filter door and power bulge. The unit
comes from the factory in the NG (Natural Gas) position.
Grasping the T-handle, insert the pin end into the hole
PART 1
GENERAL INFORMATION
SECTION 1.4
PREPARATION BEFORE USE
Page 16


