Page 132
i. Set a VOM to measure resistance.
j. Connect one meter test lead to Wire 14 that
was disconnected in Step 3.
k. Connect the other meter test lead to Wire 14 at
J2-3. See Figures on Pages 92-95.
l. CONTINUITY should be measured. If
CONTINUITY is measured, repeat Step 5 and
then retest.
m. If CONTINUITY is not measured, repair or
replace Wire 14 between the J2 Connector and
the fuel solenoid.
PROCEDURE: 8 kW UNITS
1. Set AUTO-OFF-MANUAL switch to OFF.
2. Set a VOM to measure DC voltage.
3. Disconnect Wire 14 from the fuel solenoid.
4. Connect the positive test lead to disconnected Wire 14
and the negative test lead to a clean frame ground.
5. Set the AUTO-OFF-MANUAL switch to the MANUAL
position.
6. Battery voltage should be measured. If battery voltage is
measured, refer back to flow chart.
Note: Disconnect the 7.5 amp fuse before discon-
necting the J2 connector.
7. Disconnect the J2 connector from printed circuit board.
8. Set VOM to measure resistance.
9. Connect the positive test lead to disconnected Wire 14
and the negative test lead to J2 Pin 3.
10. CONTINUITY should be measured. If CONTINUITY is
not measured, repair or replace Wire 14 between J2 Pin
3 and the fuel solenoid.
RESULTS:
Refer to flow chart.
TEST 68 – CHECK FUEL SOLENOID
DISCUSSION:
In Test 67, if battery voltage was delivered to Wire 14,
the fuel solenoid should have energized open. This test
will verify whether or not the fuel solenoid is operating.
Fuel Solenoid FS1 Nominal Resistance – 27-33 ohms.
Fuel Solenoid FS2 Nominal Resistance – 29 ohms.
PROCEDURE: 8 AND 12-20 kW UNITS
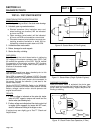
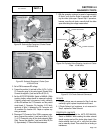
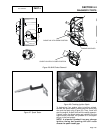
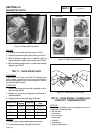
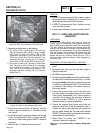
1. Install a manometer to Port 2 on the fuel regulator. See
Figure 18 or Figure 20.
2. Set the AUTO-OFF-MANUAL Switch to MANUAL.
3. Proper gas pressure should be measured during cranking.
If gas pressure is measured, the fuel solenoid is operat-
ing. If gas pressure is not measured, repair or replace the
fuel solenoid.
PROCEDURE: 10 kW UNITS
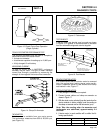
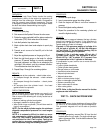
1. Remove the hose from fuel solenoid (FS2) and install a
manometer to Port 2 on the fuel regulator. See Figure 19.
2. Set the AUTO-OFF-MANUAL Switch to MANUAL.
3. Proper gas pressure should be measured during crank-
ing. If gas pressure is measured, both fuel solenoids are
operating. Discontinue testing.
4. If gas pressure was not measured in Step 3, remove fuel
solenoid FS2 and install a manometer to the bottom port
of the fuel regulator.
5. Set the AUTO-OFF-MANUAL Switch to MANUAL.
6. Proper gas pressure should be measured during crank-
ing. If gas pressure is measured, fuel solenoid FS1 is
operating. Replace fuel solenoid FS2. If gas pressure is
not measured, repair or replace fuel solenoid FS1.
RESULTS:
Refer to flow chart.
TEST 69 – CHECK CHOKE SOLENOID
DISCUSSION:
The automatic choke is active cyclically during crank-
ing and energized ON during running. For low speed
exercise the choke will be closed.
The 12-20 kW units utilize a plate that covers the
throttle bores. The choke is closed if the solenoid is
not energized.
The 10 kW unit utilizes a throttle plate located in
the choke housing and the choke is open when the
solenoid is de-energized.
The 8 kW unit has a choke solenoid that is closed
during the entire crank cycle when the solenoid is
energized and the engine is cranking.
PROCEDURE: 10-20 kW UNITS
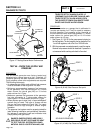
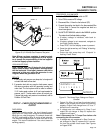
1. Operational Check: Set the AUTO-OFF-MANUAL
Switch to MANUAL. While cranking, the choke solenoid
should pull the choke plate open cyclically. The dura-
tion of the cycle will vary depending on it’s position in
the crank cycle sequence. Refer to the Crank Cycle
Sequence Table on the following page for crank cycle
sequences and duration times. If the choke solenoid
does not pull in, verify that the choke can be manually
opened. There should be no binding or interference.
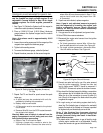
2. Disconnect the C3 Connector.
PART 4
DC CONTROL
SECTION 4.4
DIAGNOSTIC TESTS


