


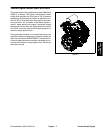
Groundsmaster 4000--D/4010--D Page 3 -- 13 Yanmar Diesel Engine
DANGER
Because diesel fuel is flammable, use caution
when storing or handling it. Do not smoke while
filling the fuel tank. Do not fill fuel tank while en-
gine is running, hot or when machine is in an en-
closed area. Always fill fuel tank outside and
wipe upany spilled diesel fuel before startingthe
engine. Store fuel in a clean, safety--approved
container and keep cap in place. Use diesel fuel
for the engine only; not for any other purpose.
Check Fuel Lines and Connections
Check fuel lines and connections periodically as recom-
mended in the O perator’s Manual. Check lines for d ete-
rioration, damage, leaking or loose connections.
Replace hoses, clamps and connections as necessary.
Empty and Clean Fuel Tank
Empty and clean the fuel tank periodically as recom-
mended in the Operator’s Manual, if the fuel system be-
comes contaminated or if the machine is tobe stored for
an extended period.
IMPORTANT: Follow all localcodes and regulations
when recycling or disposing waste fuel.
To clean fuel tank, flush tank out with clean diesel fuel.
Make sure tank is free of contaminates and debris.
Priming the Fuel System
The fuel system needs to be primed before starting the
engine for the first time, after running out of fuel or after
fuel system maintenance (e.g. draining the filter/water
separator, replacing a fuel hose). To prime the fuel sys-
tem, make surethat thefueltank hasfuel init.Then, turn
the ignition key to the RUN position for 10 to 15 seconds
which allows the fuel pump to prime thefuel system. DO
NOT use the engine starter motor to crank the engine in
order to prime the fuel system.
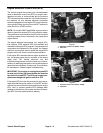
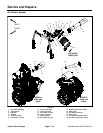
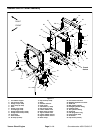
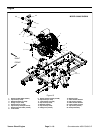
Fuel Tank Removal (Fig. 9)
1. Park machine on a level surface, lower cutting
decks, stop engine, apply park ing brake and remove
key from the ignition switch.
2. Raise and support operator seat and hood.
3. Use a fuel transfer pump to remove fuel from the fuel
tank and into a suitable container.
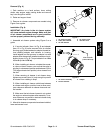
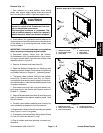
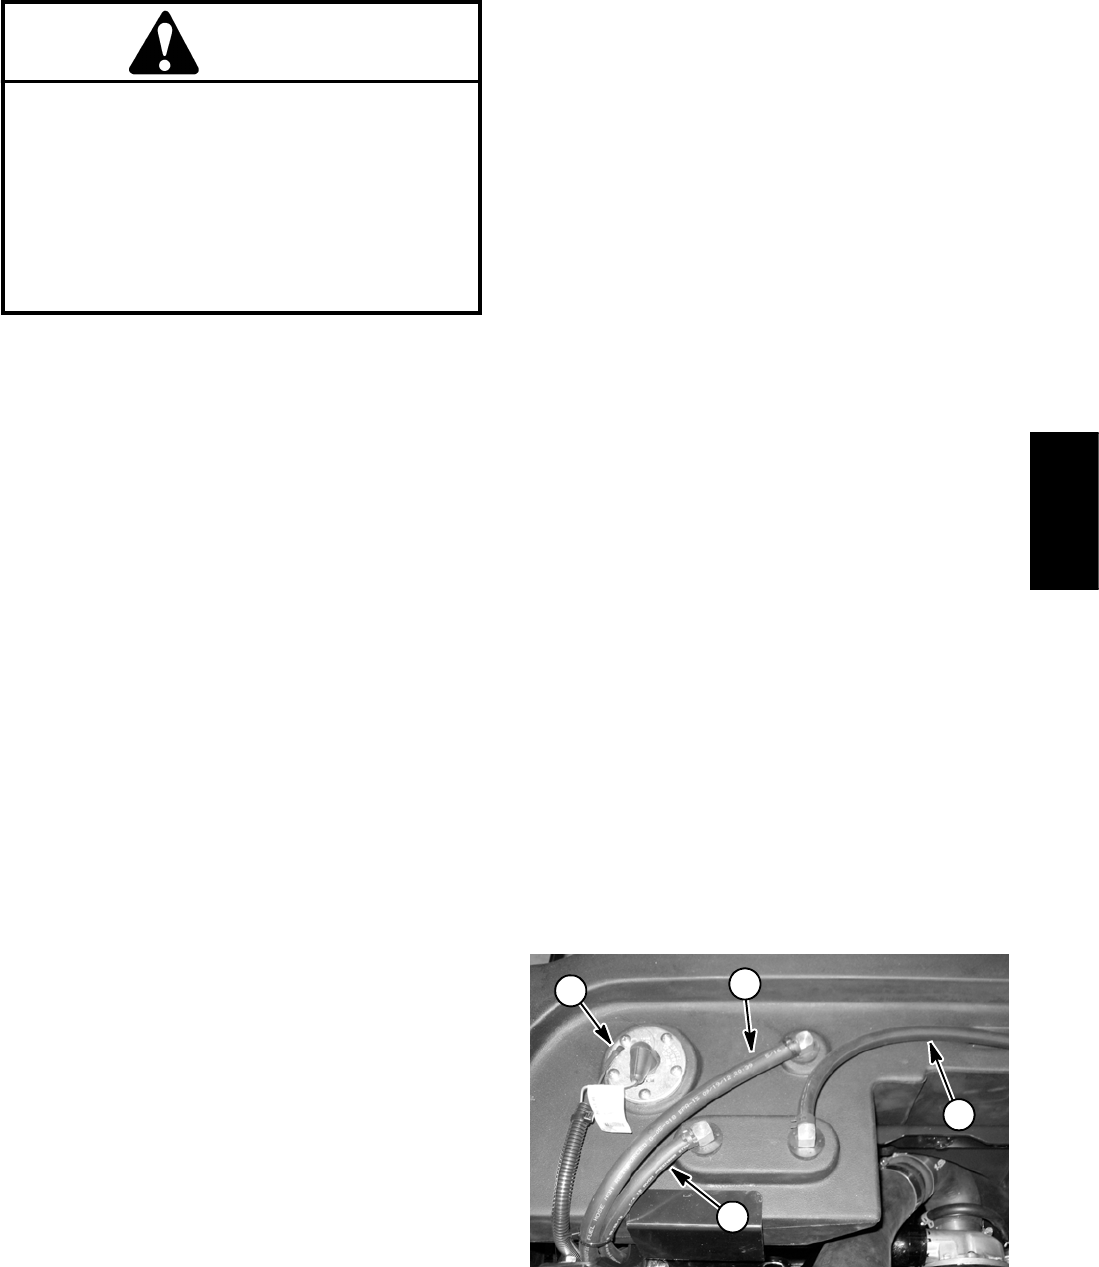
NOTE: Fuel sender may have two (2) wire harness ter-
minals (shown in Fig. 10) or a single harness connector.
4. Disconnect wire harness connections from the fuel
sender (item 14).
5. Disconnect fuel supply, vent and return hoses from
elbow fittings in top of tank (Fig. 10).
6. Remove fuel tank using Figure 9 as a guide. Tank is
secured to frame with fasteners (items 1, 2, 3 and 4) on
the forward side and bracket (item 22) on the rear side.
Fuel Tank Installation (Fig. 9)
1. Install fuel tank using Figure 9 as a guide. When se -
curing tank to frame, follow the following sequence:
A. Loosely install fasteners on front oftank (items 1,
2, 3 and 4).
B. Install and tighten bracket (item 22) at rear of
tank.
C. Torque two ( 2) flange nuts (item 4) from 60 to 80
in--lb (7 to 9 N--m).
2. Connect fuel supply hose to the standpipe and vent
and return hoses to the elbow fittings (Fig. 10). Secure
hoses with clamps.
3. Secure wire harness connector(s) to fuel sender. On
senders with two (2)wire harness terminals, applyskin--
over grease (see Special Tools in this chapter) to har-
ness terminals after installation.
4. Lower and secure operator seat and hood.
5. Fill fuel tank with new fuel.
6. Prime the fuel system (see above).
7. Before returning machine to operation, make sure
that no fuel leaks exist.
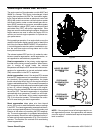
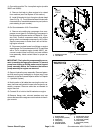
Figure 10
1. Fuel supply hose
2. Vent hose
3. Return hose
4. Fuel sender
2
1
3
4
Yanmar
Diesel Engine