9 - 1
MELSEC-Q
9. QD75 DATA WRITE/READ/VERIFY
9
9. QD75 DATA WRITE/READ/VERIFY
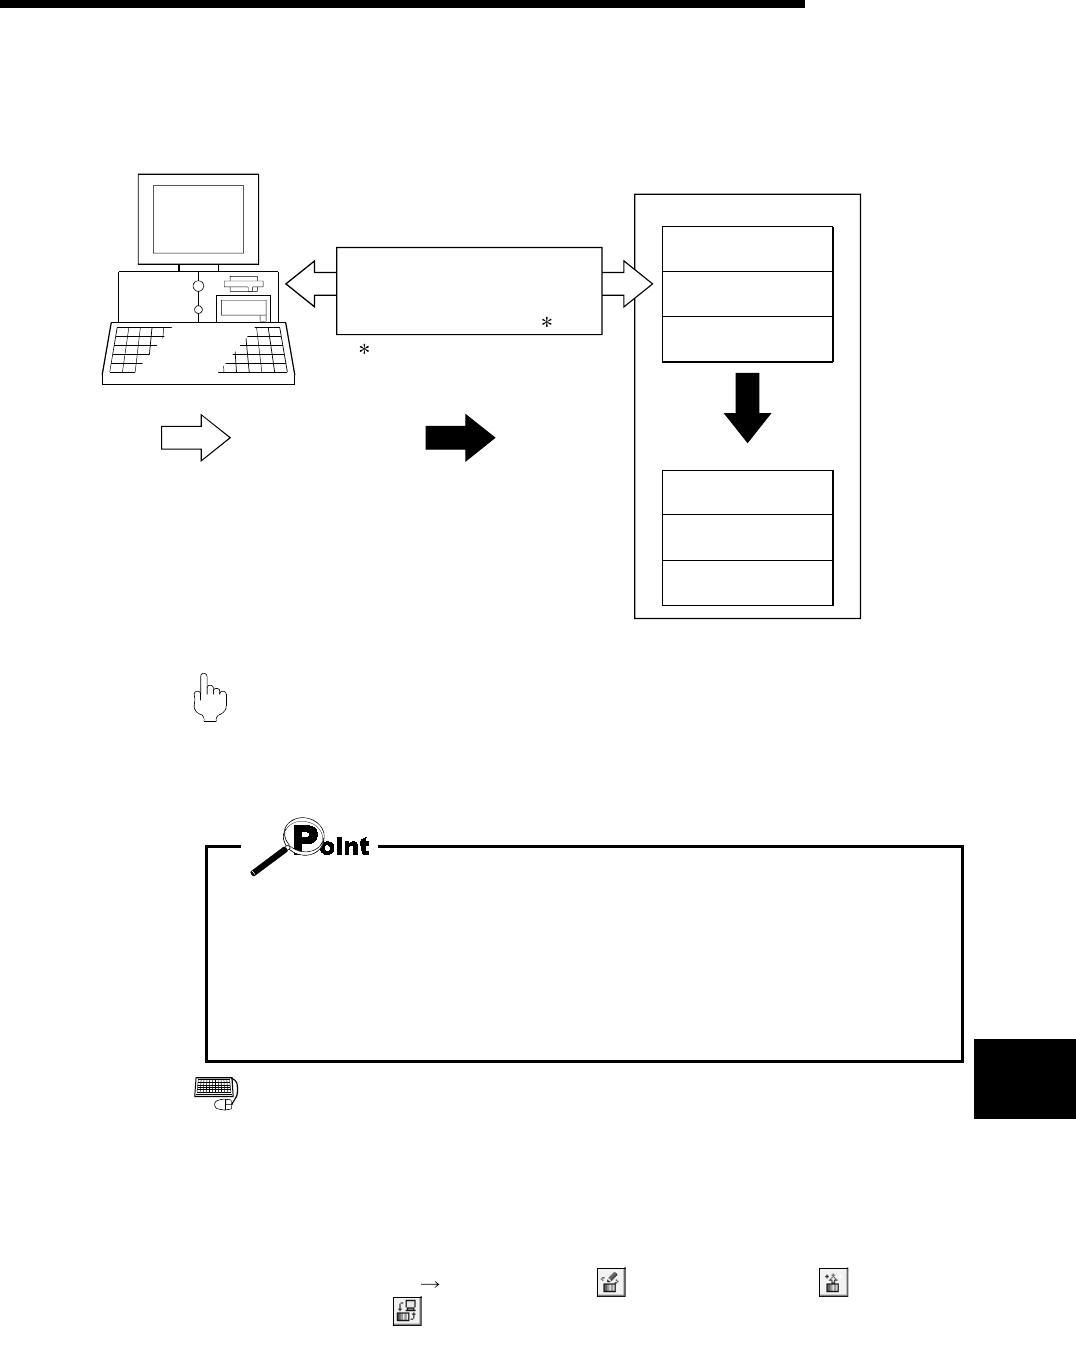
Perform write to QD75/read from QD75/verify QD75 data, data write from QD75 buffer
memory to flash ROM, and QD75 initialization.
QD75
Buffer memory
Parameters
Positioning data
Block start data
Flash ROM
Parameters
Positioning data
Block start data
Write to QD75/read from QD75/
verify QD75 data
Write to flash ROM
Via QCPU, Q corresponding serial
communication module or
Q corresponding MELSECNET/H
network remote I/O module
:Only when connecting to the
remote I/O module directry.
9.1 Write to QD75/Read from QD75/Verify QD75 Data
PURPOSE
Write, read and verify the data set in the project (parameters, positioning data,
block start data) on an axis by axis basis.
• Write to QD75 executes a write to the QD75 which is set in the active project.
When performing batch write to multiple QD75s, use the multi-module batch write
function. (Refer to Section 11.1.4)
• Whether write to QD75 may be performed or not is determined by the PLC state
check setting in Option setting. (Refer to Section 11.5)
• When trying operation while simultaneously changing the positioning data, you can
use the positioning data test edit function to write only the positioning data during a
test. (Refer to Section 11.7.2)
BASIC OPERATION
1. Place the QCPU in the STOP status.
When performing write to QD75 without putting the QCPU in the STOP status,
change the PLC state check setting in Option setting.
2. As an active project, set the project used for write to QD75/read from
QD75/verify QD75 data. Refer to Section 5.2 for the active project setting.
3. Click the [Online]
[Write to QD75] (
)/[Read from QD75] (
)/Verify
QD75 data] (
) menu.
4. Set the data type and range in the QD75 Writing/Reading/Verify dialog box.
5. Click the "OK" button to start operation.
6. For QD75 data verify, the verify result appears.
