


Building a Custom Portable Program
User’s Guide 125
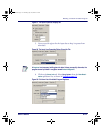
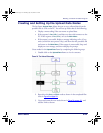
3. Enable the TimeOut checkbox. Enter 45 in the Seconds pull-down
list that appears next to
TimeOut. This instructs the program to return
to the
Main Menu if the user presses a function key or if 45 seconds
pass with no input.
4. Press OK to save your settings and exit the dialog.
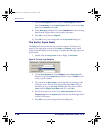
The Modify: Erase File Node
After you have uploaded data from the portable file, you will want to erase its
contents. Otherwise, further data you collect is appended to the data you just
uploaded, and your data file will quickly grow out of control. Complete the
following steps:
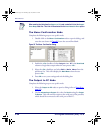
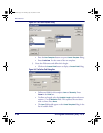
1. Select the
Modify: Erase File node to open its dialog box.
2. On the
Data to Modify tab, select File in the Data Destination pull-
down list.
3. Select Monthly Inventory from the
File pull-down list.
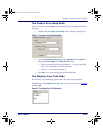
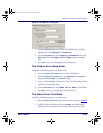
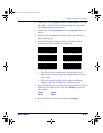
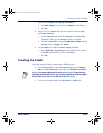
4. On the
Modification type tab, select Delete from the pull-down list.
Figure 99. The Modify Type Tab: Erase File
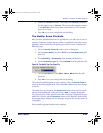
5. On the Next Node tab, select Exit Main Menu from the pull-
down list.
6. Press OK to save your settings and exit the dialog.
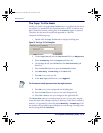
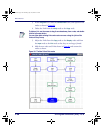
The nodes for uploading data are now complete. Close the
Upload Frame to
return to the main program level. Then select File > Save to save your changes
to the file.
The nodes that you created for the
Upload Data frame ask the user for confir-
mation of the upload task. If the user answers Yes, it outputs the data file
over the serial port. If the upload is successful, a message is displayed, the por-
table’s file is cleared, and the
Main Menu returns. If the upload is unsuccessful,
the program beeps, displays an error message, and gives the user the option of
trying again.
Your portable program should now be complete.
2342.book Page 125 Thursday, July 22, 2004 8:35 AM