


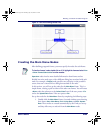

PPG Tutorial
108 PT Program Generator (PPG) v5.0
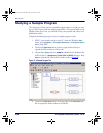
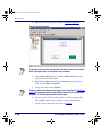
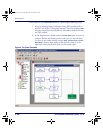
2. Move the Link cursor to the Main Menu frame and click the left mouse
button.
3. Move the
Link box to the Collect Data frame and click the mouse
again. An arrow appears, pointing from the
Main Menu frame to the
Collect Data frame.
4. Select
Create > Link from the menubar, click on the Main Menu frame,
and then click on the
Upload Data frame. A second arrow appears.
The Links you created give the user access to either the
Collect Data or Upload
Data
frame from within the Main Menu.
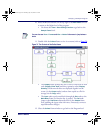
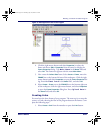
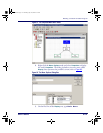
Main Menu Access
From each of the action frames, you want to give the user access to the Main
Menu
. You must create additional Links back to the Main Menu frame. These
will be jointed Links that bend at a 90° angle. Complete the following steps:
1. Select Create > Link and click on the Collect Data frame.
2. Instead of clicking directly on the other frame, move the cursor
straight up until it is level with the Main Menu frame, and then click
the left mouse button.
3. Now move the pointer to the Main Menu frame and click the left
mouse button. A jointed line appears.
4. Use the same method to create a jointed Link from the
Upload Data
frame to the
Main Menu frame.
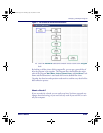
Your frame should now look like
Figure 79 on page 109.
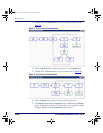
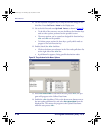
To adjust a Link, use the mouse to drag the Link’s arrowhead.
To delete a Link, select the ESC key.
Jointed Links work just like straight Links, but they give you more flexibility in their
placement. If a jointed Link appears jagged, drag its joint until its lines are
perpendicular.
To redraw the screen and erase any extraneous lines, click in any blank area of the
flow chart
2342.book Page 108 Thursday, July 22, 2004 8:35 AM