


MU128 Guided Tour
89
English
Operation
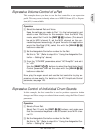
1 First, set the Send and Return controls to appropriate levels.
Before you actually change the Reverb or Chorus settings, you
should set the Send and Return controls, in order to properly
hear the effect and the changes you make.
To do this:
1) Select the desired Part from the Multi Play mode Single
Part display. (Use the [PART -/+] buttons.)
2) Select “RevSend” (Reverb Send) or “ChoSend” (Chorus
Send) with the [SELECT </>] buttons, and set it to “40”
or higher.
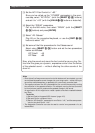
3) Select the All Part display (by pressing both [PART -/+]
buttons).
4) Select “RevRtn” (Reverb Return) or “ChoRtn” (Chorus Re-
turn) with the [SELECT </>] buttons, and set it to “60”
or higher.
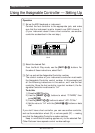
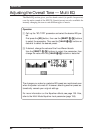
2 Call up the Effect Edit mode.
Press the [EFFECT] button.
3 Select and call up the desired effect section.
Select “REV” (Reverb) or “CHO” (Chorus) with the [SELECT </
>] buttons and press [ENTER].
4 Select and change the Type parameter.
Use the [SELECT <] button to select “Type,” then change the
setting with the [VALUE -/+] buttons or data dial.
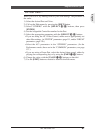
5 Edit other parameters as desired.
Once you’ve selected a Reverb or Chorus Type, you can adjust
the other parameters.
For Reverb, try changing the Reverb Time and HPF Cutoff and
listen to how the changes affect the Reverb sound. For Chorus,
the parameters differ depending on the selected Chorus Type.
Use the [SELECT </>] buttons to select the parameter, then ad-
just the value with the [VALUE -/+] buttons or data dial.
For a list of Reverb Types and other information on Reverb, see page
147. For a list of the available parameters for each Reverb Type, re-
fer to the “Sound List & MIDI Data” booklet.
For a list of Chorus Types and other information on Chorus, see page
148. For a list of the available parameters for each Chorus Type,
refer to the “Sound List & MIDI Data” booklet.
Effects