


74
MU128 Guided Tour
Edit Menu Parameters — Creating a Two-Voice Layer
Editing a Performance is almost identical to editing Parts in the Multi mode.
The Edit menu tree is slightly different, and certain parameters are different
as well. (For a full list and description of Performance Edit parameters, see
page 137.)
In the following instructions, you’ll use the Edit menu parameters to cre-
ate a two-Voice Performance and “fatten” the sound using Detune.
Operation
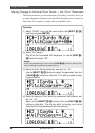
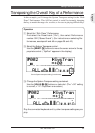
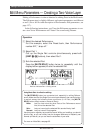
1 Select the desired Performance.
For this example, select the Preset bank, then Performance
number 027, “Jump-off.”
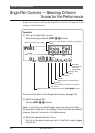
2 Select Part 1.
Call up the Single Part controls (simultaneously press both
[PART -/+] buttons), then select Part 1.
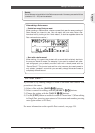
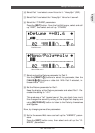
3 Solo the selected Part.
Press the [MUTE/SOLO] button twice (or repeatedly until the
display below appears) to solo the selected Part.
Dark bar indicates Part 1 is being soloed.
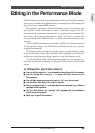
Editing in the Performance Mode
Using Mute/Solo for effective editing:
The [MUTE/SOLO] button is a convenient tool, especially in editing Perform-
ances. Make sure that the Single Part controls are selected, then use the button
to switch among the following three conditions. (In All Part, the [MUTE/
SOLO] button simply mutes/un-mutes all Parts.)
Mute: Lets you hear what the other Parts of the Performance sound
like, minus the selected Part.
Solo: Lets you hear what the selected Part sounds like by itself.
Normal: Lets you hear all Parts together.
Use this function regularly as you edit the sound. While you’re editing, you should
solo the Part, so you can clearly hear the changes. Make sure to frequently use
Normal (all Parts on), so you can hear the total effect of your edits.
For more on Mute/Solo, see page 95.