


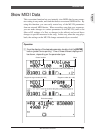

MU128 Plug-in System
179
English
About Plug-in System
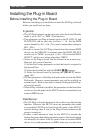
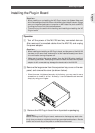
Installing the Plug-in Board
1
Caution
• When installing or uninstalling the XG Plug-in board, the System Setup and
Multi Part settings of the MU128 are initialized to their default values. Always
save your important settings to a computer or MIDI data filer (such as MDF3)
by using the Dump Out functions beforehand.
• To avoid injury, be careful while handling and installing/uninstalling the XG
Plug-in board.
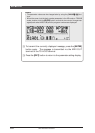
Operation
1 Turn off the power of the MU128 and any connected devices.
Also remove all connected cables from the MU128, and unplug
the power adaptor.
1
Caution
• When installing/uninstalling an XG Plug-in board, and the power of the MU128
has been on for some time, make sure to let the installed board(s) cool down
for a while after turning the power off.
• Make sure to unplug the power adaptor from the MU128 before installing/
uninstalling the board. Attempting to install/uninstall the board while power
adaptor is still connected may damage the board and/or the MU128.
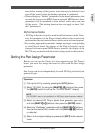
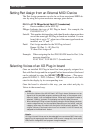
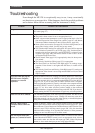
2 Remove the large screw from the expansion bay cover on the rear
panel, and remove the cover (as shown below).
• Since the screw is tightened securely at the factory, you may need to use a
screwdriver to loosen it at first. Normally, it can be fastened and removed
simply by using your fingers.
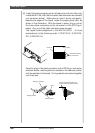
3 Remove the XG Plug-in board from its protective packaging.
1
Caution
Before handling the XG Plug-in board, make sure to discharge any static elec-
tricity from your body or clothes by touching a grounded metal surface. Also be
careful not to touch any of the parts or connectors of the board.
MIDI
THRU
OUT
IN-A IN-B
HOST SELECT
MIDI
Mac
PC-2 PC-1
TO HOST
DC IN
OUTPUTINPUT
L
R
SER NO.