


47
Chapter 2: Task Guide
To select transitional timing or store qualified
See Also “To change the sampling clock mode” on page 44
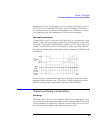
To automatically adjust sampling positions
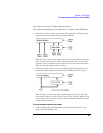
When adjusting the state mode sampling position with eye finder, the
logic analyzer looks at signals from the device under test, figures out
the location of the data valid window in relation to the sampling clock,
and automatically sets the sampling position.
Because eye finder automatically runs on individual channels, it can
correct for the small delay effects caused by probe cables and circuit
board traces. This makes the logic analyzer's setup/hold window
smaller and lets you accurately capture data at higher clock speeds.
Eye finder requires:
• At least 500 transitions on each signal during its run. (You can use the
advanced eye finder settings to cause longer or shorter runs.)
• All devices which can drive each signal should contribute to the stimulus.
• All device under test operating modes relevant to the eventual logic
analysis measurement should contribute to the stimulus as well.
NOTE: Eye finder measurements and normal logic analyzer measurements cannot
run simultaneously.
To run eye finder
1. Probe the device under test by connecting the logic analyzer channels.
2. Select the state (synchronous sampling) mode (see “To select the state
mode” on page 44).
3. Format labels for those logic analyzer channels.
4. Make sure that the device under test and the logic analyzer have warmed
up to their normal operating temperatures.
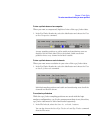
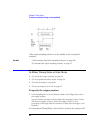
5. In the Format tab, select the Setup/Hold button.
6. In the Sampling Positions dialog, select the Eye Finder option.
7. In the Eye Finder Setup tab, select the Use signals from Device Under
Test option.