


Chapter 6: Replacing Assemblies
To remove and replace the keyboard and flat-panel display assemblies
6–13
6
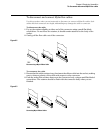
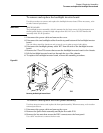
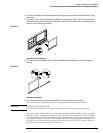
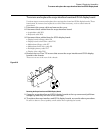
To remove the flat-panel display from the front-panel cover plate, remove the four Torx
fasteners.
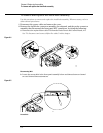
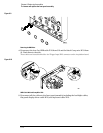
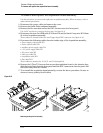
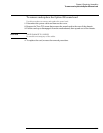
7 To remove the cursor keyboard and flat lens, remove the four Torx T10 screws that
secure the lens corners, then carefully remove the lens. You can lift the cursor keyboard
directly out of the front casting.
Figure 6-14
Removing the Cursor Keyboard
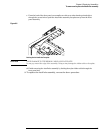
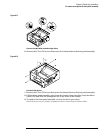
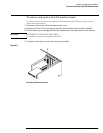
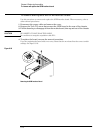
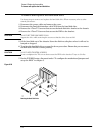
8 To remove the backlights, lift the tab and slide each backlight out of the flat-panel
display.
Figure 6-15
Removing the backlights
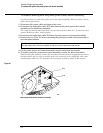
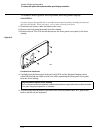
9 To re-assemble the front panel assembly, reverse the above procedure.
The cursor keyboard has holes that fit over locating pins in the front panel casting.
CAUTION PREVENT GLASS BREAKAGE!
Use care when handling the Lens Glass and the FPD monitor to prevent glass breakage.
Inspect the inside surfaces of the Lens Glass and the Display Monitor closely for dust, smudges,
and finger prints. Viewing these with line-of-sight 45 degrees to the surface is the best method
for seeing subtle faults. Clean the inside surfaces with glass cleaner and lint-free lens paper before
re-assembly. Clean the front of the FPD monitor by applying the glass cleaner to the lint-free
lens paper or soft lens cloth. Do not apply glass cleaner directly to the FPD monitor. This will
prevent cleaner from corroding FPD connections.