


quency control to position the high (or low) car
-
rier at the center of the display. Note the
frequency reading.
j.
On the keyboard, enter
1 to toggle the polarity.
k. Now, adjust the center frequency control to po
-
sition the low (or high) carrier at the center of
the display. Note the frequency reading.
l. The difference between these two frequencies
should be 200 MHz ±8 MHz. If not, enter
2
and fine adjust the DAC to obtain this devia
-
tion.
m.
When finished setting the DAC, press
Q on the
keyboard to return to the menu then enter
3 to
go to the next calibration step (adjusting the
DAC to obtain 20 MHz deviation).
n.
On the keyboard, enter
2, then press the 1 key
to start calibration.
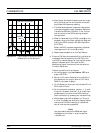
o. While oberving the Spectrum Analyzer display,
adjust the value of the DAC’s setting to obtain
a 10 MHz change in frequency.
p.
On the keyboard, press
Q to return to the
menu, then enter
1 to toggle the polarity.
q. Measure the change in frequency on the Spec-
trum Analyzer. The change in frequency
should be 20 MHz. If not, enter
2 and adjust
the DAC.
r. Repeat steps 5.p and 5.q as necessary to obtain
a 20 MHz frequency change. When finished ad
-
justing the DAC, press
Q to return to the
menu.
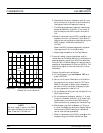
s. On the Spectrum Analyzer, set the Span/Div to
1 MHz per division and adjust the center fre
-
quency control to position the high (or low) car
-
rier at the center of the display. Note the
frequency reading.
t.
On the keyboard, enter
1 to toggle the polarity.
u. Now, adjust the center frequency control to po
-
sition the low (or high) carrier at the center of
the display. Note the frequency reading.
v. The difference between these two frequencies
should be 20 MHz ±0.8 MHz. If not, enter
2
and fine adjust the DAC to obtain this devia
-
tion.
4-42 682XXB/683XXB MM
FM
CALIBRATION CALIBRATION