


Rev. A
Workman MD/MDX
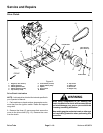
Drive Train
Page 5 -- 14
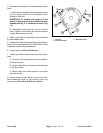
Driven Clutch
NOTE: The driven clutch on v ehicles with serial num-
bers above 310000000 is different than the clutch used
on earlier vehicles. The procedure to remove or install
the driven clutch is the same regardless of machine seri-
al number.
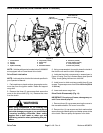
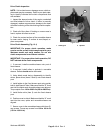
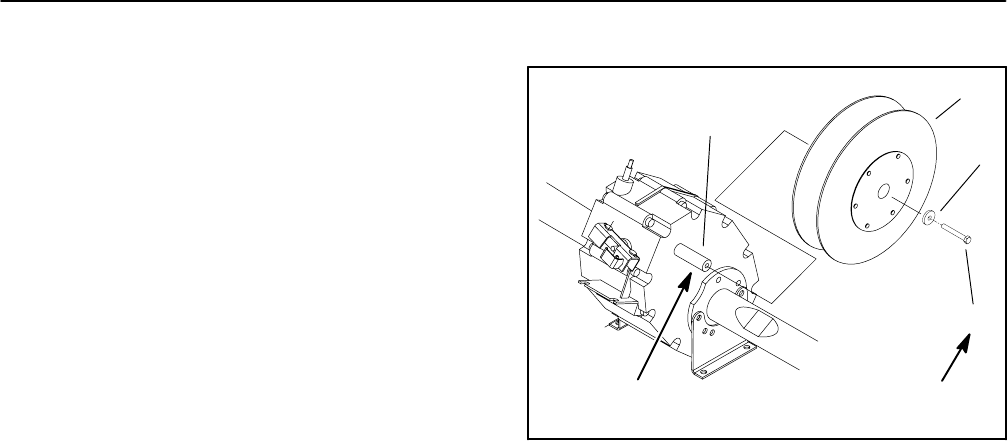
Driven Clutch Removal (Fig. 20)
1. Park machine on a level surface, stop engine, set
parking brake and remove key from the ignition switch.
Raise and support cargo box.
2. Remove muffler from the engine and engine mount
(see Exhaust System Removal in Engine Chapter).
3. Remove drive belt from the driven clutch.
4. Remove cap screw and stepped washer securing
the driven clutch to the input shaft of the transaxle.
5. Pull driven clutch from the transaxle input shaft.
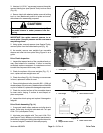
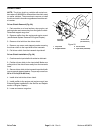
Driven Clutch Installation (Fig. 20)
1. Coat transaxle input shaft with antiseize lubricant.
2. Position driven clutch to the input shaft. Make sure
pulley side of the clutch faces away from the transaxle
case.
3. Secure driven clutch to the transaxle input shaft with
cap screw and stepped washer. Torque cap screw from
39 to 47 ft--lb (53 to 63 N--m).
4. Install drive belt to the driven clutch.
5. Install muffler to the engine and engine mount (see
Exhaust System Installation in the Service and Repairs
section of Engine Chapter).
6. Lower and secure cargo box.
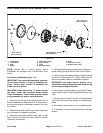
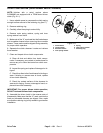
1. Cap screw
2. Stepped washer
3. Driven clutch
4. Input shaft (transaxle)
Figure 20
1
2
4
3
Antiseize
Lubricant
39 to 47 ft--lb
(53to63N--m)