


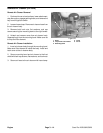
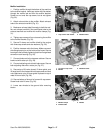
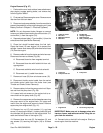

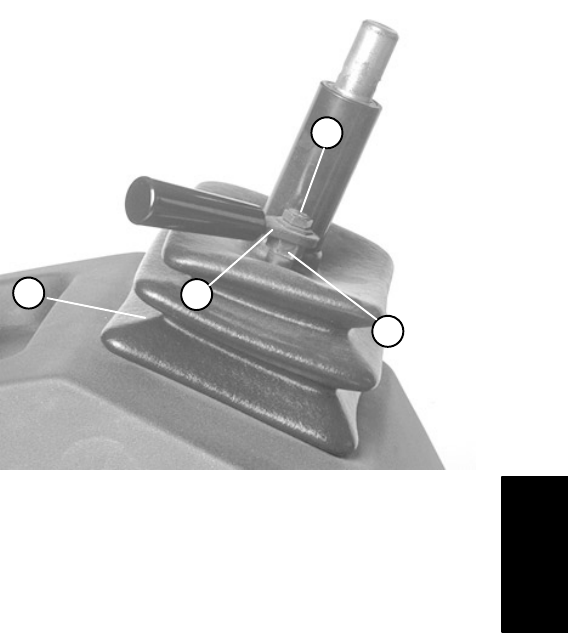
3. Remove adjustment lever from tilt lock pin by first re-
moving cap screw (Fig. 36).
4. Drain fuel tank as follows:
A. Close fuel shutoff valve.
B. Remove self tapping screw securing the fuel
hose and R–clamp to the frame.
C. Disconnect fuel hose leading from the fuel tank
at the fuel shutoff valve. Use funnel and hose to
drain the fuel into a suitable container for storage.
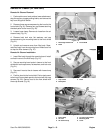
5. Remove four cap screws and flat washers securing
the fuel tank to the frame.
6. Make sure not to tear the steering boot while care-
fully pulling the top of the boot over the tilt pin.
7. Lift fuel tank from frame. Make sure not to lose
grommets.
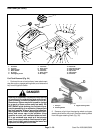
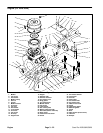
Figure 36
3
4
1
2
1. Adjustment lever 3. Cap screw
Fuel Tank installation (Fig. 34)
2. Tilt lock pin 4. Steering boot
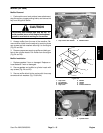
1. Position fuel tank to the frame making sure not to
tear the steering boot while carefully lowering the top of
the boot over the tilt pin.
A. Apply antiseize lubricant to the threads of the
four cap screws.
B. Make sure grommets are in place. Secure fuel
tank to the fame with four flat washers and cap
screws.
C. Torque cap screws from 30 to 60 in–lb (35 to 69
kg–cm).
2. Route fuel hose from the tank to the fuel shutoff
valve. Connect and secure fuel hose to the shutoff valve
with the hose clamp.
3. Secure R–clamp and fuel hose to the frame with self
tapping screw.
4. Secure adjustment lever to tilt lock pin with cap
screw (Fig. 36).
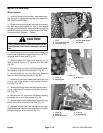
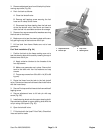
5. Install steering wheel onto the upper steering shaft.
Secure steering wheel to upper steering shaft with the
roll pin using a drift punch (Fig. 35).
6. Open fuel shutoff valve.
7. Fill fuel tank with fuel (see Fill fuel Tank). Check fuel
lines and tank for leaks.
Engine
Sand Pro 2020/3020/5020 Page 3 – 21 Engine