


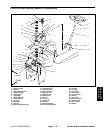
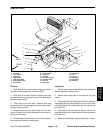


Sand Pro 2020/3020/5020 Page 6 – 19 Wheels, Brakes,and Miscellaneous
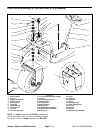
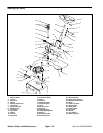
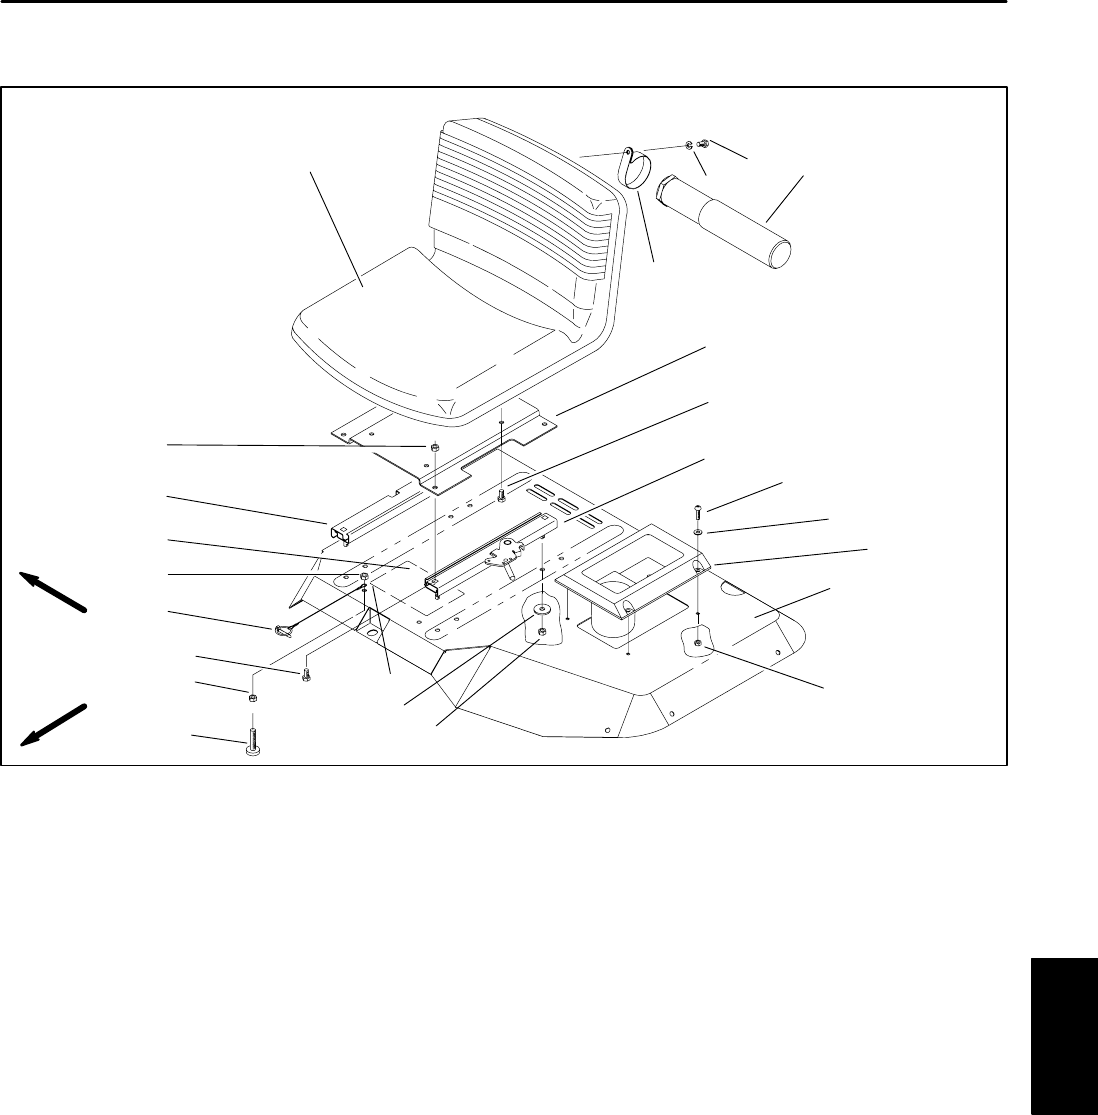
Seat (SP 5020)
1. R–clamp
2. Lock washer
3. Cap screw
4. Manual tube
5. Seat adjust plate
6. Round head screw
7. Flat washer
8. Service decal
9. Lynch pin
10. Lock nut
11. 4–inch seat slider
12. Leveling screw
13. Jam nut
14. Seat slider
15. Flat washer
16. Seat
17. Lock nut
18. Flat washer
19. Cup holder
20. Seat base
Figure 18
6
3
4
16
5
14
3
2
10
7
13
10
12
1
10
17
19
11
8
3
9
15
18
FRONT
RIGHT
20
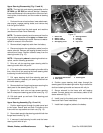
Removal
1. Park machine on a level surface, engage the park-
ing brake, lower attachment, and stop engine.
2. Slide seat all the way forward. Remove both cap
screws and lock nuts securing the front of the seat adjust
plate to the seat slider.
3. .Slide seat all the way back. Remove both cap
screws and lock nuts securing the rear of the seat adjust
plate to the seat sliders.
4. Remove seat and seat adjust plate from the seat
sliders. Remove four cap screws securing the seat ad-
just plate to the seat.
5. Lift seat base. Remove lock nuts and flat washers
securing seat sliders to the seat base.
Installation
1. Lift seat base. Secure seat sliders to the seat base
with flat washers and lock nuts.
2. Secure seat adjust plate to the seat with four cap
screws.
3. Slide seat sliders all the way back. Position seat and
seat adjust plate to the seat sliders. Secure rear of the
seat adjust plate to the seat sliders with two cap screws
and lock nuts.
4. Slide seat all the way forward. Secure front of the
seat adjust plate to the seat sliders with two cap screws
and lock nuts.
5. Make sure seat slides properly and locks in place.
Whells, Brakes,
and Miscellaneous