VX5 Delivered with No Hard Drive 85
E-EQ-VX5RG-G-ARC VX5 Reference Guide
VX5 Delivered with No Hard Drive
How To Install 2.5” IDE Hard Drive
1. Turn the VX5 off and remove the power supply before opening the access cover located on
the top of the VX5.
2. Loosen the three (3) Phillips head screws securing the access cover so the cover can be
removed. The screws are a captive part of the cover and cannot be removed.
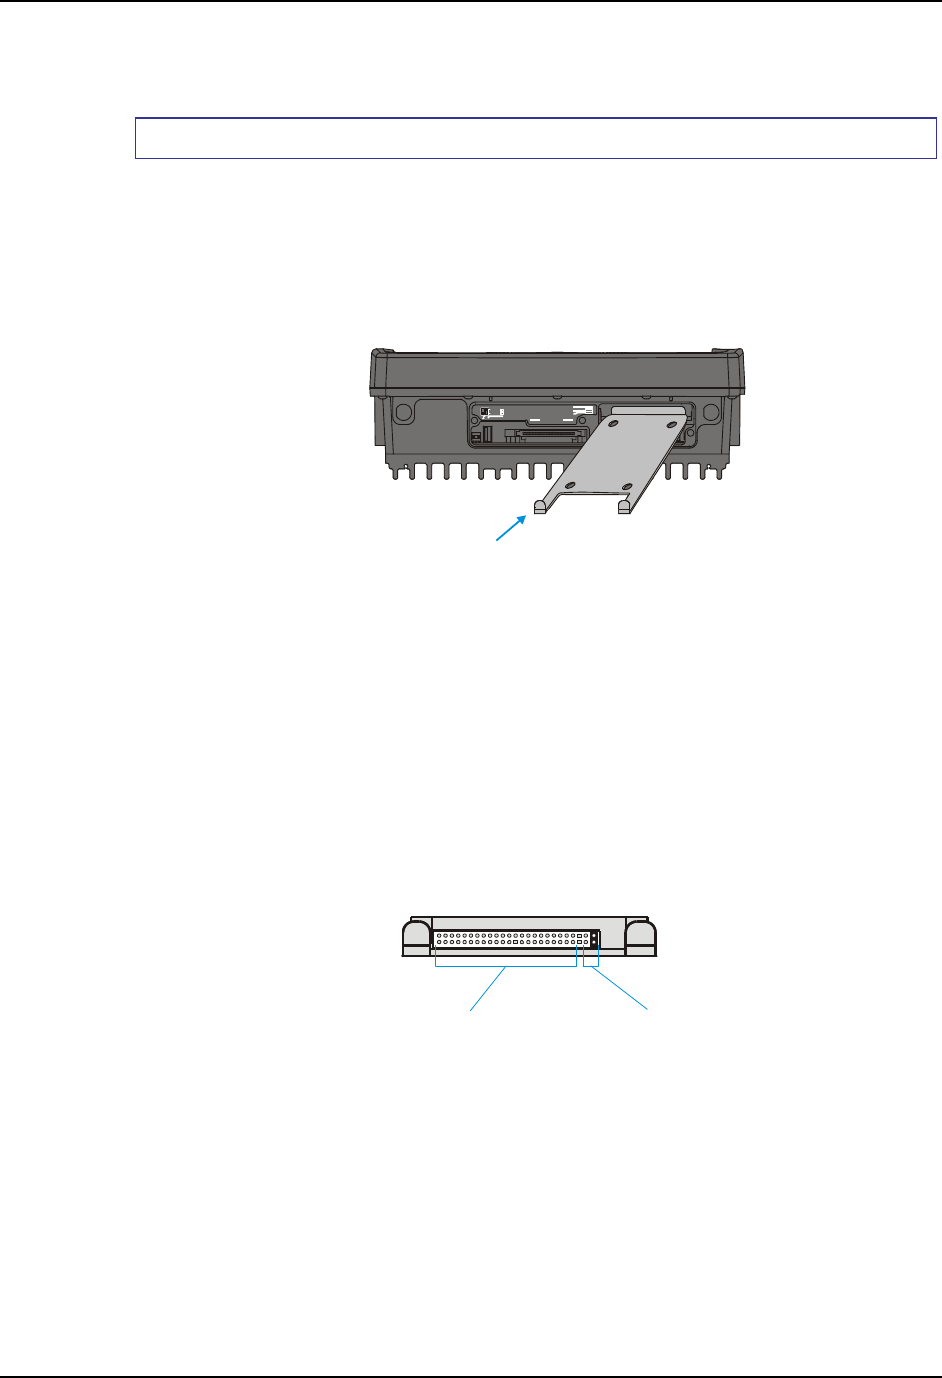
3. Slide the Hard Drive Sled (or bracket) out of the VX5.
COM1COM2
SCANNER
SERIAL
USB
IDE DRIV E
CARD BUS A
CARD BUS B
PCMCIA/CF ATA
H
r
Driv
l
Figure 3-9 Hard Drive Sled
Note: The tethered access panel cover is not shown in the illustration above.
4. Attach the hard drive to the hard drive sled, using 4 M3x4 flat head screws inserted through
the holes in the bottom of the hard drive sled. Torque to 8.0±1 in/lb (0.9±.11 N/m). The
VX5 accepts 2.5” IDE flash or rotating hard drives.
5. Insert the hard drive into the VX5. Slide the assembly into the opening from which the empty
bracket was removed. Do not slide it all the way in.
6. Connect the hard drive cable to the connector pins on the back of the hard drive. Make sure
the cable is centered correctly on the connector pins. Do not attempt to place the hard drive
cable over the jumper pins.
Hard Drive Cable
Connector Pins
Hard Drive
Jum
er Pins
Figure 3-10 Hard Drive Connector Pins
7. Insert the hard drive assembly the rest of the way into the VX5.
8. Reinstall the access panel cover, torquing the screws to 9±1 inch pounds (1.016±.11 N/m).
The screws require a Phillips size 1 driver head.
9. If the VX5 displays a message such as “operating system not found” during the first boot with
the new hard drive, it may be necessary to reboot. The error may be eliminated with a reboot.
If the error persists, please review the BIOS settings for the primary hard drive. Also check
the hard drive documentation for the proper jumper settings.
