


Groundsmaster 4000--D/4010--D Page 7 -- 31 Chassis
Removal
1. Park machine on a level surface, lower cutting
decks, stop engine, apply park ing brake and remove
key from the ignition switch.
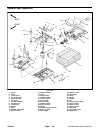
2. Remove hood assembly from machine:
A. Remove hair pins (item 6) that retain screen
pivots to hood pivots.
B. Slide hood assembly to disengage screen pivots
from hood pivots and lift hood from machine.
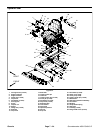
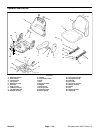
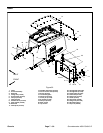
3. Disassemble hood as needed using Figure 32 as a
guide.
Installation
1. Assemble hood using Figure 32 as a guide.
2. Install hood to machine:
A. Position hood to machine and engage screen
pivots to hood pivots.
B. Install hairpins (item 6)to secure screen pivots to
hood pivots.
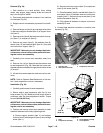
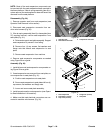
3. Align hood to machine to allow correct operation of
hood latch and d ust seals:
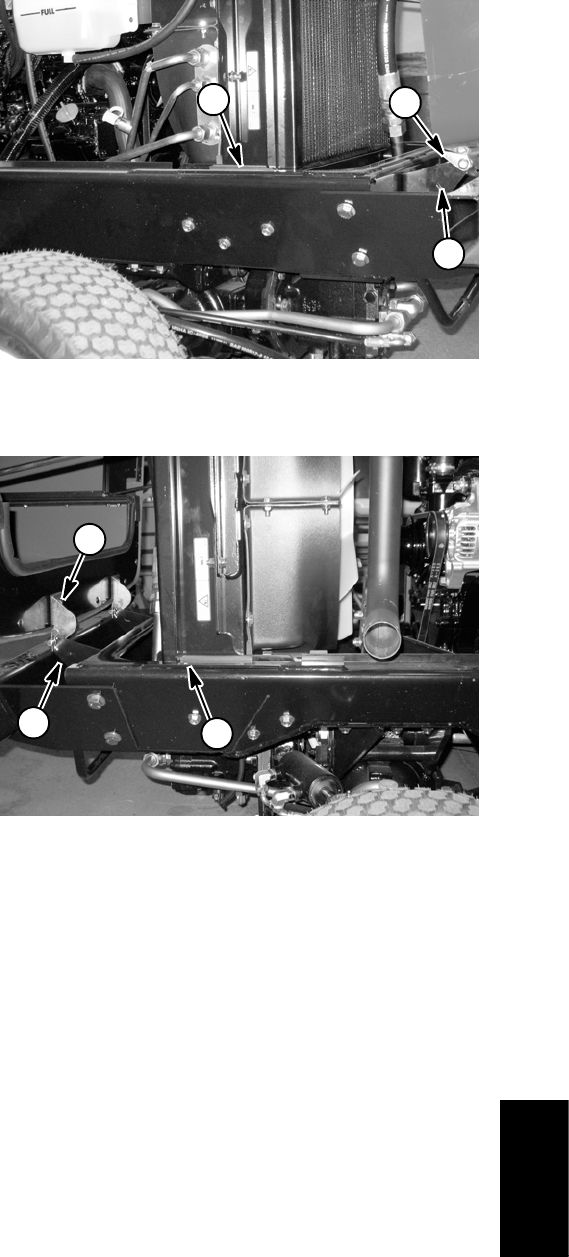
A. Place shim that is from 3/8” to 7/16“ (9.5 to 11.1
mm) thick on top of frame (both RH and LH sides)
near thesides of radiator/oil cooler(Figs. 33 and34).
B. Close hood so that it rests on shims and fasten
thehoodlatches.
C. Loosen hood pivots at frame to adjust vertical
placement of p ivots. Re--tighten hood pivot fasten-
ers.
D. Loosenscreen pivots toallow hoodlatches topull
hood against radiator support. Re--tighten screen pi-
vot fasteners.
4. After hood is assembled to machine, check for the
following:
A. Check that bulb and foam seals are equally com-
pressed at all contact points with hood. Bulb and
foam seals should compress from 0.125” to 0.375”
(3.2 to 9.5 mm) when hood assembly is correct.
B. Hood should open and close without contacting
oil cooler hardware.
C. Hood should fit to fuel tank with no open gaps.
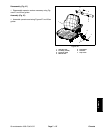
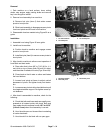
1. LH shim location
2. LH hood pivot
3. LH screen pivot
Figure 33
1
2
3
1. RH shim location
2. RH hood pivot
3. RH screen pivot
Figure 34
3
2
1
Chassis