


32
Section 3: Adjustments
RCF3696, RCFM3696, RCF3610, & RCFM3610 Rotary Cutters 326-600M
12/15/15
Table of Contents
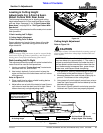
Deck Leveling Front To Back
Refer to Figure 3-2 on page 31:
With Rotary Cutter lowered to approximate cutting height,
measure distance from end of front blade cutting tip to
ground and from end of rear blade cutting tip to ground.
The tailwheel must be adjusted up or down if the rear
blade tip is one of the following:
• Same distance off the ground as the front blade.
• Lower than the front blade.
• More than 1" higher off the ground than the front blade.
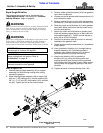
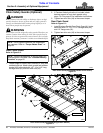
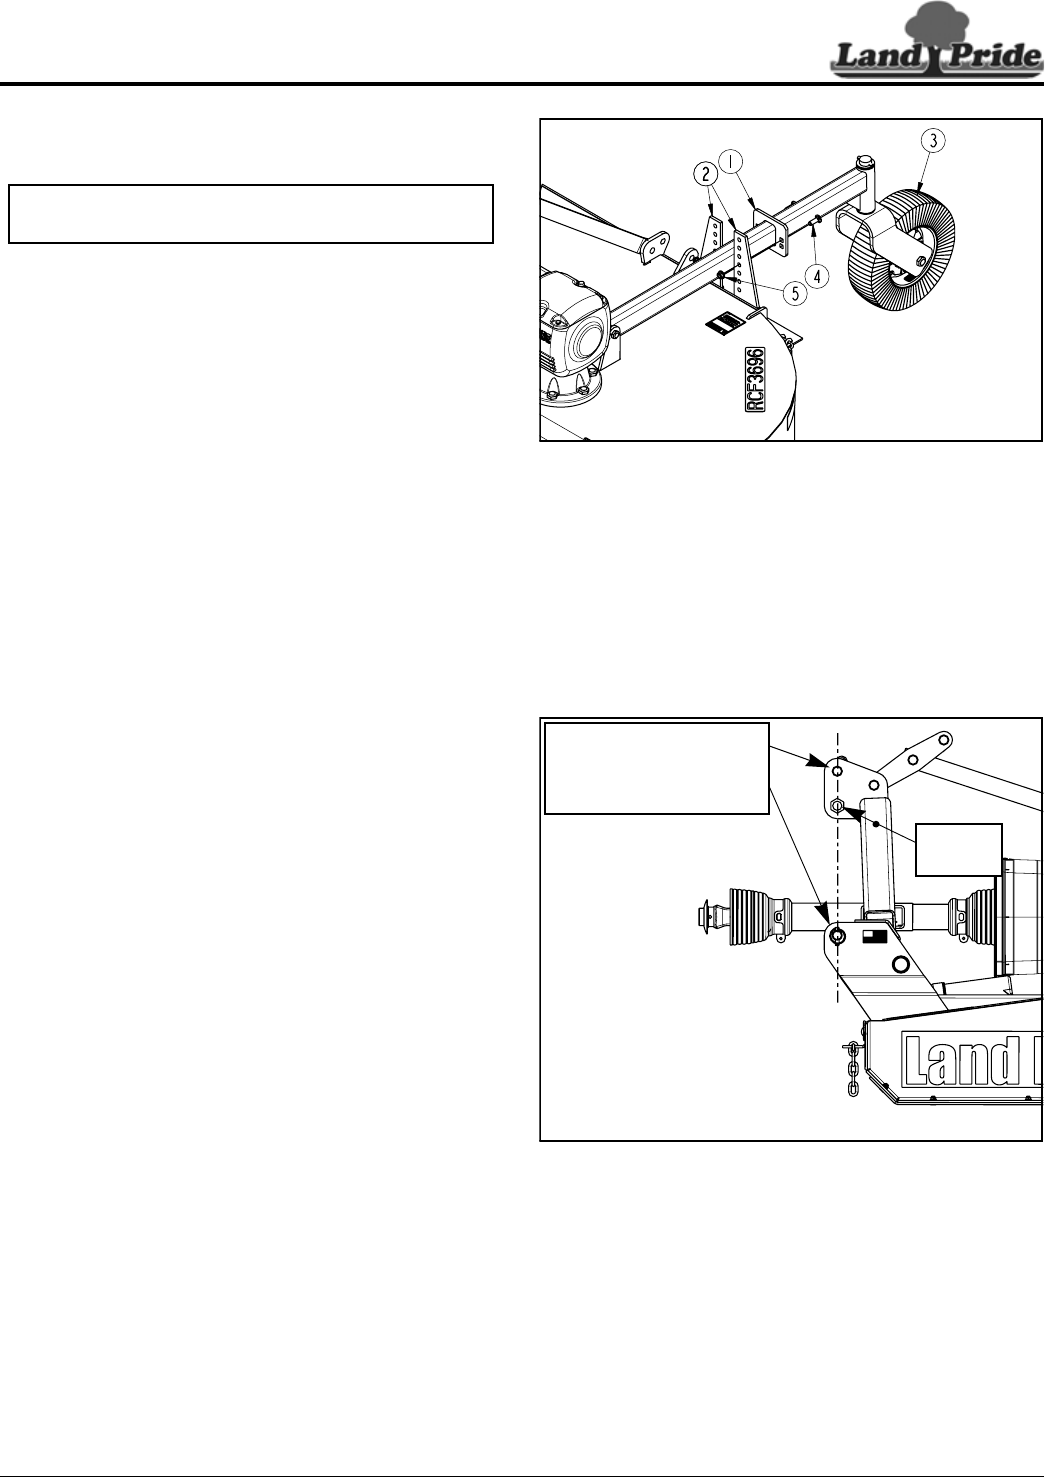
Refer to Figure 3-3:
Adjust tailwheel if cutting height is too high or too low.
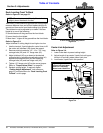
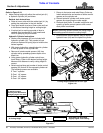
1. Use the tractor’s 3-point hydraulic control lever to lift
the cutter until tailwheel (#3) clears the ground.
2. Remove existing hardware; 1/2" -13 x 1 1/2" long
carriage bolts (#4) and 1/2" flange nuts (#5).
3. Adjust tailwheel (#3) up or down to the desired
cutting height by repositioning adjusting plate (#1)
against mounting brackets (#2) and replacing
carriage bolts (#4) and hex flange nuts (#5).
4. Tighten 1/2" flange nuts (#5) to the correct torque.
Refer to “Torque Values Chart” on page 56.
5. Recheck cutting height. If required, repeat
“Cutting Height Adjustment” instructions on
page 31 and instructions for “Deck Leveling Front
To Back” on this page.
NOTE: The unit cuts most efficiently if front of cutter
is slightly lower than back of cutter.
3-Point Cutter Height Adjustment
Figure 3-3
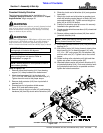
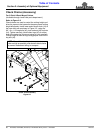
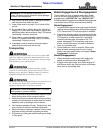
Center Link Adjustment
Refer to Figure 3-4:
1. Lower cutter deck to preset cutting height.
2. Adjust length of top center 3-point link until upper
hitch pin is vertically above lower hitch pins.
3. Lock center 3-point link in this position.
3-Point Cutter Height Adjustment
Figure 3-4
33960
33959
Adjust Length of Center
3-Point Link Until Upper
Hitch Pin is Vertically
Above Lower Hitch Pins.
Bolt-on
Bushing