


31
Section 3: Adjustments
12/15/15
RCF3696, RCFM3696, RCF3610, & RCFM3610 Rotary Cutters 326-600M
Table of Contents
Leveling & Cutting Height
Adjustments For 3-Point Cutters With
Beam Arms
The following instructions are for leveling and setting the
cutting height of 3-point mounted cutters with tailwheels
mounted on beam arms. See page 33 for “3-Point &
Semi-Mount Cutters With Rear Axles” and page 35 for
“Pull-Type Cutters With Rear Axles”.
Four primary adjustments for the 3-point cutter should be
made prior to actual field operations:
• Deck Leveling Left To Right
• Cutting Height Adjustment
• Deck Leveling Front To Back
• Center Link Adjustment
Proper adjustment of each of these items will provide
higher efficiency, improved cutting performance and
longer blade life.
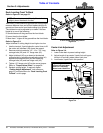
!
WARNING
Always disengage PTO, put tractor in park or set park brake,
shut tractor engine off, remove ignition key, and wait for all
moving parts to stop before dismounting from tractor.
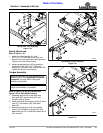
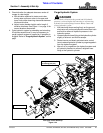
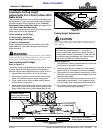
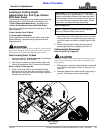
Deck Leveling Left To Right
Refer to Figure 3-1:
The Rotary Cutter must operate level from side to side at
all times. Make certain gauge wheels are adjusted to
identical heights before adjusting lower 3-point lift arms.
1. Locate tractor and cutter on a flat level surface.
2. Use tractor’s hydraulic 3-point control lever to lower
cutter until tailwheels make contact with ground.
3. Place a spirit level or other suitable leveling device
across the front of the deck.
4. Adjust either one or both of the tractor’s lower 3-point
lift arms up or down to level the deck from left to right.
Some tractors have only a single adjustable lift arm.
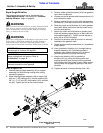
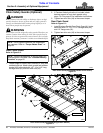
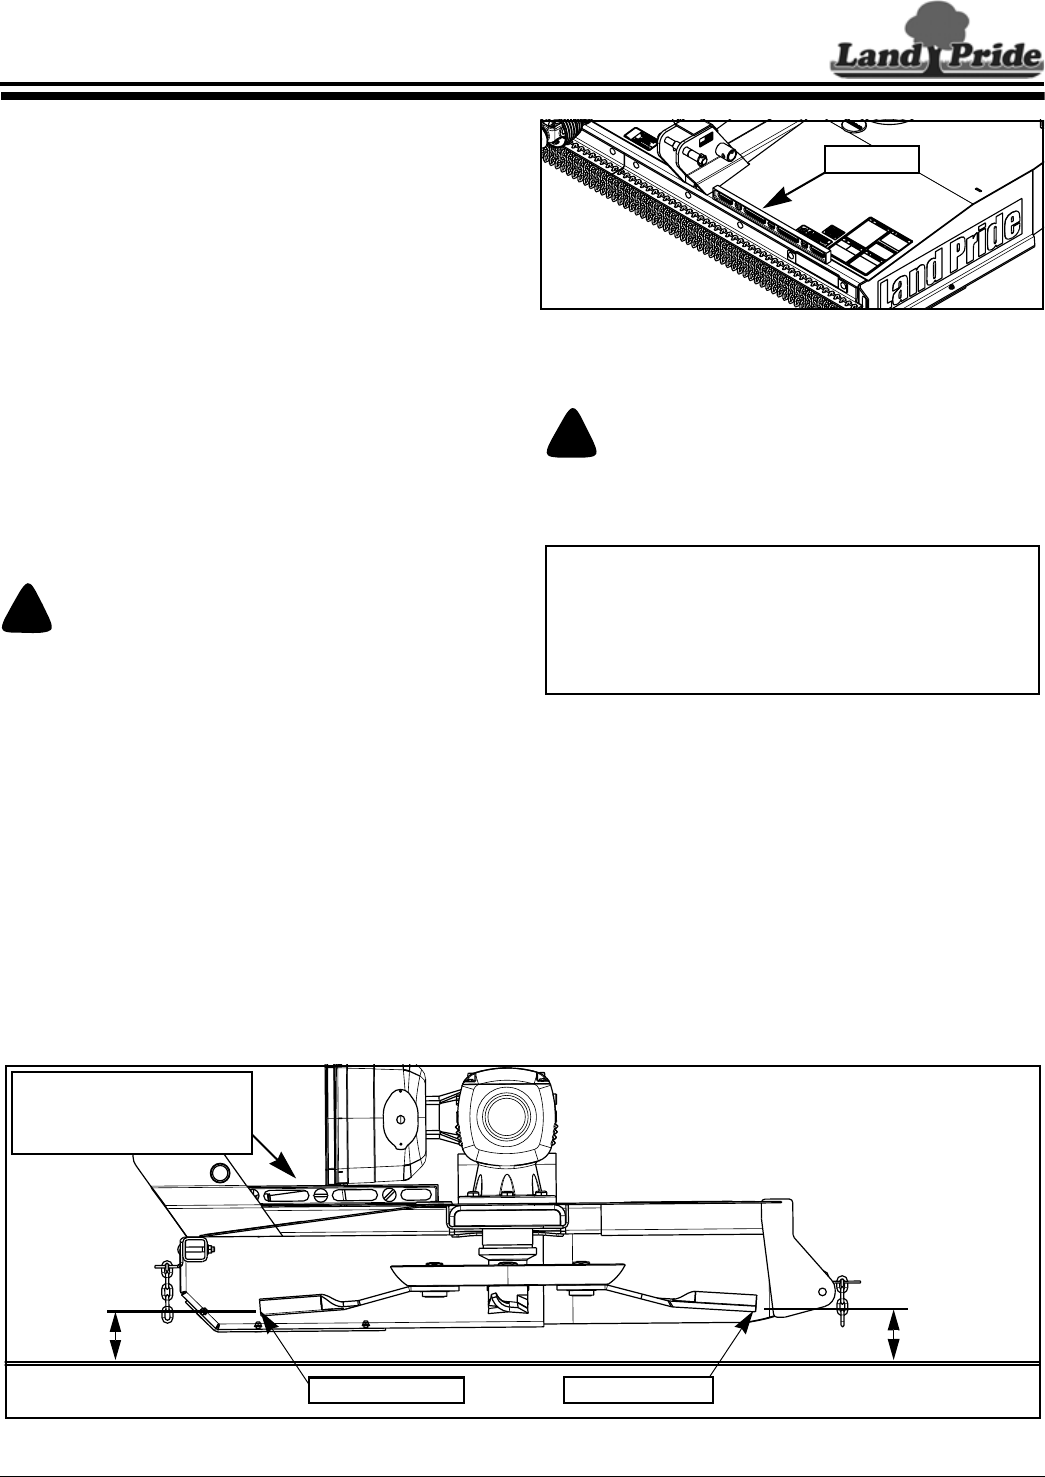
Cutting Height Adjustment
Figure 3-2
Set Front Blade Tip
At Cutting Height
Front Blade Tip
33961
Rear Blade Tip
Spirt Level
For Optimum Cutting
Efficiency, Deck Rear Should
Be Slightly Higher Than Deck
Rear Blade Tip Should Be
Slightly Higher Than Cutting
Section 3: Adjustments
Deck Leveling
Figure 3-1
Cutting Height Adjustment
!
CAUTION
Avoid direct contact with cutter blades by wearing a pair of
gloves. Cutter blades have sharp edges and burrs that can
cause injuries.
Refer to Figure 3-2:
1. With gloves on, carefully rotate blade tips on one side
of the cutter to the position shown.
2. Measure distance from cutting tip of front blade to
ground surface. This distance is the cutting height.
3. Using tractor’s 3-point hydraulic control lever, raise or
lower the 3-point arms until the front blade tip is at the
desired cutting height.
4.
The top center link should be loose when
deck
rear is
supported by the tailwheel. If not, lengthen center
link until loose. Final adjustment will be made later.
5. Set tractor’s 3-point control lever stop once the
3-point arms are properly adjusted.
33962
Spirt Level
IMPORTANT: The front blade tip should be lower than
rear blade tip by approximately 1". The cutter is
subject to continuous material flow under the deck if
the rear blade is at the same height or lower than the
front blade causing horsepower loss, grass clumps,
blade wear, and frequent blade sharpening.