


11
Section 1: Assembly & Set-Up
12/15/15
RCF3696, RCFM3696, RCF3610, & RCFM3610 Rotary Cutters 326-600M
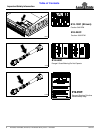
Table of Contents
Torque Requirements
Refer to “Torque Values Chart” on page 56 to
determine correct torque values for common bolts. See
“Additional Torque Values” at bottom of chart for
exceptions to standard torque values.
Gearbox Vent Plugs & Dipsticks
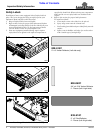
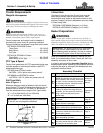
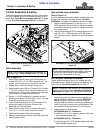
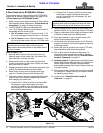
Vent Plug Installation
Refer to Figure 1-2:
A vent plug is shipped loose and packaged with the
Operator’s Manual. Remove temporary solid plug on top
of T-box and replace with included 3/8" vent plug. See
your nearest Land Pride dealer if vent plug is missing.
Figure 1-2
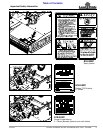
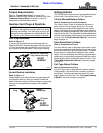
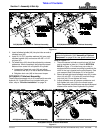
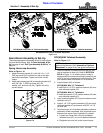
Vented Dipstick Installation
Refer to Figure 1-3:
Vented dipsticks are shipped loose and packaged with
the Operator’s Manual. See your nearest Land Pride
dealer if dipstick is missing. Remove temporary pipe plug
from top of each gearbox and replace with supplied
dipsticks.
Figure 1-3
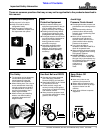
IMPORTANT: Rotary Cutters are shipped with a
solid plug in the gearbox to prevent loss of oil during
shipping and handling. The solid plug on top of the
gearbox must be replaced with a vented dipstick. Do
not operate cutter without vented dipstick installed.
22320
Remove 3/8" T-Box Solid
Plug & Install Vent Plug
DO NOT
OVERFILL!
30216
DO NOT
OVERFILL!
Oil Level
Plug
Remove Pipe
Plug
Install
Vented Dip-
Getting Started
The RCF36 Series cutters can be purchased with either
3-point hitch, Semi-Mount hitch, or Pull-Type hitch.
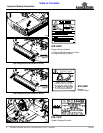
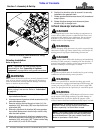
3-Point Mounted Rotary Cutters
Refer to illustrations on cover of manual:
The 3-point Rotary Cutter is attached to the tractor’s
lower 3-point arms and upper center link. The lower
3-point arms are hydraulically adjusted to the cutting
height. The height of the rear tailwheels are manually or
hydraulically adjusted depending upon which option the
cutter is set-up with. The tailwheels should be adjusted to
hold the cutting blades slightly higher at the back than at
the front. The “3-Point Assembly & Set-Up” instructions
begin on page 12.
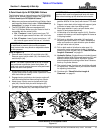
Semi-Mount Rotary Cutters
Refer to illustrations on Cover
The Semi-Mount cutter is attached to the tractor’s lower
3-point arms and have more freedom to float over uneven
terrain than does the 3-point mounted cutter. The lower
3-point arms are hydraulically adjusted to the cutting
height. The rear tailwheels are manually adjusted with a
ratchet jack or hydraulically adjusted to hold the cutting
blades slightly higher at the back than at the front. The
“Semi-Mount Assembly & Set-Up” instructions begin
on page 17.
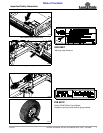
Pull-Type Rotary Cutters
Refer to illustrations on Cover
The Pull-Type cutter is attached to the tractor drawbar.
Cutting height is controlled with a hydraulic cylinder or
ratchet jack. Leveling rods keep the rear of the cutter
slightly higher than the front. The “Pull-Type Assembly
& Set-Up” instructions begin on page 22.