


19
Section 1: Assembly & Set-Up
12/15/15
RCF3696, RCFM3696, RCF3610, & RCFM3610 Rotary Cutters 326-600M
Table of Contents
Semi-Mount Hook-Up
!
DANGER
All guards and shields must be installed and in good working
condition at all times during cutter operation.
!
DANGER
A Crushing Hazard exists when hooking-up equipment to a
tractor. Do not allow anyone to stand between tractor and
implement while backing-up to implement. Do not operate
hydraulic 3-point lift controls while someone is directly
behind tractor or near implement.
!
DANGER
Do not engage tractor PTO while hooking-up and unhooking
driveline or while someone is standing near the driveline. A
person’s body and/or clothing can become entangled in the
driveline resulting in serious injury or death.
!
WARNING
Always disengage PTO, put tractor in park or set park brake,
shut tractor engine off, remove ignition key, and wait for all
moving parts to stop before dismounting from tractor.
!
WARNING
Do not over-speed PTO or machine breakage may result.
Some tractors are equipped with multispeed PTO ranges. Be
certain your tractor’s PTO is set for the cutter’s rated PTO
speed. See Specifications & Capacities for rated PTO speed.
!
WARNING
Do not use a PTO adaptor with a quick hitch. A PTO adapter
will increase strain on the tractor’s PTO shaft resulting in
possible damage to shaft and driveline.
IMPORTANT: An additional driveline may be
required if cutter is to be used on more than one
tractor, especially if a Quick Hitch is used.
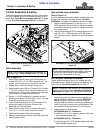
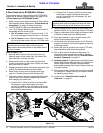
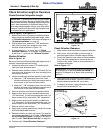
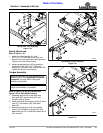
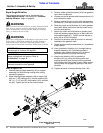
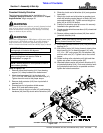
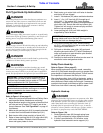
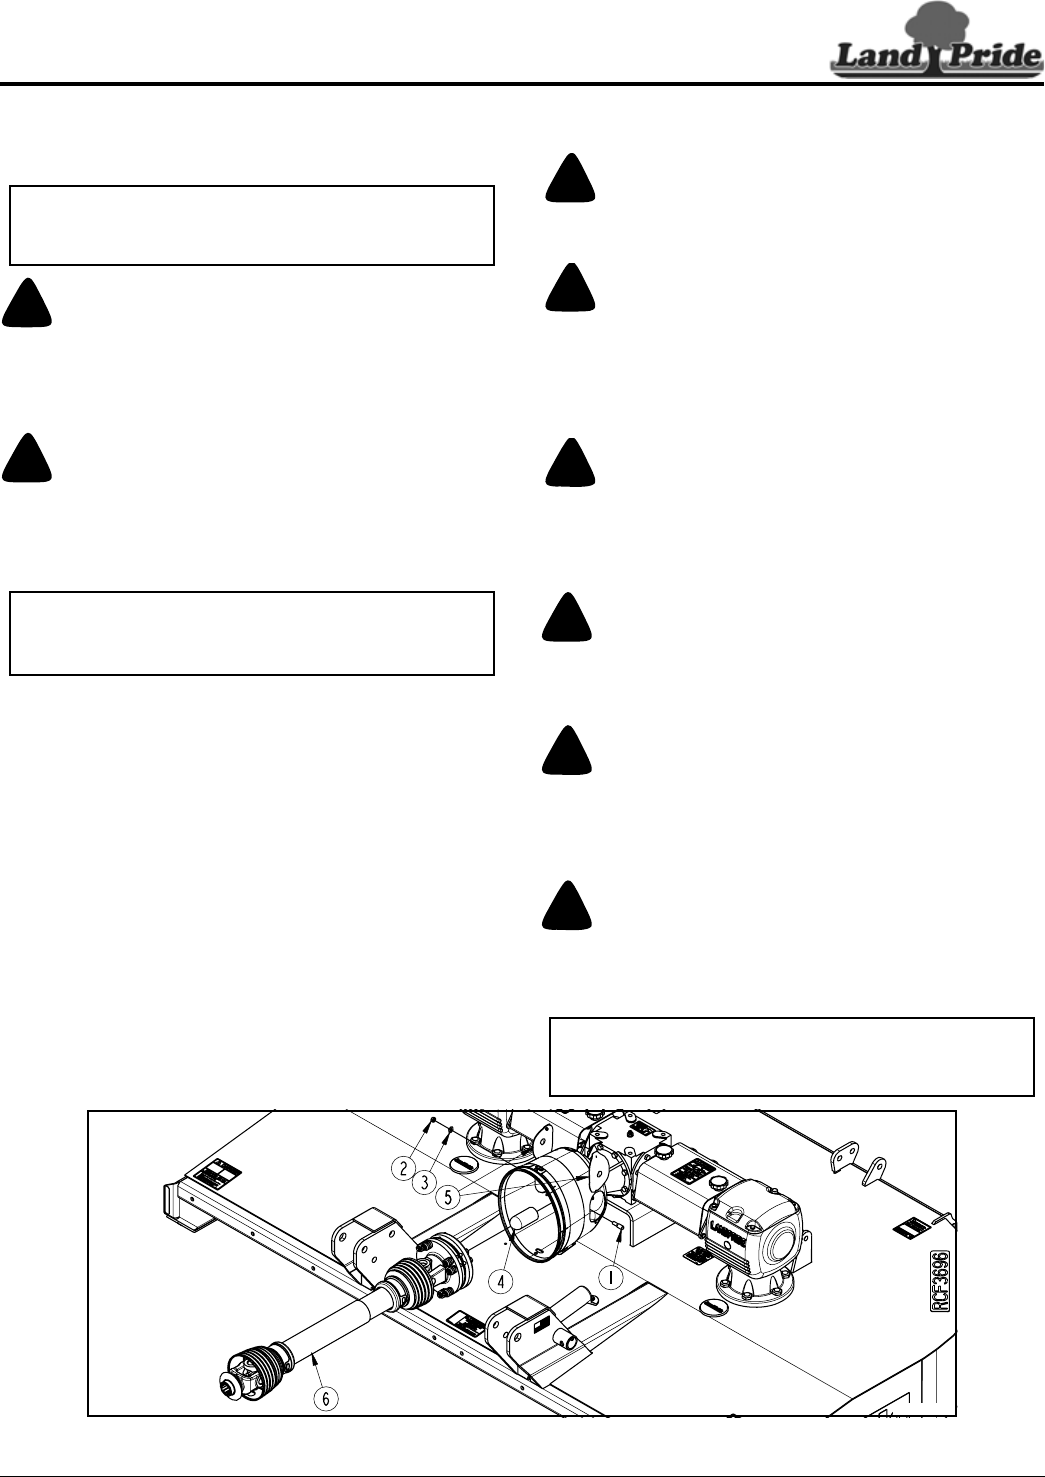
Semi-Mount Driveline Installation
Figure 1-14
33944
Driveline Installation
Refer to Figure 1-14:
!
WARNING
Make certain all driveline yokes are securely fastened at both
ends. A loose yoke can work free allowing the driveline to
rotate uncontrollably causing machine damage and bodily
injury or death to anyone nearby.
!
WARNING
Do not use a PTO adapter. A PTO adapter will increase strain
on the tractor’s PTO shaft resulting in possible damage to
shaft and driveline. It will also defeat the purpose of the
tractor’s master shield and could cause bodily injury or death.
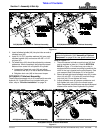
1. Remove rubber protective sleeve (#4) from gearbox
input shaft and discard.
2. Unsnap one end of gearbox shield access doors (#5)
and rotate doors open.
3. Remove conical dog pin or bolts (#3), washer(s) (#5),
and nut(s) (#2) from slip-clutch end of driveline (#6).
4. Slide slip-clutch end of driveline (#6) onto gearbox
input shaft. Make certain that the slip-clutch is fully
onto the shaft splines.
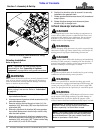
5. Attach slip-clutch end of driveline to gearbox input
shaft with existing conical dog pin or bolts (#3), flat
washer(s) (#3), and nut(s) (#2). Tighten conical dog
pin or bolts (#1) on slip-clutch to 45-50 ft-lb torque.
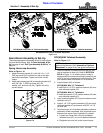
6. Push/pull on driveline yoke to ensure it is securely
fastened to the gearbox shaft.
7. Rotate gearbox shield access doors (#5) closed and
snap in place.
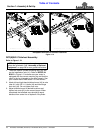
NOTE: If preferred, the front guards may be
assembled first. See “Assembly of Optional
Equipment” on page 28 for front guard instructions.
IMPORTANT: The driveline must be lubricated
before putting it into service. Refer to “Lubrication”
on page 49.