Basic Functional Test - Multiple Inverters
975-0239-01-01 2–39
Basic Functional Test - Multiple Inverters
The following steps will complete a basic functional test of multiple XW Inverter/
Chargers. If any test fails, please refer to the Troubleshooting section in the XW Inverter/
Charger Operation Guide for assistance.
To perform a functional test on multiple inverters:
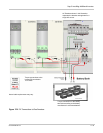
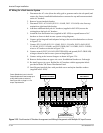
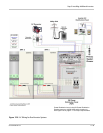
1. Check/verify all wiring and cable connections.
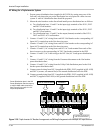
2. Measure DC voltage at the DC terminals on the inverter and confirm its within range
and has correct polarity. The acceptable range is >20 Vdc for 24 V system or >40 Vdc
for 48-V Systems.
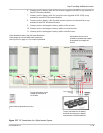
3. Switch INV1 DISCONNECT to ON position.
4. Check inverter display for startup self-test during which all LED's will flash
momentarily. Once self-test is complete, inverter will display "Stb". (The Fault/
Warning LED may flash for a few seconds but eventually will turn off. If Fault/
Warning LED persists, check to ensure battery temperature sensor is connected. Also,
if the inverter has been pre-configured, it may go straight into normal operating
mode.)
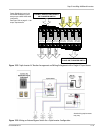
5. Using the XW System Control Panel, set First (Master) Inverter Device Number
a) Go to the inverter’s Advanced Settings menu by pressing Down arrow + Enter
from System Status screen and then simultaneously pressing Enter + Up arrow +
Down arrow.
b) Select Multi Unit Config menu.
c) Change Dev Number from “00” to “01”. The inverter will now appear as
XW6048-01 in the device list.
d) Press Exit to go back to the System Status screen.
6. Switch INV2 DISCONNECT to ON position.
7. Check inverter display for startup self-test during which all LED's will flash
momentarily. Once self-test is complete, inverter will display "Stb". (If the inverter has
been pre-configured, it may go straight into normal operating mode or display F66
warning.)
8. Using the XW System Control Panel, set Second (Slave) Inverter Device Number and
Inverter Mode.
a) Select new inverter XW6048-00 in the device list.
b) Go to the inverter’s Advanced Settings>Multi-Unit Config menu.
c) Change Dev Number from “00” to “02” (or the next number that hasn’t been
used). The inverter will now appear as XW6048-02 in the device list.
d) Change Invtr Mode from “SplitPhMaster” to “SplitPhSlave”.
e) Press Exit until you see the System Status screen.
9. Check for faults. If fault condition(s) exist, correct and restart Functional Test.
10. If a third inverter is installed, repeat steps to configure it as a Slave.
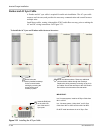
11. Using the XW System Control Panel, enable the System
a) Go to System Settings menu
b) Change System Mode to “Operating”
c) Press Exit until you see the System Status screen.


