


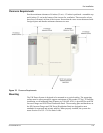


Step 3: Mounting the XW Power Distribution Panel and XW Conduit Box
975-0239-01-01 2–7
Step 3: Mounting the XW Power Distribution Panel and XW Conduit
Box
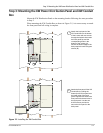
Mount the XW Distribution Panel on the mounting bracket following the same procedure
in Step 2.
When mounting the XW Conduit Box as shown in Figure 2-5, it is not necessary to attach
the front panel until all wiring is complete.
Figure 2-5
Installing the XW Conduit Box
Mounting
Plate
Mounting
Plate
DC
GND
?
AC
GND?
AC
OU
T
AC
IN
UG
OU
T
UG
IN
GE
N
OU
T
GE
N
IN
DC
OU
T
DC
IN
PVGFP
P
V
O
U
T
P
V
I
N
NEUTRALS ?
Power Distribution
Block?
Power Distribution Panel
xantrex
AC
OU
T
AC
IN
UG
OU
T
UG
IN
GE
N
OU
T
GE
N
IN
DC
OU
T
DC
IN
PVGFP
P
V
O
U
T
P
V
I
N
NEUTRALS ?
Power Distribution
Block?
Mounting
Plate
Mounting
Plate
xantrex
Hyb rid I nvert er /C harger
Grid ( AC1)
Gen (AC2)
Fault /
Warning
Equalize
Battery
Charging
Inverting
Flashing = sell
DC
GND
?
AC
GND?
AC
OU
T
AC
IN
UG
OU
T
UG
IN
GE
N
OU
T
GE
N
IN
DC
OU
T
DC
IN
PVGFP
P
V
O
U
T
P
V
I
N
NEUTRALS ?
Power Distribution
Block?
Power Distribution Panel
xantrex
AC
OU
T
AC
IN
UG
OU
T
UG
IN
GE
N
OU
T
GE
N
IN
DC
OU
T
DC
IN
PVGFP
P
V
O
U
T
P
V
I
N
NEUTRALS ?
Power Distribution
Block?
xantrex
Hybrid Inverter /Charg er
Grid (AC1)
Gen (AC2)
Fault /
Warning
Equalize
Battery
Charging
Inverting
Flashing = sell
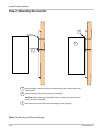
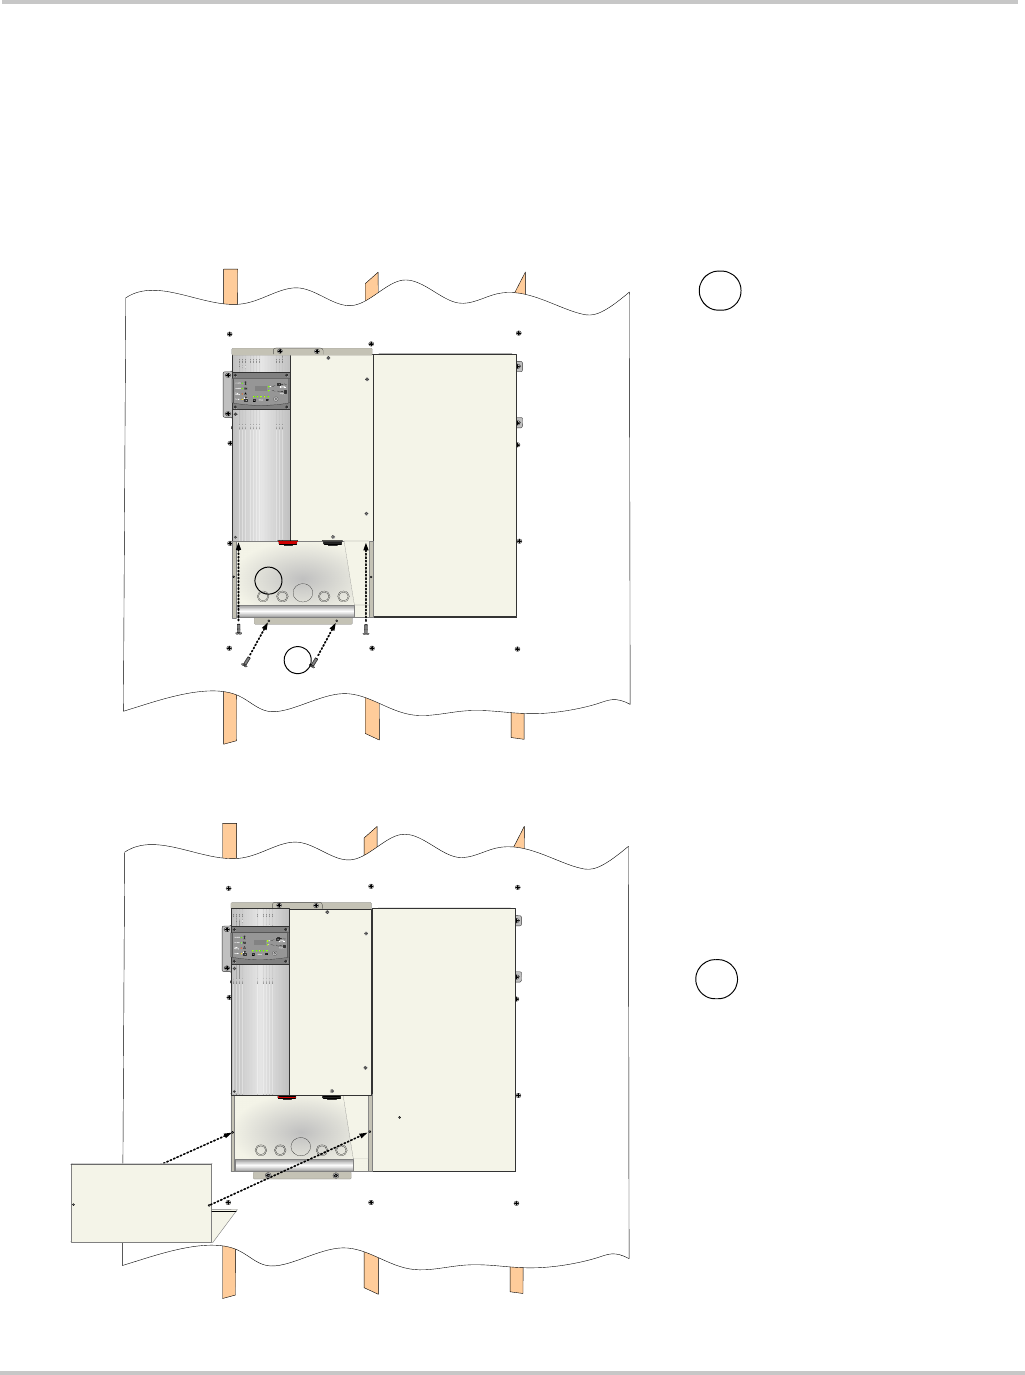
Attach the back panel of the
XW Conduit Box to the bottom
of the inverter with two screws
through the keyhole slots under
the back panel top and the
corresponding holes in the
bottom of the inverter (A).
Secure the bottom edge of the
back panel to the wall using two
screws (B).
Attach the front panel of the XW
Conduit Box by sliding the
bottom lip of the front panel over
the lower edge of the back
panel. Align the two holes in the
front panel with the two holes in
the back panel. Use the two
#10-32 screws provided to
secure the front panel to the
back panel.
2
1
A
B