


Rev. A
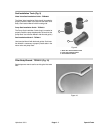
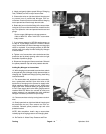
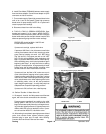
4. Attach and gently tighten special fitting of Charging
Tool (TOR4001) to inlet on top of accumulator.
5. Close outlet valve on right hand side of charging tool
to prevent loss of pressurized Nitrogen from ac
-
cumulator. Close inlet valve on left hand side of charging
tool to prevent back flow through the tank tube.
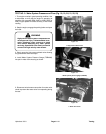
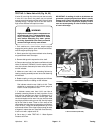
6. Rotate the jam nut (not the fitting) of the accumulator
valve two (2) turns counterclockwise as viewed from the
top. This opens the valve and pressurizes the tool and
gauge.
Service range of Nitrogen pre-charge pressure:
1800 to 2800 PSI. Allow +200 PSI if accumulator
body is warm.
7. If pre-charge pressure is WITHIN service range, go
to step 8. If pre-charge pressure is ABOVE service
range, accumulator has internal damage and should be
rebuilt or replaced. If pre-charge pressure is BELOW
service range, go to step 10 under Adding Dry Nitrogen
to Accumulator.
8. Tighten nut of accumulator valve clockwise and de-
pressurize tool by slowly opening outlet valve on right
hand side of pressure gauge.
9. Disconnect charging tool from accumulator. Reinstall
the yellow protective cap and valve protector bracket.
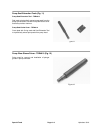
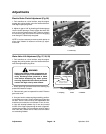
Adding Dry Nitrogen to Accumulator
10. With charging tool connected to accumulator, attach
a charged tank of dry Nitrogen to high pressure tube on
charging tool. Tighten tank fitting by turning hose fitting
counterclockwise.
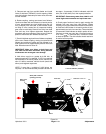
11. The accumulator tool, attached to the accumulator,
has a pressurized manifold. Open inlet valve on left
hand slide of charging tool to pressurize supply tube.
While watching pressure gauge on tool, slowly open
supply tank valve. Pressure reading on gauge will start
to rise. Close supply tank valve when gauge pressure
reaches 2500 PSI Wait a few minutes to make sure
system pressure has equalized then add additional
Nitrogen if necessary for 2500 PSI pre-charge.
12. Close accumulator valve by turning lower nut clock-
wise.
13. Slowly open knob on right hand side of charging tool
de-pressurize the tool, then remove tool from ac
-
cumulator. Reinstall yellow protective cap and valve
protector bracket.
NOTE: After completion, install a tag on accumulator
indentifying the charging pressure and charging date.
14. Do Test No. 2: Water Pump Pressure and Flow.
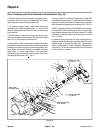
Figure 16
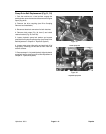
Figure 17
Testing Page 6 - 14 HydroJect 3010