


Drive Belt Replacement
The blade drive belt, tensioned by the spring loaded
idler, is very durable. However, after many hours of use,
the belt will show signs of wear. Signs of a worn belt are:
squealing when belt is rotating, blades slipping when
cutting grass, frayed edges, burn marks and cracks. Re-
place the belt if any of these conditions are evident.
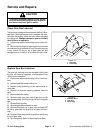
1. Lower cutting unit to the shop floor. Remove belt
covers from top of cutting unit and set covers aside.
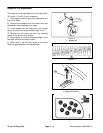
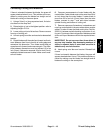
2. Unhook spring from idler arm bracket to release belt
tension. Remove cotter pin and clevis pin securing idler
arm bracket to idler arm.
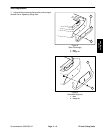
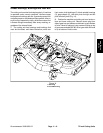
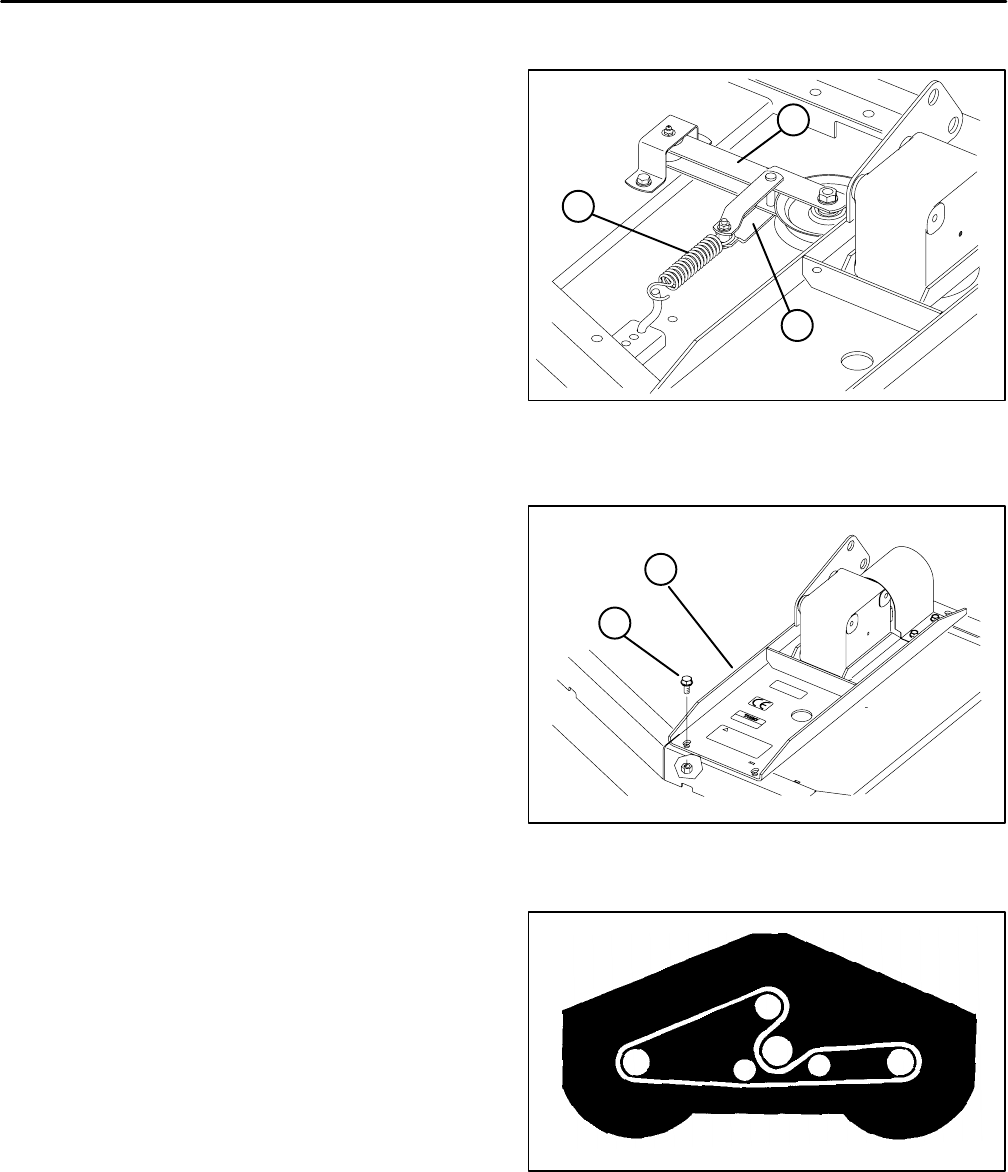
3. Remove (2) capscrews and nuts securing front of
gear box plate to deck channels.
4. Loosen (2) capscrews and nuts securing rear of
gear box plate to deck channels and raise front of gear
box plate to access belt.
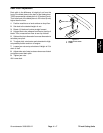
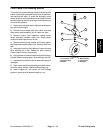
5. Remove old belt from around spindle pulleys and
thru idler pulley assembly.
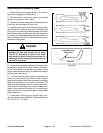
6. Route new belt around spindle pulleys and thru idler
pulley assembly, as shown in figure 21.
7. Reposition gear box plate on deck channels while
routing belt around gear box pulley. Mount gear box
plate to deck channels with capscrews and nuts pre-
viously removed.
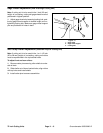
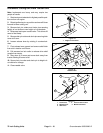
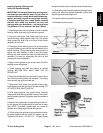
8. Reinstall idler arm bracket to idler arm with cotter pin
and clevis pin. Hook spring onto idler arm bracket. To as-
sure there is proper tension on drive belt, spring should
be extended to a length of approximately 7.00 inch (178
mm). If spring is not extended to this length, relocate
spring rod to a new mounting holes further away from
from belt.
9. Reinstall belt covers.
1
3
2
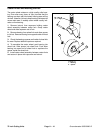
Figure 19
1. Spring
2. Idler Arm
3. Idler Arm Bracket
1
2
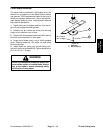
Figure 20
1. Gear Box Plate
2. Capscrews & Nuts
Figure 21
72 inch Cutting Units
Page 11 – 12
Groundsmaster 3000/3000–D