30
Fuel
System
Tract
o
rs,
Lawn
and
Garden
- 110 a
nd
112
10-2
Carburetor
-
110
Tract
or
SM-2059
-
(Apr-67)
Allow
parts
to
rem
ai
n
in
so
luti
on
from
one
to
two
hours
.
Then
remove
a
nd
rinse
with
fresh
clean
in
g
so
lvent.
Dry
with
compressed
a
ir,
mak-
ing
sure
all
hole
s
are
open
and
free
of
carb
on
and
di
rt.
Never
u
se
rags
or
waste
paper
to
dry
the
parts.
Any
lint
may
plug
je
ts
of
channels
and
aff
e
ct
operating
efficiency
of
carburetor.
CAUTION:
Never
use
compressed
aIr
to
clean
a
completely
assembled
carburetor.
To do
so
may
cause
the
float
to
collapse.
INSPECTING
CARBURETOR
Insp
ect
fl
oa
t
valve
to
be
sur
e
valve
seat
ma-
terial
or
other
debris
is
not
adhering
to
tapered
surface
of
valve.
If
any
mat
e
rial
appears
on
tap
ere
d
surface,
replace
floa
t
valve
and
valve
seat
assembly.
Inspect
seat
assembly
for
wear
or
o
ther
dam-
age.
If
valve
seat
is
damaged
in
any
way,
re-
place
valve
seat
assembly
and
flo
at
valve.
Valves
and
seats
are
available
only
as
match-
ed
sets
and
should
never
be
interchang
ed.
For
a
positive
leak
test,
imm
e
rse
the
float
in
hot
wa
ter.
Any
leak
can
be
det
ec
ted
at
once
by
air
bubbles
escaping
from
the
float.
Do
not
at-
tempt
to
repair
the
float
if
it
leaks.
Replace
it.
Check
float
shaft
and
replace
if
worn.
Inspect
tapered
ends
of
needle
s .
If
a
ring
has
been
cut
in
the
tapered
surface
of e
ither
because
th
e
needle
has
been
turned
too
tightly
against
the
s
ea
t,
replace
the
needl
e.
The
seats
for
the
high
speed
and
idle
mixture
adjusting
n
ee
dles
are
an
inte
g
ral
part
of
the
carburetor
body
casting
and
ther
efo
re
cannot
be
remov
ed
or
replaced.
Insp
e
ct
carburetor
body
casting
and
fuel
bowl
for
cracks
or
damaged
seating
surface.
Examine
threaded
holes
for
damaged
threads.
Check
thr
o
ttle
and
choke
shaft
bearing
areas
in
carbu-
retor
body
for
wear.
Replace
if
worn
or
damaged
.
Inspect
jets
for
damaged
or
plug
ge
d
holes.
Replace
if
damaged.
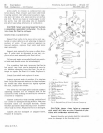
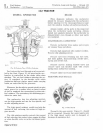
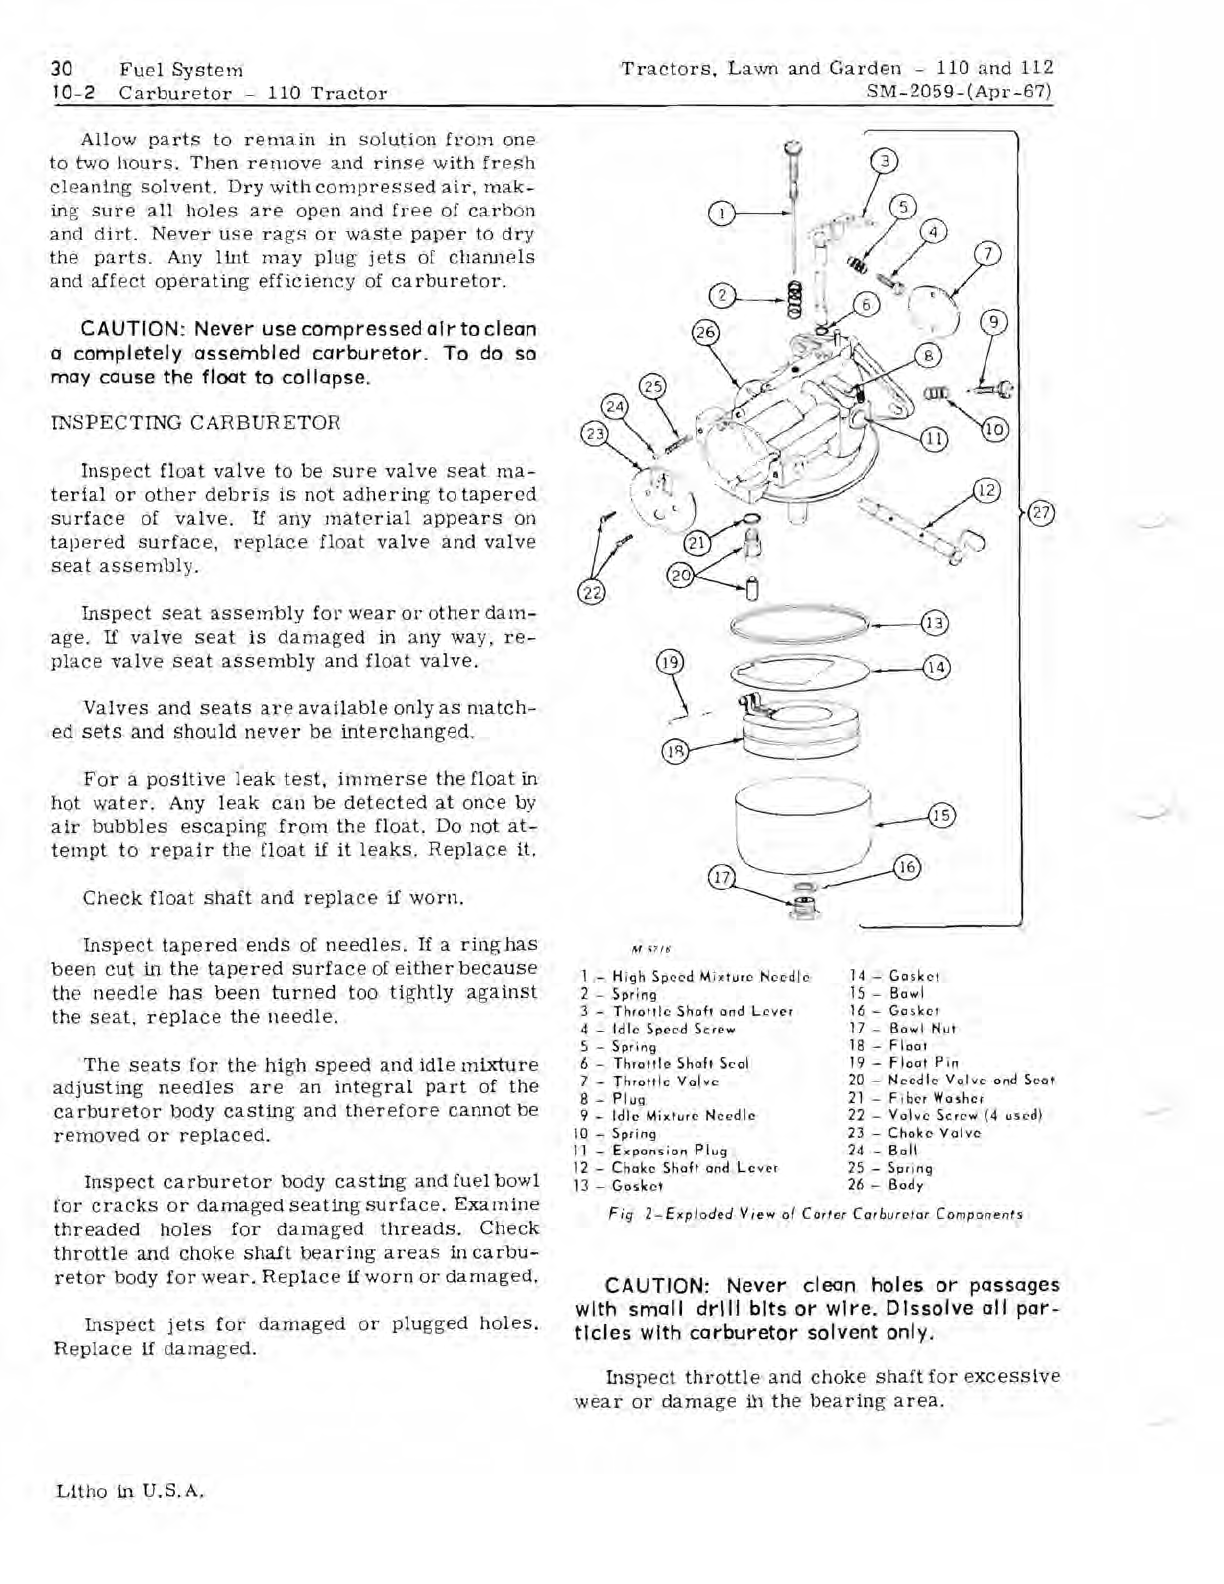
M
,,7ft;
-
High
Sp
ee
d
Mixture
Needle
14
-
Ga
ske
t
2 -
Spring
15
-
Bowl
3 -
Throttle
Shaft
and
Lever
16
-
Gesket
4 -
Idle
Speed
Screw
17
-
Bawl
Nut
5 -
Spring
18 -
Float
6 -
Throttle
Shaft
Se
al
19
-
Float
Pin
7 -
Throttle
Valve
20
-
Needl
e
Valve
and
Scat
8 -
Plug
21
- F i
ber
Washer
9 -
Idle
M
ixtur
e
Ne
e
dle
22
-
Valve
Scr
e w
(4
us
ed)
10 -
Spring
23
-
Choke
Valv
e
11
-
Expansion
Plug
24
-
Boll
12
-
Choke
Shaft
and
Lever
25
-
Spring
13 -
Gasket
26
-
Body
Fig
.
2-Exploded
View
of
Corter
Carburetor
Components
CAUTION:
Never
clean
holes
or
passages
with
small
drill
bits
or
wire.
Dissolve
all
par-
ticles
with
carburetor
solvent
only.
Inspect
throttle
and
choke
shaft
for
excessive
wear
or
damage
ill
the
b
ea
rin
g
area.
Litho
in
U.S.A.


