


Section4: Operation
The HiGH speed belt range position
combined with a FAST wheel speed
setting propels the tiller at the fastest
pace. Reduce the enginethrottle speed
when starting outto help avoid personal
injury or propertydamage if using this
speed combination.
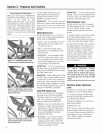
3. Kneelon fefiside of tiller. To create
beit slack, reachoverto right side ofthe
pulieys and push in atthe center of the
beit with a finger. At the sametime, use
your ieft hand to work the belt part=way
onto the iower=fronttransmission pulley
groove (Figure4=10).
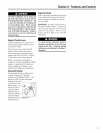
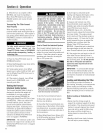
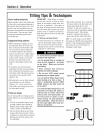
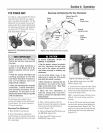
Figure 4-11: Low range to high
range. Shows moving belt from top=
rear groove onto top-front groove.
7. Checkboth sides of the high range
puiiey grooves to verify that the belt is
properly seated.
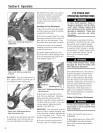
Figure 4o10: Low range to high range.
Shows moving belt from lower-rear
groove onto IowerWront groove.
Changing Belt Frem HiGH Range te
LOW Range
1. To avoid personal injury, shut off
engine,iet aii moving parts come to a
complete stop, then disconnect spark
plug wire from spark piug and movewire
away from spark piug before making any
adjustments. Letengine and muffler cool.
2. Move the Wheels/Tines/PTODrive
Leverinto NEUTRAL.
3. Standon Ieftside of tiiier. Useyour
right handto hold the Wheels/Tines/PTO
Drive Leverup into REVERSEposition.
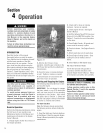
4. Goto the other side ofthe tilier to Useyour ieft handto movethe belt off
finish seating the belt onto the putley top-front enginepuiiey grooveto top-rear
groove, engine pulleygroove (Figure4-12).
5. Working from the left sideof the tiller, _ ::::
work the bett as much aspossibie onto
thetop-front engine pulley groove (Figure
4-11).
6. Finish seatingthe beltfrom the right
sideof thetiller.
JNIPORTANT: Proper beittension is
important for good performance. See
Section 5, Drive Belt Maintenance for
information on belt maintenanceschedule
and procedures.
NOTE: If extra belt slack is needed to
move the belt, just raise the
Wheels/Tines/PTO Drive Lever up into
REVERSE.This iowers the engine puiley,
and createsmore slack.
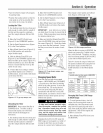
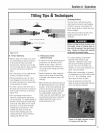
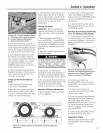
Figure 4-12: High range to low
range. Shows moving belt from top-
front groove onto top-rear pulley
groove.
4. Goto right sideof tiller and finish
seatingthe beit.
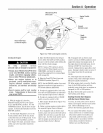
5. Stiil holding the iever up in REVERSE
position, and working from the ieft side of
thetiiier, move the beit from the lower=
front transmission grooveto the lower-
reartransmission groove.
6. Goto the right side of thetiiier and
finish seating the belt (Figure4-13).
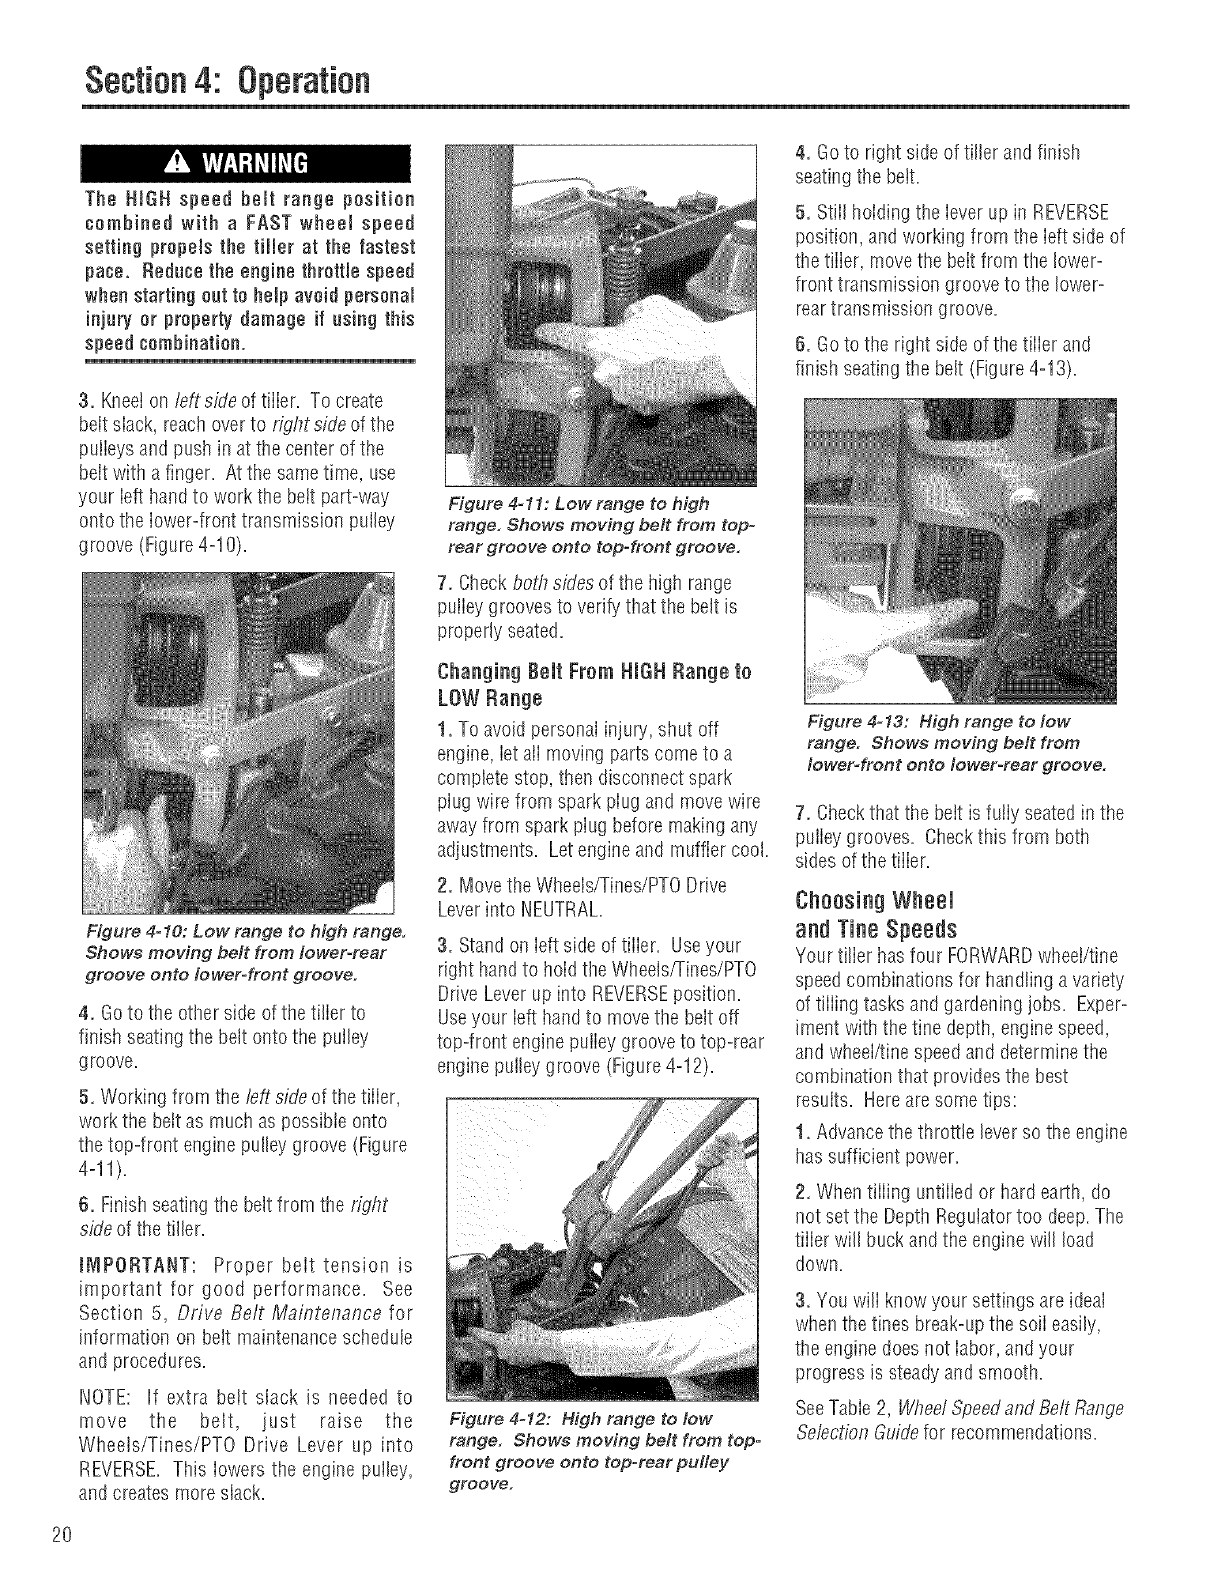
Figure 4-13: High range to low
range. Shows moving belt from
Iowet=front onto Io wet-rear groo re.
7. Checkthatthe bett isfully seatedin the
pulley grooves. Checkthis from both
sides of the tiiier.
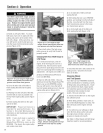
Choosing Wheel
and TineSpeeds
Your tilier hasfour FORWARDwheei/tine
speedcombinations for handling avariety
of tiiiing tasks and gardening jobs. Exper-
iment with the fine depth,enginespeed,
and wheel/finespeedand determine the
combination that provides the best
results. Hereare some tips:
1. Advancethe throttle leverso the engine
hassufficient power.
2. Whentiffing untiiied or hard earth, do
not set the DepthRegulatortoo deep.The
tiiier will buck andthe engine will load
down.
3. You will know your settings are ideal
whenthe tines break-upthe soil easily,
the enginedoes not iabor, andyour
progress is steadyand smooth.
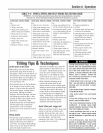
SeeTable2, Wbee/Speedand BettRange
Se/ectionGuidefor recommendations.
2O