


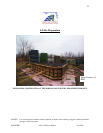
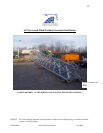
6.0 Tower and Wind Turbine Generator Installation
NOTICE: Use of the material contained in this document is subject to the warning on page Iv and the disclaimer
on page v of this document.
DOC012R02 AOC 15/50 User Manual Nov 2001
39
CAUTION
THE BLADES SHOULD NOT BE SCRATCHED OR GOUGED
DURING SITE HANDLING AS THIS CAN CAUSE A LOSS OF
ROTOR PERFORMANCE AND/OR BLADE DEGRADATION
FROM ENVIRONMENTAL EFFECTS.
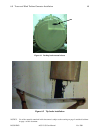
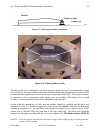
The string in the conduit should be used to pull a #10 gage wire through the conduit. The blade
cable should then be attached to the wire (with tape, for example) and pulled through the blade
conduit, with the molded 3-pin connector at the root end of the blade. Lubricating the blade
cable facilitates this operation. Female connectors should be crimped to the black and red wires
and a fork-tongue connector to the blue wire. The female connectors should be connected to the
rectifier and the fork-tongue connector to the ground point on the damper bracket (see Figure 6-
2).
To avoid damaging the tip brakes during blade installation, it is preferable to install them once
the blades have been attached to the hub. Till then, the blade ends should be protected with foam
to prevent damage, should they strike the ground or any hard object.
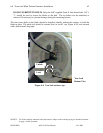
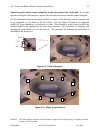
After connecting the electromagnet, the tip brake assembly should be inserted carefully into the
end of the blade without pinching the electromagnet wires. Each tip brake should be bolted to its
blade using low profile nylon-insert lock nuts over the blade end studs. The lock nuts should be
torqued to 14.8 Nm (11 ft-lbs) for the 5/16" studs and 24 Nm (18 ft-lbs) for the 3/8" studs, using
½" and 9/16" socket wrenches, respectively. It is recommended to step torque each nut to
distribute the force over all studs.
CAUTION
FORCING THE TIP BRAKE INTO THE BLADE CAVITY CAN
DAMAGE BOTH THE BLADE AND THE TIP BRAKE. TIP
BRAKES SHOULD SLIDE INTO THE BLADE CAVITY
EASILY.
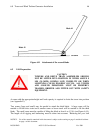
After the tip brake has been mounted on the blade and wired, the blade should be positioned so
that the tip brake can open and close freely. The tip brake should be opened and let go; it should
close completely.