


© 2006 Alamo Industrial
Section 9 - 5
Axtreme Boom (Asy Man) 07/06
Joystick Mounting
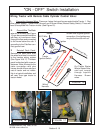
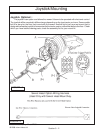
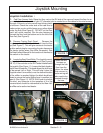
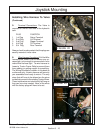
through. If there is no hole one will need to be cut with
a hole saw. Check the under side of the cab floor to
make certain you do not hit a brace or any other object
under the floor (See Figure 5) . DO NOT cut the floor
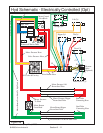
mat it will not be required. Run the wire harness up
through the floor from the bottom and to the left of the
floor mat (See Figure 6) .
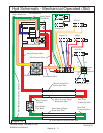
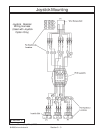
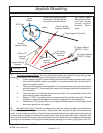
2. Remove Tractor Dash Panel . Remove the
plastic panel on the RH side of the dash from the floor
up (See Figure 7). This will give access to the tractor
ignition switch plug for connecting the wire harness to
the tractor starter wires (See Wire Schematic). See
the New Holland Manual for the location of the wires to
the switch on the tractor.
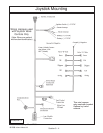
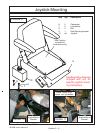
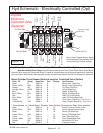
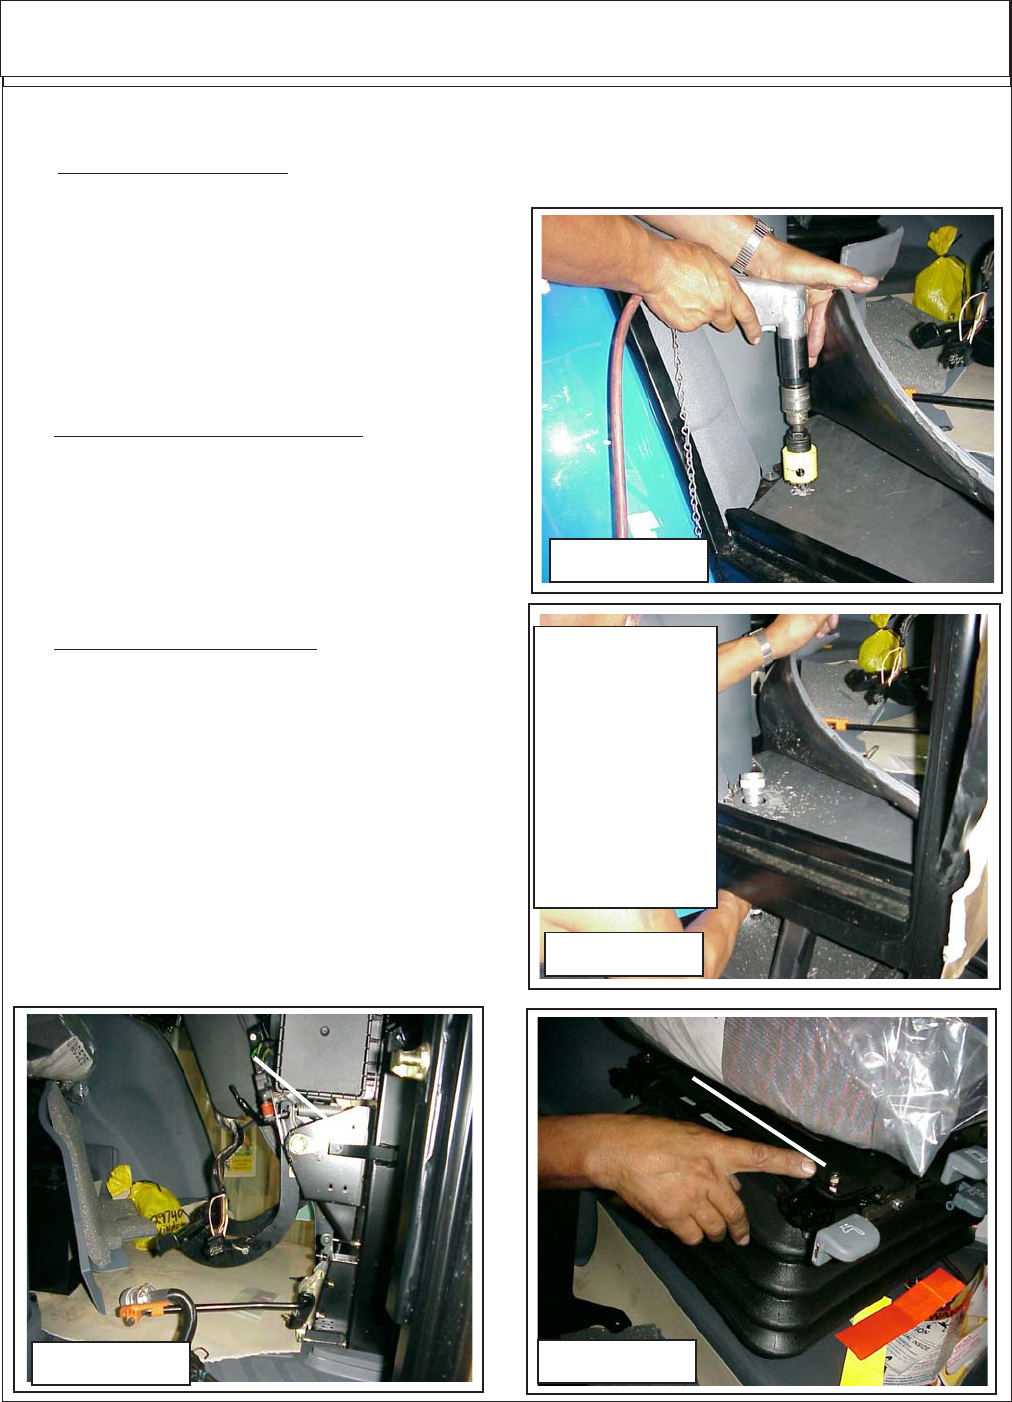
3. Locate the Seat Panel Bolts. The Joystick mount-
ing bracket will bolt the lower seat panel (See Figure 8,
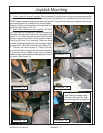
9 & 10). If the controls on the RH Fender interfere with
the joystick (See Figure 11). Loosen the black knob on
top of the shift selector. This knob allows the shift lever
to be moved Left or Right. This will help it clear the
Joystick when it is mounted, once the desired location
of the shifter is reached tighten the black knob back
down to secure the tractor shifter lever in position you
want it. (See Figure 11). NOTE: Shift Lever is a tracotr
Function, any reference to the operation of it or the
nomenclature should be referenced to the New Hol-
land Manual or authorized dealer.
FIGURE 5
FIGURE 7
Tractor Dash
Panel removed
FIGURE 8
Joystick Installation :
1. Cab Floor Access Hole. Raise the floor mat on the RH side of the cap and inspect the floor for an
access hole to the under side of cab. A 2" diameter hole is needed to run the cables or the wire harness
Existing Bolts
and Holes
FIGURE 6
Insert the wire
harness up
through the cab
floor from the
bottom, the wires
that connect to
tractor wiring will
also need to be
inserted through
the hole.